Static images are a thing of the past. To really connect with customers, you need visuals that speak to them directly. That’s where making an API call to generate an image comes in. Instead of just serving up the same old static files, you can send data—like a customer's name or a unique offer—to an endpoint and get a fully customized image URL in return. This is the secret to moving beyond one-size-fits-all content.
Why Dynamic Visuals Matter in Modern Apps

In a world overflowing with digital noise, generic content is easy to ignore. While a static image sends the same message to everyone, a dynamic visual creates a unique experience for each person. This simple shift turns an api call image workflow into a powerful tool for building real engagement.
Think about it. A welcome email with a banner that actually says the new subscriber's name. An in-app notification showing a user's specific progress. These small, personalized touches make a massive impact.
Moving Beyond Static Content
The move toward programmatic image creation isn’t just a passing trend; it’s a direct response to what consumers want: relevance. Dynamic images can instantly adapt based on things like:
- User Data: Personalizing visuals with names, locations, or past purchases.
- Real-Time Information: Displaying live sports scores, weather updates, or stock prices right inside an image.
- Behavioral Triggers: Generating unique coupon codes or event tickets based on what a user just did.
This level of customization makes people feel seen and valued. For a fantastic real-world example of dynamic visuals in action, look at how AI clothing try-on technology is completely changing the online shopping game.
The Growing Demand for Image APIs
The numbers don't lie—developers are all in on AI image generation. As of Q2 2025, over 2.1 million developers were actively building on the OpenAI platform. Even more impressive, daily API calls to its image endpoints shot past 2.2 billion. This shows just how deeply image APIs are being woven into all kinds of applications.
Once you master the process of making an API call for an image, you unlock the power to create more engaging marketing campaigns, build more interactive apps, and ultimately, deliver more memorable experiences for your users.
Your First Successful Image API Call
Alright, let's move from theory to action and make your first successful API call. Before you can generate a single image, you need your unique API key from the OKZest dashboard. Think of it as your secret password—it's what grants you access.
You'll find the key waiting for you in the API section of your dashboard. Treat this key like any sensitive credential and keep it secure.
Here’s a quick look at where to find it.
Just copy the key, and you're ready for the next part.
Securing Your API Key
It's tempting to just paste your new API key directly into your application's source code, but that's a huge security mistake. If you ever share your code or check it into a public repository like GitHub, your key is exposed. Anyone could grab it and start making requests on your behalf, burning through your quota in no time.
The right way to handle it is to store your key as an environment variable. This simple step keeps it separate from your code, making your application safer and much easier to manage across different environments (like your local machine and a live server).
Authentication and a Quick Test
To prove to our servers that you're a legitimate user, you need to pass your key in the request headers. Specifically, you'll use an Authorization header with the format Bearer YOUR_API_KEY. This is the standard way to authenticate API requests. For a deeper look at the mechanics, our guide on a REST API for images has more detail.
Before you start writing Python or Node.js code, I always recommend a quick cURL command to test your connection and key. It’s a super fast, low-effort way to make sure everything is working before you get tangled up in more complex code.
Pro Tip: Always run a simple cURL test first. I can't tell you how many hours of debugging this can save. It instantly confirms your API key is valid and your connection to the endpoint is solid.
Here’s how to run a basic test to verify your setup:
- Open up your terminal or command prompt.
- Swap
'YOUR_API_KEY'with the actual key you copied from your dashboard. - Hit enter and run the command.
If it's all set up correctly, you’ll get a success message back from the API. That's your green light—you're authenticated and ready to start generating images. This simple check is a crucial first step before integrating the API into your application. You've now made a successful api call image request.
Generating Images with Python and Node.js
Alright, this is where the fun really starts—turning theory into actual code. Once you’ve run a quick cURL test to make sure your credentials are good to go, you can start plugging the image generation logic right into your application's backend. It’s a pretty standard workflow for anyone looking to automate personalized content at scale.
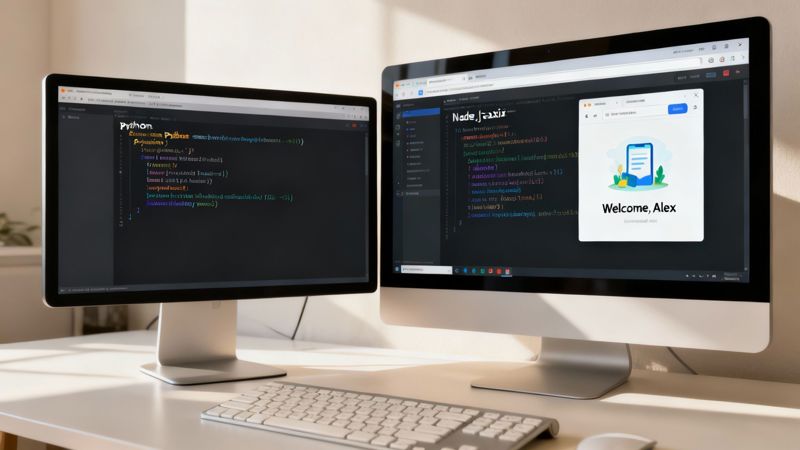
We'll walk through two of the most common backend environments out there: Python and Node.js. For both, our goal is the same: hit the API to create a personalized welcome banner for a new user named Alex.
Creating Your First Image with Python
If you're a Python developer, you're probably already familiar with the requests library. It's the go-to for making HTTP requests because it’s so straightforward and easy to read. If you don't have it installed, just run pip install requests in your terminal.
Here’s a simple script showing how to structure the API call. It pulls in the necessary libraries, securely grabs your API key from an environment variable (always a good practice), and sets up the data payload for the request.
import os import requests
Load your API key from an environment variable for security
API_KEY = os.getenv('OKZEST_API_KEY') API_URL = "https://api.okzest.com/v1/images"
Define the request payload
'template_id' is the unique identifier for your image design
'merge_tags' is where you pass dynamic data
payload = { "template_id": "YOUR_TEMPLATE_ID", "merge_tags": { "first_name": "Alex" } }
Set the authorization header
headers = { "Authorization": f"Bearer ", "Content-Type": "application/json" }
Make the POST request to the API
response = requests.post(API_URL, json=payload, headers=headers)
Check the response and print the image URL
if response.status_code == 200: image_data = response.json() print(f"Success! Image URL: {image_data['url']}") else: print(f"Error: - ")
This little piece of code makes a POST request to the OKZest API, passing in Alex’s name. If everything goes smoothly, you'll get back a 200 status code and a JSON object that includes the URL for the brand-new image. Simple as that.
Building the Same Request in Node.js
For those of you running a Node.js backend, axios is probably your best friend for this kind of task. It’s a promise-based client that makes handling server-side requests a breeze. If it's not already in your project, a quick npm install axios will get you set up.
The logic here is almost a mirror image of the Python example. You’ll set up your API key, build the JSON payload with Alex's info, and manage the asynchronous response.
const axios = require('axios');
// Securely load your API key from environment variables const apiKey = process.env.OKZEST_API_KEY; const apiUrl = 'https://api.okzest.com/v1/images';
// Define the request payload with template and merge tags const payload = { template_id: 'YOUR_TEMPLATE_ID', merge_tags: { first_name: 'Alex' } };
// Set the required headers for authentication
const headers = {
'Authorization': Bearer ${apiKey},
'Content-Type': 'application/json'
};
// Use an async function to make the API call
async function generateImage() {
try {
const response = await axios.post(apiUrl, payload, );
console.log(Success! Image URL: ${response.data.url});
} catch (error) {
console.error(Error: ${error.response.status} - ${error.response.data.message});
}
}
generateImage(); The growth of API-first tools like this is just staggering. The global market for AI tools, which often depend on this kind of programmatic functionality, hit 378 million users in 2025—that's a 64 million user jump in just one year. It really shows how massive the demand for programmatic content has become.
Key Takeaway: Notice how both scripts keep the dynamic data (
first_name: "Alex") separate from the static template ID? That separation is the secret sauce to creating personalized images at scale. If you want a full walkthrough of setting up integrations like this, check out our detailed https://okzest.com/blog/api-integration-tutorial. And for a deeper dive into how AI is changing image creation, turning everyday photos into high-quality portraits, take a look at this ultimate guide on AI for professional headshots.
Using Merge Tags for Advanced Personalization

This is where the real magic of an api call image workflow happens. While the first few examples were great for swapping out a static name, true personalization means adapting to whatever data you have on hand. The key to this is using merge tags, which are essentially smart placeholders inside your image templates.
Think of a merge tag like {{first_name}} or {{company_name}} living inside your OKZest template. When you make the API call, you just pass along the real data for these placeholders, and the API dynamically slots it into the final image. It's a simple concept, but it means you can use a single template to generate thousands of completely unique visuals on the fly.
Building a Resilient API Call
Anyone who has worked with customer data knows it can be messy. It's a common headache in any real-world application. What happens if a user signs up but leaves their first name blank? If your API call depends on that field, you could easily end up with a broken image link and a pretty terrible user experience.
This is exactly why building in fallbacks is so important. A well-designed API call should always have a default value ready to go when the primary data is missing.
For example, your code can quickly check if the first_name field from your database is empty. If it is, you simply pass a default value like "Valued Customer" in the merge tag payload. This simple check ensures that every single api call image request produces a valid, professional-looking visual, no matter what your data quality looks like. It makes your whole integration far more robust.
A Practical Example with Fallbacks
Let's see how this would actually work. Imagine you want to generate a personalized welcome banner for new users, but you know for a fact some of your records are missing a first name. You can build logic right into your request to handle this gracefully.
Here’s what the JSON payload would look like in practice:
- Scenario 1 (Data Exists): Your database has "Maria" as the first name.
"merge_tags": { "first_name": "Maria" }
- Scenario 2 (Data is Missing): The
first_namefield is null or empty."merge_tags": { "first_name": "Valued Customer" }
By planning for missing data with fallbacks, you guarantee a consistent and professional result every single time. This simple step prevents broken images and turns a potential error into a seamless user experience.
This kind of dynamic content generation is seeing massive adoption. In 2025, AI-powered image APIs processed over 12 million image generation requests per hour globally, with average response times dropping below seven seconds. That kind of speed makes real-time personalization practical for almost any application.
If you want to dive deeper into this specific technique, check out our guide on how merge tags for images are revolutionizing email personalization.
Putting Your Dynamic Images to Work
So, you've successfully called the API and have a URL for your freshly generated image. That's a great first step, but the real magic happens when you get that image in front of your audience.
Whether you’re sliding it into an email, your web app, or a social media campaign, the goal is the same: to show a personalized visual to the right person at the right time. How you do that depends on the channel.
For email, it's dead simple. You just take the URL from the API response and drop it into the src attribute of a good old-fashioned HTML <img> tag. This is the most reliable method and works flawlessly across nearly every email client you can think of, from Gmail to Outlook.
Displaying Images in Web Applications
Things get a little more interesting when you're working with a web app. You've got two main routes you can take, and the best choice usually comes down to performance versus how simple you want to keep your code.
Client-Side Rendering (CSR): In this setup, the user's browser does the heavy lifting. You use JavaScript to make the API call for the image after the page has loaded. Once the browser gets the image URL back, it updates the
srcof an<img>tag on the fly. This is perfect for single-page applications or any interactive part of your site where content changes without a full page refresh.Server-Side Rendering (SSR): With SSR, your server calls the API before it even sends the page to the browser. It grabs the image URL, bakes it directly into the HTML, and then sends the fully-formed page. This approach is often better for SEO and can make your initial page load feel much faster, since the user isn't waiting around for another request to finish.
No matter if you go client-side or server-side, the end result is identical: getting a personalized image URL into an
<img>tag'ssrcattribute. The core idea is simple, even if your application's logic is complex.
Speed Things Up with Caching
Hitting the API to generate a brand-new image every single time a user views a page can be a waste of resources, especially if the data behind it hasn't changed. Think about a welcome banner with a user's first name—it doesn't need to be recreated every time they land on their dashboard.
This is exactly where caching comes in.
By storing the generated image URL for a short time, you can serve it up from your cache on future requests instead of making a fresh API call for the image. This simple strategy dramatically reduces latency, cuts down on your API usage, and makes for a much snappier user experience. You can cache at different levels—in your app's backend, at the edge with a CDN, or even right in the browser. It's a small tweak that delivers a huge performance boost as you scale.
Handling Errors and API Rate Limits
When you're building an application, it’s not just about the happy path. You have to prepare for the moments when things don’t go as planned. Even a simple API call to generate an image can run into snags, and your code needs to handle them without crashing the whole experience for your user.
Hoping for a perfect 200 OK response every single time just isn't realistic. Servers get busy, requests can be accidentally malformed, or you might just hit the API a little too hard in a short amount of time. This is where understanding HTTP status codes is so important—it's the API’s way of telling you exactly what’s going on.
Once you do get that successful response, a common next step is deciding where to put your shiny new image. This little flowchart can help you think through the best placement.
<img src="https://okzest.blob.core.windows.net/blog/a-flowchart-asking-embed-image-with-two-branches-leading-to-email-and-web-app-options.jpg" alt="A flowchart asking "Embed Image?" with two branches leading to "Email" and "Web App" options." width="800">
It boils down to a simple choice: pop it in an email for a direct marketing punch or embed it in your web app for a more interactive feel.
Common API Error Codes
With the OKZest API, you'll generally only run into a few specific error codes. Instead of letting them bring your app to a halt, you can catch them and react intelligently.
400 Bad Request: This is the classic "you sent something wrong" error. It almost always means a required field is missing from your JSON payload or a value is formatted incorrectly. Time to double-check those merge tags and the template ID.401 Unauthorized: Your API key is either missing, wrong, or has expired. This one's almost always a credential issue.429 Too Many Requests: You've hit your rate limit. This isn't a problem with your code's logic; it's just the API telling you to slow down a bit.
By planning for these errors, you can build much more resilient logic. For a
400, you could log the faulty request data to help with debugging. A401might trigger an alert for you to check your API keys.
Working with API Rate Limits
Rate limits are a standard part of most APIs, and they exist for a very good reason: to keep the service stable and fast for everyone. They stop any one user from accidentally (or intentionally) overwhelming the system.
If you get a 429 status code, the absolute worst thing you can do is immediately retry the request. That’s a fast track to a cycle of failure and could even get your API key temporarily blocked.
The smart move is to implement an exponential backoff strategy.
It sounds complicated, but the idea is simple. You just wait for a short, increasing amount of time between retries. For instance:
- Your request gets a
429error. - Wait 1 second, then try again.
- If it fails again, wait 2 seconds.
- Still no luck? Wait 4 seconds, and so on.
This approach gives the API time to catch its breath and dramatically increases the odds that your next request will succeed without adding to the congestion. It's a fundamental technique for building production-ready integrations that can handle a high volume of image generation calls.
Ready to automate your personalized visuals and create stunning, dynamic content at scale? OKZest provides both no-code and API solutions to make it happen. Start for free and see how easy it is to add merge tags to your images. Explore your options at https://okzest.com.