So, what exactly is a dynamic image API for email marketing? Think of it as a service that creates unique, personalized images on the fly for every single person on your email list. It's the tech that lets you move past boring, static visuals and embed things like names, locations, or even live countdown timers right into your email graphics. The magic happens the moment a subscriber opens your message.
Why Real-Time Personalization Is a Game-Changer
Let's be honest, a crowded inbox is a tough place to compete. Just dropping a first name into the subject line doesn't cut it anymore. Real personalization happens in the moment, creating a one-to-one connection that feels exclusive and genuinely relevant to the person reading it. Your standard, one-size-fits-all images just can't keep up.

Beyond Basic Merge Tags
This is where a dynamic image API completely flips the script. It lets you turn simple data points into powerful visual hooks that actually get people to click. The possibilities go way beyond just slapping some text on a background—you can create rich, contextual experiences for every user.
I've seen this work wonders in the real world:
- Live Countdown Timers: An e-commerce store can put a ticking clock right inside a sale announcement image. That creates real urgency and drives immediate clicks. No faking it.
- Weather-Based Recommendations: A travel company could show an image of a sunny beach but overlay it with the recipient's local, dreary weather forecast. That makes the getaway offer pretty hard to resist.
- Personalized Event Tickets: An event organizer can automatically generate a unique ticket image with the attendee's name and a scannable QR code. It’s a professional touch that delivers a smooth experience right in their inbox.
These are the kinds of memorable moments that stick with people because they feel personal. If you want to go deeper on this, we've covered more strategies in our guide on what personalization in marketing truly means.
The Proven Impact on ROI
Switching from static to dynamic content isn't just a cool trick; it has a direct and serious impact on your numbers. The data is pretty clear on this. Brands that consistently use dynamic content in their emails can see a massive 100% increase in email ROI, jumping from an average of 21:1 to a staggering 42:1.
This isn't just a small bump. It's a fundamental change in how effective email marketing can be. When you treat each subscriber as an individual with their own data points, you're not just broadcasting a message—you're starting thousands of personal conversations.
To really get the most out of dynamic images, you need to fit them into a bigger strategy that follows current marketing automation best practices. This makes sure your awesome-looking emails are part of a cohesive, data-driven customer journey that boosts engagement at every step.
How to Choose the Right Dynamic Image API Provider
Picking the right partner for your dynamic image API is more than just a tech decision—it’s a strategic move that can make or break your email campaigns. With so many providers out there, you have to look past the slick landing pages and really dig into the core features. Get this choice right, and you'll bring your creative ideas to life smoothly. Get it wrong, and you're in for a world of headaches.
The very first thing to check is how well it plays with your current tools. The API needs to connect seamlessly with your Email Service Provider (ESP). A smooth integration means you can pop dynamic image URLs into your emails using the same merge tags you already use, like {{first_name}} or {{customer_id}}. Anything less just creates clunky workarounds nobody has time for.
Evaluate the Template Editor and Flexibility
The heart of any dynamic image service is its template editor. This is where your team will spend their time building the visuals for your personalized campaigns. So, think about who's actually going to be using it. Is it a marketer who needs something intuitive, or a developer who wants to get their hands dirty with code?
You're looking for that sweet spot between user-friendliness and power. A solid no-code editor empowers your marketing team to design templates, map dynamic text layers, and set up fallbacks without ever touching code. But for those more complex jobs, check if the platform also allows for programmatic tweaks via the API. This gives your developers the freedom to build highly customized, one-of-a-kind visuals. For a deeper look at the technical side of things, our guide on a custom image API covers these considerations in more detail.
When you're comparing providers, it helps to break down the features that matter most.
Comparison of Key Dynamic Image API Features
| Feature | What to Look For | Why It Matters |
|---|---|---|
| ESP Integration | Native or simple integrations with major platforms like Mailchimp, Klaviyo, HubSpot, etc. | A plug-and-play setup saves hours of development time and eliminates technical hurdles. |
| Template Editor | A drag-and-drop, no-code interface with options for programmatic control via API. | Empowers both marketing and development teams to create, test, and launch campaigns quickly. |
| Dynamic Elements | Support for text, images, QR codes, and other dynamic layers. | Allows for richer, more complex personalization beyond just adding a recipient's name. |
| Performance/CDN | Use of a global Content Delivery Network (CDN) for fast image loading. | Slow-loading images kill engagement. A CDN ensures a great user experience worldwide. |
| Reliability/Uptime | A publicly available status page and a history of 99.9% or higher uptime. | You can't afford for your images to fail during a critical, time-sensitive promotion. |
| Support | Access to real-time support channels like live chat, not just email tickets. | When something goes wrong minutes before a send, you need answers immediately. |
This breakdown should help you focus on the capabilities that directly impact your workflow and campaign success.
Non-Negotiables: Reliability and Support
An API is only as good as its uptime. Seriously. Picture this: you launch a flash sale with a dynamic countdown timer, but the provider's server goes down. Suddenly, all your subscribers see are broken images. Disaster.
This is why you absolutely must prioritize providers with a rock-solid history of reliability and low latency. Look for services that use a global Content Delivery Network (CDN), which ensures your images load in a snap for every subscriber, no matter where they are.
Don't sleep on the value of good support. When you’re on a tight deadline and a merge tag is acting up, waiting 24 hours for an email response just won’t cut it. A provider with real-time chat or dedicated support can be the difference between a minor hiccup and a full-blown campaign failure.
Demystifying Pricing Models
Figuring out the cost structure is key to avoiding surprise bills and making sure you’re getting a good return on your investment. Most providers in the dynamic image API space stick to one of two main models: pay-per-call or subscription.
Pay-Per-Call: With this model, you’re charged for every single API request that generates an image. It's perfect for businesses with unpredictable or low send volumes, like an event company sending out a one-off ticket campaign.
Subscription: Here, you pay a flat monthly or annual fee that gets you a certain number of image generations. This is the go-to for companies with consistent, high-volume needs, like an e-commerce brand sending out daily personalized promos.
Take a good look at your sending habits to figure out which model is more cost-effective for you. A subscription might seem like a bigger investment upfront, but it almost always offers better value for frequent senders. On the other hand, pay-per-call gives you the flexibility to scale without a long-term commitment. Always, always check for hidden fees or overage charges before you sign on the dotted line. Clear documentation and transparent pricing are signs of a partner you can trust.
Designing and Building Your Dynamic Templates
Once you've picked your dynamic image API, the real fun begins. This is where you turn your marketing strategy into a real, personalized visual that lands in your customer's inbox. The goal is to build templates that not only look fantastic but are also tough enough to handle whatever data you send their way.
The whole process actually starts in your favorite design tool, not the API editor. Whether you’re a Figma fan, a Canva pro, or an Adobe XD expert, the idea is the same. You need to create a beautiful, high-quality base image that will act as the foundation for every personalized version you generate. Think of this static background as the canvas for your dynamic masterpiece.
Laying the Foundation in Your Design Tool
Imagine your base image is a stage. You’ve got to arrange the set perfectly but also leave strategic, empty spaces where your star performers—the dynamic elements—will show up. This might be a spot for a customer's name, a placeholder for their profile picture, or a special area for a product they just looked at.
I’ve learned the hard way that planning is everything. Before you even draw a single shape, map out exactly which elements need to be dynamic.
- Text Layers: Where does the customer’s name go? Is there a spot for their loyalty points balance or a unique coupon code?
- Image Layers: Do you need a placeholder for a user-submitted photo, a specific product image, or maybe a map showing their nearest store?
- Conditional Elements: Will some graphics only appear for certain customer segments? You need to plan for these variations from the get-go.
When you design with these dynamic layers in mind from the start, the final image looks polished and cohesive—not like you just slapped some text on a generic background as an afterthought.
Mapping Dynamic Layers in Your API Editor
With your base image designed and exported, it’s time to pull it into your dynamic image API's editor. This is where you connect the dots, turning that static design into a flexible, data-driven template. You'll upload your base image and then start adding and defining the dynamic layers right on top of it.
This is the technical core of the process. For each layer, you’ll define specific parameters that control how it looks. For a text layer, you'll choose fonts, set the size and color, and define its exact X and Y coordinates. You can also control things like text alignment and wrapping to make sure names of all lengths—from "Jen" to "Christopher"—fit perfectly without messing up the design.
My best piece of advice? Always, always define fallback values for every single dynamic element. If the
first_namedata is missing for someone on your list, what should the image show instead of a weird blank space? A solid fallback like "Valued Customer" prevents broken-looking images and keeps the experience professional for everyone.
The same logic applies to images. If you’re pulling in a product image and the source link is broken, have a default brand logo or a generic lifestyle photo ready to sub in. A bulletproof fallback strategy is what separates amateur campaigns from professional ones.
Designing for a Multi-Device World
It’s so easy to get caught up in your design and forget that these images will be seen in all kinds of different environments. You have to think about different email clients and user settings to make sure everyone has a great experience.
Light Mode vs. Dark Mode A design that looks incredible in light mode can become totally unreadable in dark mode if you're not careful. When creating your base templates, try to avoid pure black text on a transparent background. A simple trick is to add a subtle, light-colored stroke or glow around your text layers. This small tweak ensures your personalized message stays legible no matter how your user likes to view their emails.
Accessibility with ALT Text
Accessibility should never be an afterthought. Dynamic ALT text is a must-have feature to look for in a dynamic image API for email marketing. This lets you generate descriptive alternative text that includes the same personalized data as the image. For instance, instead of a generic alt="Event Ticket", you can create alt="Your personalized ticket for the 2025 Marketing Summit, reserved for John Smith." This makes the experience more inclusive for users who rely on screen readers.
Maintaining Brand Consistency at Scale
One of the biggest hurdles with personalization at scale is keeping your brand consistent. Your dynamic templates are the solution. By setting strict rules for fonts, colors, and logo placement right inside the template, you create brand-safe guardrails for your entire team.
This setup allows your team to generate thousands of unique images for different campaigns without watering down your brand identity. Every personalized certificate, event invite, or promo offer will have the same professional look and feel, reinforcing trust with every email opened. The template handles the hard work of staying on-brand, freeing you up to focus on the creative strategy.
Alright, you've got your dynamic image template ready to go. Now for the fun part: plugging it into your email platform so it can work its magic.
This is where you connect your dynamic image API with your Email Service Provider (ESP). It’s the step that turns a cool design into a live, personalized experience for every single person on your list. The good news is, whether you're a marketer who prefers no-code tools or a developer writing scripts, this is surprisingly straightforward.
The core idea is simple. You’ll build a special URL for each image. This URL starts with the base link to your template and then adds parameters that pull data straight from your ESP. You're basically telling the API, "Hey, take this template, find the layer I named 'name', and fill it with the data from the {{first_name}} merge tag in my email list."
Every time someone opens your email, their ESP sends a request using this URL, complete with their unique data. In a flash, the API generates a custom image just for them.
This isn't just a niche trick anymore. The combination of AI-powered dynamic images and email marketing is taking off. We're seeing a 340% year-over-year jump in marketers using AI for email image generation, and 49% are now using generative AI for visuals and copy. The industry is moving fast.
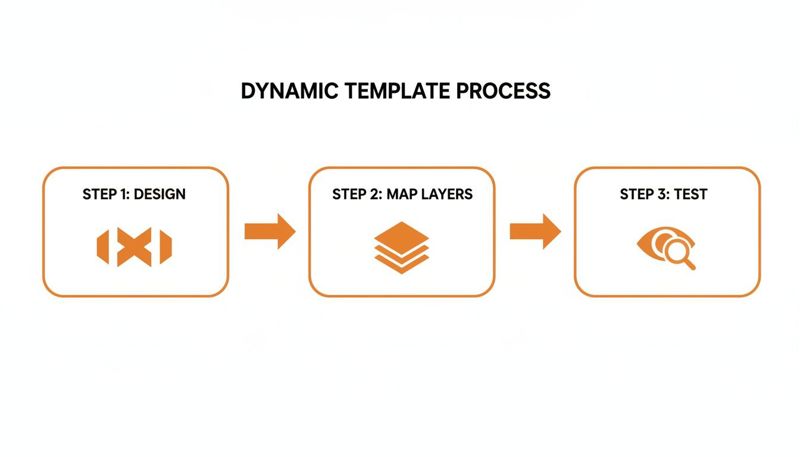
This whole process is much simpler than it sounds. It really boils down to three phases: designing the template, mapping the layers to your data, and testing it out.
Let's break down how you actually get this done.
The No-Code Workflow Using Merge Tags
For most marketers, this all happens right inside the email editor of your ESP. Platforms like Mailchimp, Klaviyo, or HubSpot all use merge tags (sometimes called personalization tags) to pull subscriber data into an email. You can use these exact same tags to build your dynamic image URL.
Let's say you have a welcome image and you want to personalize it with a subscriber's name and city. Here’s how it works:
Grab Your Base URL: First, get the base URL for your template from your dynamic image API provider (like OKZest). It’ll look something like this:
https://api.okzest.com/v1/images/template-123.Add Your Dynamic Parameters: Next, you'll tack on parameters to this URL. Each parameter matches a dynamic layer in your image. For the value, you'll simply insert your ESP's merge tag.
- To add the name, you’d append
?name={{first_name}}. - To add the city, you’d follow it with
&location={{city}}.
- To add the name, you’d append
Build the Final URL: Put it all together, and you get the final URL that you’ll drop into the
<img>tag in your email's HTML.https://api.okzest.com/v1/images/template-123?name={{first_name}}&location={{city}}
When your email goes out, the ESP swaps {{first_name}} and {{city}} with the actual data for each recipient. Simple as that.
Pro Tip: Double-check your merge tags! A tiny typo, like using
{{first-name}}when your ESP uses{{first_name}}, is the most common reason personalization fails. It has to be an exact match.
The Developer Workflow Using API Calls
If you need more control or want to automate things, you can generate these images programmatically before an email even gets sent. This is perfect for transactional emails, like creating a personalized event ticket image the second someone registers. It just involves a direct API call from your app's backend.
Here’s a quick example using cURL, which could be part of an automated script:
curl -X POST "https://api.okzest.com/v1/images/generate"
-H "Authorization: Bearer YOUR_API_KEY"
-H "Content-Type: application/json"
-d '{
"template_id": "template-123",
"parameters": {
"name": "Alex Johnson",
"event_date": "2025-12-01"
}
}'
The API will shoot back a URL for the freshly made image. Your app can then inject this URL into the email template being sent to Alex. This approach gives you total control and is ideal for integrating with custom CRMs or event platforms. If you want to go deeper, our API integration tutorial has more detailed examples.
A Few Best Practices for a Smooth Integration
No matter which path you take, a couple of key habits will make sure your dynamic images always look sharp and work perfectly.
URL Encoding for Special Characters Let's be real—subscriber data can be messy. Names can have accents (like José) or other symbols that can break a URL. URL encoding is the process of converting these characters into a web-safe format. Most modern ESPs and API clients handle this for you, but if you're seeing broken images for certain contacts, this is the first thing to check.
Always Have a Fallback Image What happens if a piece of data is missing or the API has a momentary hiccup? A broken image icon is the last thing you want your audience to see. A good fallback strategy is essential.
You can set a default image directly in your dynamic image API. This means if the name parameter comes up empty, the API can render a generic greeting like "Welcome!" instead of leaving a blank spot. It ensures you always deliver a polished, professional email, no matter what.
How to Measure and Optimize Your Campaigns

Hitting "send" on your first dynamic image campaign feels great, but that's just the beginning. The real work starts now: proving that these personalized visuals are actually moving the needle on your goals. To do that, you need a solid game plan for tracking performance and tweaking your strategy based on what the data tells you.
This whole process really kicks off before you launch. Rigorous testing isn't just a nice-to-have; it's what stops you from sending out broken images or embarrassing personalization fails. You have to go way beyond a quick "send to myself" check and really stress-test your dynamic templates.
A Comprehensive Testing Strategy
Before your campaign goes out to the masses, you need to see how your images hold up with all sorts of data thrown at them. I recommend creating a dedicated test segment in your email list with contacts that have a wide variety of data points.
- Varying Data Lengths: What does the image look like for someone named "Sue" versus "Christopher"? Does the text wrap elegantly, or does it completely break your design?
- Missing Data: Check what happens if a merge tag is empty. Does your fallback image or text show up as planned, or are you left with an awkward blank space?
- Special Characters: Always test names with accents, hyphens, or other symbols. You need to be sure they render perfectly without causing any weird glitches.
Beyond just the data, you absolutely have to check how your emails look across different clients. An image that’s pixel-perfect in Apple Mail can look like a mess in Outlook. Use a tool like Litmus or Email on Acid to preview your campaign on dozens of devices and clients. Pay special attention to how Gmail, Outlook, and various mobile apps handle your dynamic creative.
Moving Beyond Open Rates
Let's be honest: open rates are a shaky metric, especially with all the new privacy features out there. To get a true picture of how your dynamic images are performing, you have to look at what happens after the open. We're talking about engagement and conversions—the stuff that directly ties back to revenue.
This is where UTM parameters become your best friend. By adding tracking codes to the URLs your dynamic images link to, you can see precisely how many people clicked and what they did on your website. To accurately track the performance of your dynamic image campaigns and measure their impact, it's essential to diligently use UTM parameters.
Think about it: if your dynamic image links to a product page, don't just use a plain URL. Build a tagged one like this:
https://yourstore.com/product?utm_source=email&utm_medium=dynamic_image&utm_campaign=winter_sale
This simple addition tells your analytics platform that every visitor from this link came from your winter sale email and specifically clicked the dynamic image.
By tagging your links correctly, you can shift the conversation with stakeholders away from fuzzy metrics like opens and focus on what really matters: click-through rates, conversion rates, and revenue per email. This is how you prove ROI.
Using A/B Testing to Prove Value
Once your tracking is solid, you can run some seriously powerful A/B tests to show, without a doubt, the value of personalization. The simplest and most effective test is to pit your dynamic images against a static version.
It's straightforward: set up a split test where 50% of your audience gets the email with a personalized dynamic image, and the other 50% gets the same email but with a generic, one-size-fits-all image.
Because you have UTM tracking on both versions, you can directly compare them in your analytics dashboard. You're looking for statistically significant differences in the metrics that count:
- Click-Through Rate (CTR): Are more people clicking the personalized image?
- Conversion Rate: Of those who clicked, were the ones who saw the dynamic image more likely to convert?
- Average Order Value (AOV): Does seeing a personalized image encourage people to spend more?
The results from these tests give you the hard data you need to justify more investment in dynamic personalization and help you make smarter decisions for your next campaign.
Common Questions About Dynamic Image APIs
As you dive into the world of dynamic images, a few practical questions are bound to pop up. It's smart to think through the real-world impact of this tech on your campaigns before you go all in.
Let’s tackle some of the most common questions marketers have when they first start exploring a dynamic image API for email marketing.
How Do Dynamic Image APIs Affect Email Load Times?
This is a great question. We all know a slow-loading email is a deleted email.
The good news is that reputable API providers are obsessed with speed. The image generation itself happens in milliseconds on highly optimized servers. From there, the final image is served through a Content Delivery Network (CDN), which means it’s delivered from a server geographically close to your subscriber.
The result? Load times are just as fast—and sometimes even faster—than your standard static images. The key on your end is to keep your base templates light, especially the background images. Aim for under 200KB.
What Happens If a Subscriber's Data Is Missing?
This is exactly why fallback strategies are non-negotiable. A solid dynamic image API will let you set default values for every personalized element, so your emails always look polished and professional, no matter what.
You’ve got a couple of layers of protection here:
- Default Text: If a
first_namefield is empty in your data, the API can be set up to show a generic greeting like "Hello there!" instead of an awkward blank space. - Fallback Images: You can also set a default company logo or a generic product photo to appear if a dynamic image layer fails to load for any reason.
The best practice is to set a complete fallback image URL right inside your email's HTML. This is your final safety net, guaranteeing that if the dynamic URL breaks, a safe, static image appears instead of that dreaded broken-image icon.
Can I Use Dynamic Images for Certificates or Tickets?
Absolutely. In fact, this is one of the most powerful and popular ways to use the technology. A dynamic image API is perfect for generating personalized certificates, event tickets, or webinar passes on the fly.
Picture this: you're organizing an event. You can design a single, beautiful event ticket template. Then, using the API, you can dynamically insert each attendee's full name, a unique QR code for check-in, or even their specific seat number.
When someone registers, an automated email fires off instantly, containing their unique, personalized ticket as a high-quality image. This not only makes your communications look incredibly professional but also creates a seamless experience for your attendees. It’s a small touch that can directly contribute to higher attendance rates—all while saving your team countless hours of manual work.
Ready to create stunning, personalized visuals that capture attention and drive action? With OKZest, you can automate personalized image creation for every subscriber, boosting engagement and building stronger relationships. Start creating for free today at okzest.com.