So, what exactly is an API image? Think of it as a smart graphic, one that's created on the fly by a programming interface. This lets you generate personalized, data-driven visuals in real-time. Instead of a single, static picture for everyone, an image API builds a unique graphic for each user based on their name, location, or even what they just bought.
What Are API Images and Why Should You Care?
At its heart, an Application Programming Interface (API) is just a messenger. It lets different software applications talk to each other and swap data. When you apply that concept to visuals, you break free from the world of generic, one-size-fits-all graphics. No more asking a designer to create hundreds of slightly different versions of the same image—you can automate the whole thing.
Imagine sending a welcome email. A static image is just… a picture. But an API-generated image can grab a new subscriber's name and instantly place it onto a beautiful welcome banner. That small change makes the entire interaction feel personal and much more engaging.
The Big Shift from Static to Dynamic
For years, marketers and developers had to rely on a fixed library of pre-made, static images. If you needed a new banner for a sale, a designer had to fire up Photoshop. If you wanted to personalize a social media post, it was a slow, manual chore.
API images completely flip that script. They connect your image templates directly to your data sources, whether that's a CRM, a user database, or an e-commerce platform. This connection turns your visuals into an active, responsive part of your communication strategy. You can dive deeper into the possibilities in our guide to dynamic image generation.
This capability is a huge reason behind the growth of the API economy. The global API market was valued at a whopping USD 216.281 billion in 2021 and is on track to hit USD 420.313 billion by 2033. It’s clear these connections are becoming essential for modern businesses. You can check out the full API market growth projections on cognitivemarketresearch.com.
Key Takeaway: The real magic of using an API for images is scalability. You can generate thousands—or even millions—of unique, personalized images from a single template without lifting a finger. It's a massive time and resource saver.
To really see the difference, it helps to put the two approaches side-by-side.
Static Images vs API-Generated Images
The old way of doing things—using static, pre-made images—has some serious limitations compared to generating them dynamically via an API. Here’s a quick breakdown of what sets them apart.
| Feature | Static Images | API Images |
|---|---|---|
| Personalization | Low (Generic for everyone) | High (Data-driven and unique) |
| Scalability | Manual & Slow | Automated & Instant |
| Creation Time | Hours or Days | Milliseconds |
| Data Integration | None | Real-time connection to your data |
| Consistency | Risk of human error | Uniform & reliable every time |
| Use Cases | Basic websites, print ads | Personalized marketing, certificates, real-time ads |
The bottom line is simple. Static images are a relic of a less connected time. For any modern marketing or communication that aims to be personal and scalable, API-generated images are the way forward. They're faster, smarter, and far more effective.
Set Up Your Image Generation API
Alright, let's get into the fun part: integrating your first api images. The journey always starts with authentication. This is simply how the API service confirms it's you and gives you the green light to start creating. Nearly every image generation API handles this with a unique API key.
Think of your API key as a secret password just for your app. Once you sign up for a service, you'll find this key tucked away in your account dashboard. Your first job is to copy it and keep it safe. Seriously—never, ever paste your API key directly into your website's front-end code, like a public JavaScript file. That’s the digital equivalent of leaving your house keys under the doormat for anyone to find.
Securing Your API Key
The right way to handle your key is by storing it in a secure environment variable on your server. When your application needs an image, your front end calls your own server. Your server then safely grabs the API key and forwards the request to the image API. As you set this up, it's a good idea to follow standard API security best practices to keep everything locked down.
Understanding API Endpoints
With your key secured, you'll start talking to the service through its API endpoints. These are just specific URLs that do different things. For an image API, you'll run into a few common ones:
- Create Endpoint (
POST /images): This is the workhorse. You send data to this endpoint—like a customer's name or a product ID—and it sends back a brand-new, custom image. - Retrieve Endpoint (
GET /images/{id}): Need to pull up an image you already made? You can fetch it again using its unique ID. This is fantastic for caching. - Update Endpoint (
PUT /images/{id}): Some APIs let you tweak an existing image template or a generated graphic by sending new data to its ID.
This flow chart gives you a quick visual of how your data travels through the API to become a personalized image.
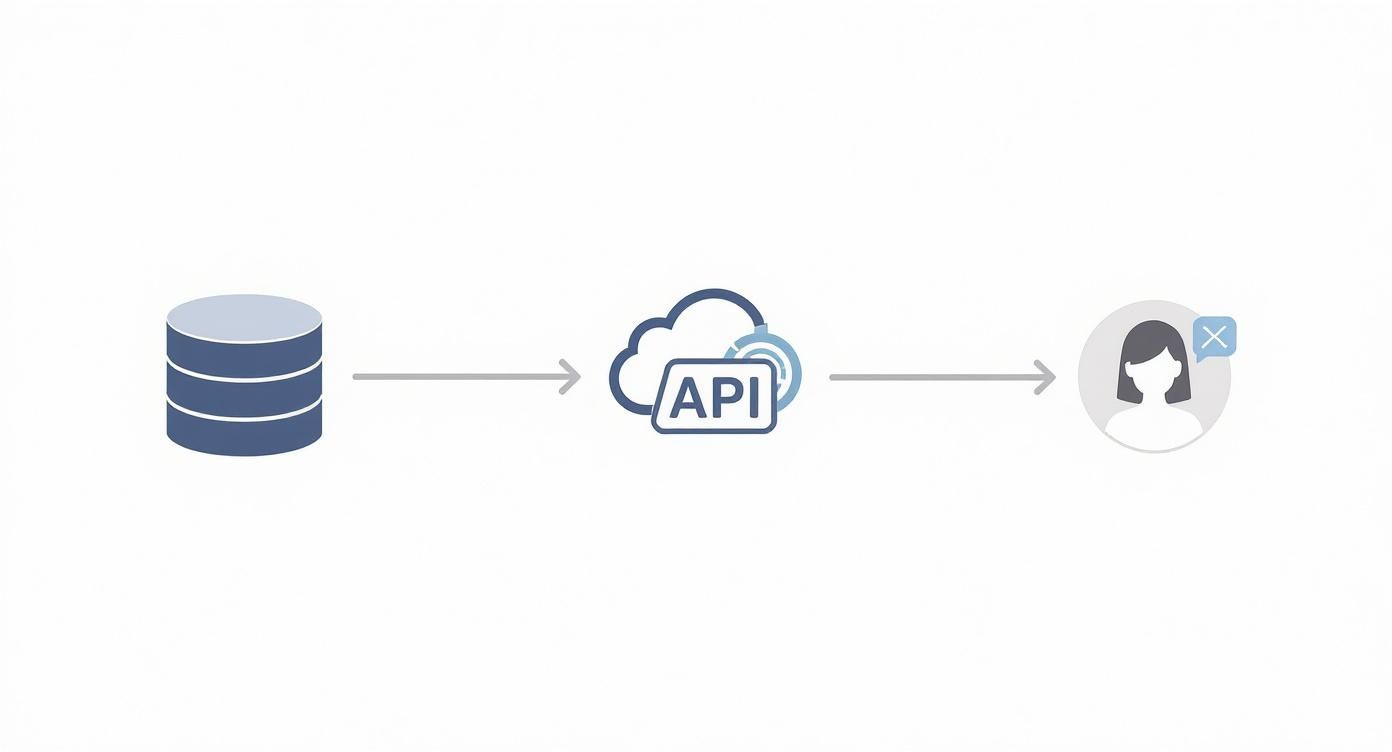
It’s a simple but powerful process: your raw data gets transformed into a slick visual asset with just one API call. What used to be a manual design job can now be completely automated.
Making Your First API Request
Now, let's look at how a real request is structured. Most API calls have two main components: the headers (which is where your authentication key goes) and the body (which holds the data for your image). The basic structure is pretty consistent no matter what programming language you're using.
I'll share a few annotated examples showing how to request an image. Just remember to swap 'YOUR_API_KEY' and 'YOUR_TEMPLATE_ID' with your actual credentials. If you want to dive deeper into more advanced setups, you can find great guides on building a custom image API.
Pro Tip: I always recommend starting with a tool like Postman or Insomnia to test your API calls. It's so much faster to spot and fix issues with your headers or JSON formatting in a dedicated client before you even write a single line of code.
These examples should give you a solid starting point for generating your own API images. By securing your key, getting familiar with the endpoints, and structuring your requests correctly, you can start automating personalized visuals in minutes.
Craft Personalized Images With Dynamic Data
Once your API connection is solid, the real fun begins. This is where you go beyond just spitting out a generic image and start creating a unique visual for every single user. The idea is simple: you design a base template and then use the API to dynamically layer user-specific data right on top of it.
This process turns a standard graphic into a powerful one-to-one communication tool. Imagine layering a new customer's name onto a welcome banner, adding a user's profile picture to a rewards certificate, or even showing their recently viewed product inside an email.
Mapping Data With Merge Tags
The most common way to pull this off is with merge tags (sometimes called dynamic parameters). When you design your image template, you define specific layers or fields that the API can change. For example, a layer for a name might be labeled {{customer_name}}, while a profile picture could be {{user_avatar}}.
When you make your API call, you just send along a JSON payload that maps your live data to these specific fields. The API takes your template, finds the corresponding merge tags, and swaps them out with the data you provided.
Let's look at a real-world scenario. You're sending a personalized thank-you image to a customer named Alex who just bought a "Classic Blue T-Shirt." Your JSON payload might look something like this:
{ "template_id": "YOUR_TEMPLATE_ID", "modifications": [ { "name": "customer_name", "text": "Alex" }, { "name": "product_name", "text": "Classic Blue T-Shirt" }, { "name": "profile_photo", "image_url": "https://example.com/alex-avatar.jpg" } ] }
The API then processes this request and generates an image that feels like it was made just for Alex. This level of personalization is quickly becoming a must-have for marketers. As you explore this, looking into integrating AI for dynamic image generation in marketing can offer some great insights, especially when using no-code platforms like Make.com.
Handling Missing Data Gracefully
But what happens if you don't have a piece of data? Maybe a new user hasn't uploaded a profile picture, or their first name is missing from your database. Sending a request with a blank field could result in a broken or just plain awkward-looking image.
This is where fallback values are absolutely critical. Any decent image API will let you set default content that appears if the primary data isn't there.
A smart fallback strategy ensures a consistent and professional user experience every time. Instead of an empty space where a name should be, you could display a friendly "Hello there!" It’s a small detail that prevents your automation from looking broken.
For example, you could configure your template so that if {{customer_name}} is empty, it defaults to something like "Valued Customer." This keeps the design's integrity intact and makes sure every recipient gets a complete, polished visual.
This kind of tech is advancing fast. The global AI image generator market, which leans heavily on APIs, is projected to hit USD 2.39 billion between 2025 and 2029. This growth just underscores the massive demand for automated, intelligent visual content. By combining dynamic data with thoughtful fallbacks, you can create engaging api images at a massive scale.
Practical Ways to Use API Images
Theory is one thing, but seeing API images in the wild is where the lightbulb really goes on. When you connect dynamic data to a visual template, you can craft some seriously powerful, personal experiences for your audience across all kinds of channels.
Let's dig into a few scenarios where this technology really makes a difference.
These examples show how a single, simple API call can turn raw data into a compelling visual that grabs attention and feels like it was made just for one person.
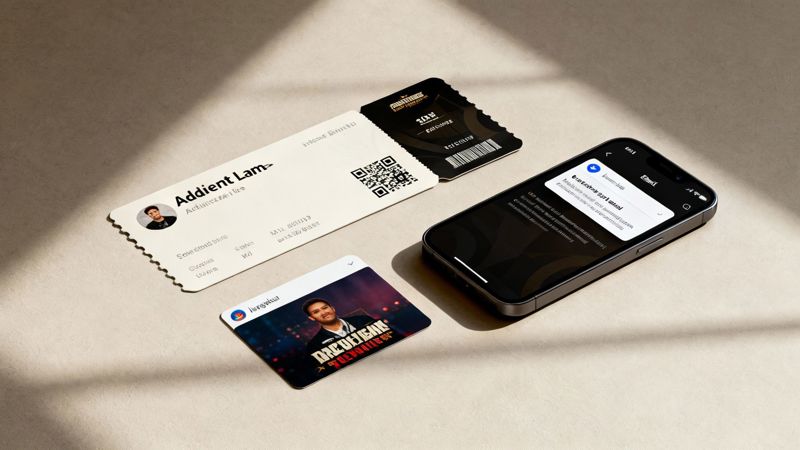
Personalized Event Tickets and Certificates
Event organizers, listen up. You can automate creating tickets and certificates with almost zero effort. Imagine you’re hosting a webinar for hundreds of people. Instead of the mind-numbing task of creating each ticket by hand, an API can do all the heavy lifting in an instant.
As soon as someone registers, your system just needs to send their details over to the image API.
- Business Value: This saves countless hours of manual work, slashes the risk of human error, and delivers a professional, personalized ticket the moment someone signs up.
- Data Points: You'd typically use the attendee's full name, a unique QR code for check-in, the event title, and the date.
- API Concept: The API call would map fields like
{{attendee_name}}and{{event_title}}and include animage_urlfor the unique QR code, generating a fresh ticket for every single person.
This exact same logic is perfect for course completion certificates, membership cards, or conference badges. It’s a beautifully simple and scalable way to give each person a unique, professional credential.
Data-Driven Email Banners
Email marketing gets a massive upgrade with personalized images. A generic promotional banner is just noise, easy for subscribers to scroll past. But one that reflects their actual interests? That's a different story. E-commerce brands, for example, can show a customer the exact products they just looked at or left in their cart.
By injecting real-time data into your email visuals, you stop broadcasting a generic message and start having a one-on-one conversation. That simple shift can make a huge difference in click-through rates and engagement.
For an abandoned cart email, your Email Service Provider (ESP) can trigger an API call the moment the automation kicks off.
- Business Value: You immediately increase the email's relevance and boost conversion rates by reminding customers of the specific products they were considering.
- Data Points: This would pull the customer's first name, the product image URL, the product's name, and its current price.
- API Concept: The data payload would map to variables like
{{first_name}},{{product_image}}, and{{product_name}}inside your banner template.
The result is a highly persuasive visual nudge that encourages the user to finish what they started and complete their purchase.
Unique Social Media and Chatbot Visuals
In the fast-paced world of social media, getting noticed is half the battle. API images let you generate unique graphics on the fly for direct messages or chatbot interactions. For instance, a chatbot could create a personalized "Welcome!" image for a new Instagram follower that includes their actual username.
Suddenly, an automated interaction feels less robotic and way more engaging. Instead of just getting a wall of text, the user receives a custom-made graphic that acknowledges them personally. It’s a small touch that creates a memorable first impression and builds a stronger connection right from the start.
Optimize Performance and Cost for API Images
When you're running API images at scale, you're constantly playing a balancing act between speed, reliability, and your budget. As your volume climbs, even tiny inefficiencies can snowball into sluggish performance and surprisingly high bills. Building a cost-efficient, resilient system right from the start is crucial for long-term success.
A massive piece of this puzzle is smart caching. Instead of generating the exact same personalized image for the same user over and over, you should cache the result after the first request. By storing that generated image on a CDN (Content Delivery Network) or even in your own storage, every subsequent request can be served instantly. This dramatically cuts down on your API calls and improves load times for your users.
Choosing the Right Image Format
The image format you choose has a direct impact on both performance and cost. Each one has its strengths, and picking the right one comes down to what you’re trying to accomplish.
Here’s a quick rundown of the most common options:
- JPEG: This is your go-to for photographs and complex images where file size is the top priority. It uses lossy compression, which means it cleverly sheds a bit of quality for a much, much smaller file.
- PNG: Best for graphics that need a transparent background, like logos or icons you plan to layer over other content. It uses lossless compression, preserving every single detail but resulting in a larger file size.
- WebP: A modern format from Google that offers the best of both worlds with lossy and lossless compression. It often creates significantly smaller files than both JPEG and PNG at a comparable quality, making it a fantastic all-around choice for web performance.
Think about your main goal. If you're generating thousands of email banners with photos, JPEG or WebP is your best bet. If you’re creating certificates with transparent signatures, PNG is the only way to go.
Monitor Usage and Manage Your Budget
As you scale up, keeping a close eye on your API usage is non-negotiable. Most API providers give you a dashboard where you can track your call volume. You should absolutely set up alerts to get notified of any unexpected spikes in usage—it could be a runaway script or, worse, someone using your API key without permission.
This kind of proactive monitoring is essential. The API management market itself is booming, which shows just how important these tools are for scaling operations. It was valued at USD 5.42 billion in 2024 and is projected to hit a staggering USD 32.77 billion by 2032. You can read more about the growth of API management on fortunebusinessinsights.com.
Pro Tip: When your API calls fail because you've hit a rate limit, don't just give up. Implement a retry logic with an "exponential backoff" strategy. This means your code waits a short period before retrying, then doubles that wait time after each subsequent failure. It's a simple way to prevent your system from overwhelming the server.
Finally, make it a habit to regularly review your pricing plan to ensure it still fits your traffic patterns. Many services offer tiered pricing, and moving to a plan with a higher request limit can often be far more cost-effective than getting hit with overage fees.
Combining smart caching, format selection, and diligent monitoring is the foundation of effective image automation. By putting these practices in place, you'll build a system that is not only powerful but also sustainable for the long haul.
API Images: Your Questions Answered
As you start weaving API-generated images into your projects, you're bound to run into a few common questions. Getting straight answers can save you hours of head-scratching and help you get things right the first time. Here are some of the most frequent queries we see from developers and marketers.
How Do I Handle API Rate Limits When Generating Images in Bulk?
Hitting a rate limit can bring your entire image generation workflow to a screeching halt. The best way to avoid this is to build an exponential backoff strategy into your code. It sounds complicated, but it's simple: if a request gets denied, your app should wait a brief moment—maybe a second—before trying again. If it fails a second time, it waits two seconds, then four, and so on. This gives the API a breather.
For bigger jobs, like creating personalized images for a massive email list, you'll want to pair this with a queuing system. Instead of blasting thousands of requests all at once, a queue spreads them out over time. This smooths out the traffic and keeps you safely under the limit.
What Is the Best Way to Secure My API Key?
Whatever you do, never expose your secret API key on the front-end. If it’s visible in your public JavaScript, anyone can find it, use it, and potentially run up a massive bill on your account.
The gold standard for security is to set up a server-side proxy. Your front-end app makes a request to your own server, which then securely attaches the secret key (stored as an environment variable) and passes the request along to the image API. This creates a protective middleman, making sure your key is never exposed.
This is surprisingly easy to do with serverless functions from services like AWS Lambda or Cloudflare Workers. It's the single most important step you can take to keep your account safe.
Can API-Generated Images Be Optimized for SEO?
Absolutely. Getting API images to play nice with search engines comes down to a few key practices.
First, if you can, serve the images from your own domain using a proxy or CDN. This lets you create keyword-rich URLs like yourdomain.com/images/personalized-blue-widget.jpg, which search engines love.
Second, always make sure your application dynamically adds descriptive alt text to the <img> tag. This is a huge deal for both accessibility and for helping search engines figure out what your image is about. Finally, stick to modern, compressed formats like WebP to keep load times snappy—a major ranking factor for Google.
What Happens If the API Service Is Temporarily Down?
Even the most dependable services can have a bad day. To prevent broken images from showing up on your website or in your emails, you need a fallback plan. Your code should have logic that defaults to a generic placeholder image if an API request fails.
This ensures your users have a consistent experience. Instead of an ugly broken image icon, they'll see a professional, branded placeholder. You can also add some simple retry logic for temporary network hiccups, but a solid fallback is non-negotiable for a resilient app.
Ready to create stunning, personalized visuals at scale? With OKZest, you can automate your image creation for emails, social media, certificates, and more. Start for free and see how it works