Ever wondered how some companies send you emails with your name beautifully embedded in an image? That's not magic; it's an API photo service at work.
Think of it as a clever bridge connecting your raw data—like a new user's name or a special discount code—to a visual template. This allows you to generate thousands of unique, personalized images on the fly, all without a single minute of manual design work.
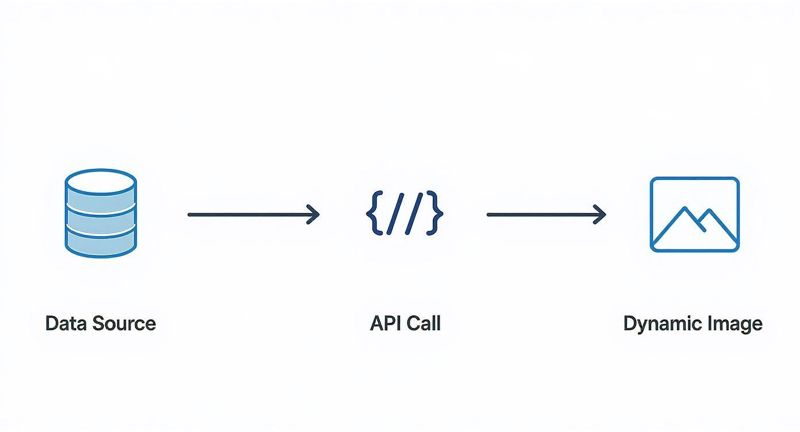
The Power Of Personalized Images With API Photo Services

It’s one thing to send a generic "Welcome!" email. It's another thing entirely to greet a new user with an image that has their name on it. That’s the kind of personal touch that makes people notice.
This guide is all about moving past the theory. We're going to get practical and show you exactly how to connect your data to visual content, creating dynamic images that work at any scale. We’ll dig into real-world scenarios, from custom onboarding visuals to unique promotional banners, and show you how a photo API service is the engine behind it all.
Why Dynamic Visuals Matter
Let's be honest, static content often just becomes part of the noise. Personalized visuals, on the other hand, grab attention because they feel like they were made for one person. That direct connection is huge for boosting engagement and creating a brand experience that actually sticks with your audience.
An API photo solution is what makes this possible without burning out your design team. It automates what used to be an incredibly manual and time-consuming process.
By programmatically generating visuals, you can scale your personalization efforts effortlessly. A single image template can be adapted for thousands of users, each receiving a unique version tailored specifically to them.
The possibilities here are pretty broad and can have a real impact on your metrics. Think about:
- Email Marketing: Imagine welcome banners with new subscriber names or promotional images showing a discount code made just for them.
- E-commerce: You could generate product mockups with a customer's name on a jersey or a custom message on a mug, right on the product page.
- Event Management: Automatically create personalized tickets or slick social sharing images for every single attendee.
- Certificates: Instantly produce and deliver course completion certificates with graduate names and dates, saving hours of work.
This isn't just a niche idea; the market for API-driven image services is blowing up. The global image recognition market, which includes these services, was valued at USD 45.02 billion in 2022 and is projected to grow like crazy. This trend really highlights how businesses are hungry for automated, intelligent ways to handle images.
To see how this fits into a bigger strategy, it's worth checking out some practical marketing automation workflow examples that lean heavily on this kind of personalization. By the end of this guide, you’ll have a clear roadmap for creating your own dynamic images.
Choosing Your Tools and Getting Authenticated
Before you can bring a single dynamic image to life, you need to get your foundation right. That starts with picking the right API photo service for your project. It’s tempting to just grab the first one you find, but a little homework now can save you a world of headaches down the road.
Not every service is built the same. Some are clearly designed for developers who live and breathe the command line, while others offer beautiful, user-friendly interfaces perfect for marketers who prefer a more visual workflow. The sweet spot is finding a tool that fits how your team actually works.
Key Features to Look For
When you're comparing your options, think beyond the basic ability to spit out an image. You need to consider the entire process, from designing the template to delivering the final product.
Here’s what I always keep an eye out for:
- An Intuitive Template Editor: This is a total game-changer. A good visual editor lets your design or marketing team create and tweak image templates without ever touching a line of code. It cleanly separates the creative work from the technical stuff.
- Flexible Integration Options: A well-documented API is a must. Look for clear code examples in different languages (like Python, JavaScript, or even just cURL) and check if they offer libraries or SDKs to make your life easier.
- Comprehensive Documentation: Clear, well-organized, and searchable documentation is non-negotiable. It should spell out every endpoint, parameter, and error code, saving you from hours of frustrating guesswork.
The best API is one you barely have to think about. It should feel like a natural extension of your app, not a roadblock you’re constantly fighting. Prioritize services that clearly care about the developer experience.
Securing Your API Access
Okay, so you've picked a service and signed up. Your first real technical step is authentication. This is how the service verifies it's really you making the request, ensuring no one else can generate images on your account. This is almost always handled with a unique API key.
Treat your API key like a password for your application—it’s super important to keep it secret. Never, ever expose it in your front-end code (like public HTML or JavaScript files) or commit it to a public Git repository. The standard, secure practice is to store it as an environment variable on your server.
Most REST APIs use an Authorization header to send the key with each request. If you want a deeper dive into how this works, our guide on using a REST API for images is a great place to get the fundamentals down.
Let's look at a quick, practical example. Most services will expect you to pass the key in the request header, usually in a "Bearer" token format.
Here's what that looks like in a basic cURL command:
curl -X POST
https://api.example.com/v1/images
-H "Authorization: Bearer YOUR_API_KEY"
-H "Content-Type: application/json"
-d '{ "template_id": "welcome-banner", "name": "Alex" }'
In that snippet, you’d replace YOUR_API_KEY with your actual secret key. That one simple header is your ticket in, granting you access to the API photo service and opening the door to creating all sorts of personalized visuals.
Crafting Your First Dynamic Image Request

Alright, you've got your API key ready. Now for the fun part—turning raw data into a beautiful, personalized visual. This is where you'll build a request that tells the api photo service exactly how to customize your image template. It's less like hardcore coding and more like giving a designer a very specific set of instructions.
Let's start with a classic scenario: adding a customer's name to a "Thank You" graphic for a post-purchase email. It's a simple touch, but it instantly transforms a generic asset into a personal acknowledgment, making your customer feel seen.
The Anatomy Of A JSON Payload
To tell the API what to do, you send it a structured piece of data called a JSON payload. Think of it as a checklist. You're specifying which parts of your image template to change and what you want to change them to. Every change is defined as a simple key-value pair.
Here’s what a basic JSON payload looks like for our "Thank You" graphic:
{ "template_id": "tx-ty-card-v1", "modifications": [ { "name": "customer_name", "text": "Maya" }, { "name": "profile_image", "image_url": "https://example.com/profiles/maya.jpg" } ] }
In this little snippet, template_id points to the specific design we've already set up. The modifications array then lists out our instructions: find the layer named customer_name and change its text to "Maya," then find the profile_image layer and swap its content with the new image URL. Simple as that.
Dissecting The API Response
Once you send your request, the API fires back its own JSON response. This response is critical. It tells you if your request worked and, most importantly, gives you the URL for your brand-new, dynamically generated image.
A successful response might look something like this:
{ "status": "success", "image_url": "https://cdn.okzest.com/generated/xyz123abc.png" }
The status field gives you an immediate thumbs-up. The real prize, though, is the image_url. This is the link you can embed directly into your email template or website HTML. If the status comes back as "error," the response will usually include a helpful message explaining what went wrong—super useful for troubleshooting.
Understanding this request-response cycle is the core skill for using any API. Once you nail this, you can automate almost any visual content creation task. It's a simple but incredibly powerful loop that scales really well.
To help you get comfortable, let's break down the most common parameters you'll use when putting together an api photo request. Getting familiar with these will help you build much more complex and interesting visuals down the line.
Common API Parameters for Image Personalization
This table outlines the essential building blocks of a typical API photo request, explaining what each one does.
| Parameter | Description | Example Value |
|---|---|---|
| template_id | The unique identifier for your pre-designed image template. | welcome-email-banner |
| modifications | An array of objects detailing the changes to make to specific layers. | [{"name": "user_name", "text": "Alex"}] |
| name | The name of the specific layer within your template that you want to alter. | discount_code_text |
| text | The new text content to apply to a text layer. | SAVE20 |
| image_url | The URL of an external image to place into an image layer. | https://cdn.example.com/product/shoe.jpg |
| webhook_url | An optional URL to send a notification to when the image is ready. | https://myapp.com/hooks/image-ready |
By combining these parameters, you can go way beyond just changing a name. You can swap out logos, update product photos in real-time, and even alter background colors to create deeply relevant visuals for every single one of your users.
Connecting Real Data For True Personalization
A dynamic image is only as powerful as the data that fuels it. Sending a static name in a JSON payload is a good first step, but the real magic happens when you connect your api photo service to live, breathing data sources. This is where you graduate from one-off examples to fully automated, scalable personalization.
Imagine pulling a new customer's details straight from your CRM the moment they sign up. Or maybe you need to fetch user info from a shared Google Sheet for a quick marketing campaign. This kind of direct connection gets rid of manual data entry and ensures your visuals are always built on the most current information you have.
Tapping Into Your Data Sources
Let's walk through a common scenario. A user, Maria, just subscribed to your newsletter. Her info—name and email—is automatically added to your CRM. Your goal is to trigger a welcome email that includes a slick image personalized with her name.
Your server-side code would first make a call to your CRM’s API to grab Maria’s data. This part happens entirely outside of the image API; you're just gathering your raw materials before you start building.
Once you have her data, you can build the payload for your api photo request. Instead of hardcoding "Maria," you'll insert a variable holding the name you just pulled. It's this dynamic process that ensures every new subscriber gets a truly personal welcome, with zero extra effort from you.
Handling Missing And Messy Data
In the real world, data is rarely perfect. What happens when someone signs up with just an email, leaving their name field blank? Sending an image with an awkward empty space where a name should be looks broken and unprofessional. This is where fallbacks become your best friend.
A fallback is simply a default value you provide in case the primary data is missing. It's a simple concept, but it's absolutely crucial for good execution.
Pro Tip: Always build fallback logic into your process. If a
firstNamevariable is null or empty, your code should default to something generic but friendly, like "Valued Customer" or "Friend." This ensures a graceful user experience, even with incomplete data.
You can set this up with a simple conditional check in your code before you even build the API request.
- Check for Data: Does the
firstNamefield exist and have a value? - Use Primary Data: If yes, use the
firstNamefrom your data source. - Use Fallback: If no, use your predefined default string, like "Welcome!".
This quick check prevents embarrassing personalization fails and keeps your communications feeling high-quality. It's a small detail that makes a huge difference in how professional your automation looks.
Data Privacy and Formatting
When you're working with user data, privacy is everything. Always make sure you're handling personal information responsibly and only using the data you have explicit permission for. Never pass sensitive information that isn't required for the visual itself.
Beyond that, data formatting is key. Names with special characters, different languages, or extra spaces can sometimes cause issues. Before sending data to the api photo endpoint, it’s a good practice to sanitize and format it. This might mean trimming whitespace or ensuring the text is properly URL-encoded to prevent characters like & or ? from breaking your API call. These small pre-processing steps help guarantee your requests go through successfully and the final images render perfectly every time.
Embedding And Delivering Your Personalized Images
Creating the perfect personalized visual is a fantastic start, but the real impact comes from how you deliver it. A dynamic image generated by an api photo service is pretty useless until it actually reaches your audience, seamlessly embedded within their customer journey—whether that's on your website, in an email campaign, or even in a social media share.
The goal is to make these images feel like a natural, integrated part of the experience, not just a tacked-on gimmick.
This whole process is a simple but powerful loop: you fetch some data, make an API call with that data, and get back a ready-to-use image URL.
Let's break down how to get that image in front of your users.
Embedding In Websites And Web Apps
On a website or web app, putting your personalized image in place is as straightforward as using a standard HTML <img> tag. The only real difference is that the src attribute won't point to a static file living on your server. Instead, it will be the dynamic URL you received from the API photo service.
For instance, your HTML might look something like this:
<img src="https://cdn.okzest.com/generated/xyz123abc.png" alt="A personalized welcome message for you">
That URL is unique to the user and the data you provided. You'd typically generate this on the server side when the page loads, making sure each visitor sees a custom visual meant just for them. This is the core idea behind creating an image link that serves up dynamic content.
Using Dynamic Images In Email Campaigns
Email is where API-driven images really get to shine, especially with platforms like Mailchimp or Klaviyo. These services famously use merge tags (or variables) to pop in personalized text, and you can use that exact same concept for your image URLs.
First, you'll construct the dynamic image URL, but you'll include the email platform's merge tag as one of the parameters. Then, you just drop that complete URL structure into your email's HTML.
- Mailchimp Merge Tag:
*|FNAME|* - Klaviyo Variable:
{{ first_name }}
Your image tag inside the email template would then look something like this:
<img src="https://api.okzest.com/v1/image?template=welcome&name=*|FNAME|*" alt="Welcome *|FNAME|*!">
When the email gets sent, the email service provider swaps *|FNAME|* with the recipient's actual name right before making the image request. This generates the personalized graphic on the fly.
Key Takeaway: The image isn't generated until the user opens the email. This real-time creation ensures the visual is delivered instantly and reflects the most current data you have at that exact moment.
Performance And Delivery Best Practices
Slow-loading images will absolutely kill user engagement. It's not enough for the image to be personalized; it also has to load fast. A huge part of this is optimizing website images for speed and user experience, ensuring they pop up quickly without looking pixelated.
Any good API photo service should be leveraging a Content Delivery Network (CDN) to slash load times for users, no matter where they are in the world.
This isn't just a niche trick; the demand for high-quality, instant visual services is blowing up. The global photographic services market was valued at around USD 35.78 billion in 2024 and is projected to hit USD 64.68 billion by 2034. This growth is fueled by businesses that need fast, scalable image delivery. By focusing on performance, you make sure your personalized visuals actually enhance the user experience instead of slowing it down.
Got Questions About API Photo Services?
When you first dive into image personalization, a few practical questions almost always pop up. They’re usually about the "what ifs"—the real-world scenarios that can trip you up if you're not prepared. Getting these sorted out early helps you build something that’s not just cool, but also reliable.
One of the biggest worries I hear is about service reliability. What actually happens if the API you’re leaning on for all these cool images suddenly goes offline? A broken image link is the last thing you want your users to see.
What Happens If The API Photo Service Goes Down?
A solid implementation always has a backup plan. This is non-negotiable. You can easily set up your application with some fallback logic to show a default, non-personalized image if an API call fails or takes too long to respond. Most services also have status pages you can subscribe to for alerts on any downtime.
For anything mission-critical, I'd recommend setting up your own simple monitoring. A small script that pings the API endpoint can automatically trigger your fallback system if it detects a problem. This way, your users get a seamless experience, even when things go wrong behind the scenes.
The goal here is resilience. Your users should never even know there was an issue. They should just see a clean, professional image—whether it’s the personalized one or your default.
How Do I Handle Special Characters Or Different Languages?
This is a huge deal for anyone with an international audience. The short answer is to make sure the API you choose has full UTF-8 encoding support. This standard covers almost every character and symbol you'll ever need.
When you build your API call, all your data needs to be properly URL-encoded. This process is what turns tricky characters like '&' or '+' into a safe format that won't break the URL. Thankfully, most modern programming languages have built-in functions that do this for you. Just remember to test with a few different languages to be sure everything looks right on the final image.
Are There Limits On How Many API Photo Requests I Can Make?
Yes, pretty much every API service has rate limits. It's how they keep the service stable and fair for everyone. These limits are usually measured in requests per minute or per month, and the specifics will depend on which subscription plan you're on.
Before you commit, dig into the API documentation and find those numbers. If you know you're going to have a high volume of requests, you'll need to design your system to play by the rules. This might mean setting up a queuing system or using an exponential backoff strategy to manage your API calls so you don't get temporarily blocked.
Ready to create stunning, personalized images without the hassle? With OKZest, you can automate your visual content for emails, websites, and social media in minutes. Start for free and see how easy it is.