What if you could generate thousands of unique, on-brand visuals without ever having to open the Canva editor? It's not a fantasy. You can automate Canva to create personalized images for every single email subscriber, social media follower, or new client, all in real-time.
This guide will show you exactly how to transform Canva from a simple design tool into a dynamic, automated content engine for your marketing.
Why Automating Canva Is a Marketing Game-Changer
Automating Canva is about more than just saving time; it's about unlocking hyper-personalized marketing at a scale that would be impossible to do manually.
Instead of sitting there updating a design one by one for each person, you can connect a data source—like a Google Sheet, your CRM, or an email list—directly to a Canva template. This connection lets you dynamically change text, images, and other design elements for every single person on your list.
The impact here is huge. The market for social media marketing automation, where tools like Canva play a key part, is already valued at $4.5 billion in 2024 and is expected to shoot up to $12.8 billion by 2033. Teams that get on board with this are seeing real results, like a 14.5% increase in productivity and a 12.2% drop in marketing overhead.
Choosing Your Automation Path
So, how do you get started? The path you choose really depends on your technical comfort level and how much control you need. Some methods are perfect for quick, no-code setups, while others give developers the keys to the kingdom for deep customization.
Before diving into the "how," it helps to understand the "what." If you're new to this, it's worth taking a moment to delve into what content automation truly is to get the bigger picture.
This simple flowchart breaks down the two main ways you can approach Canva automation.
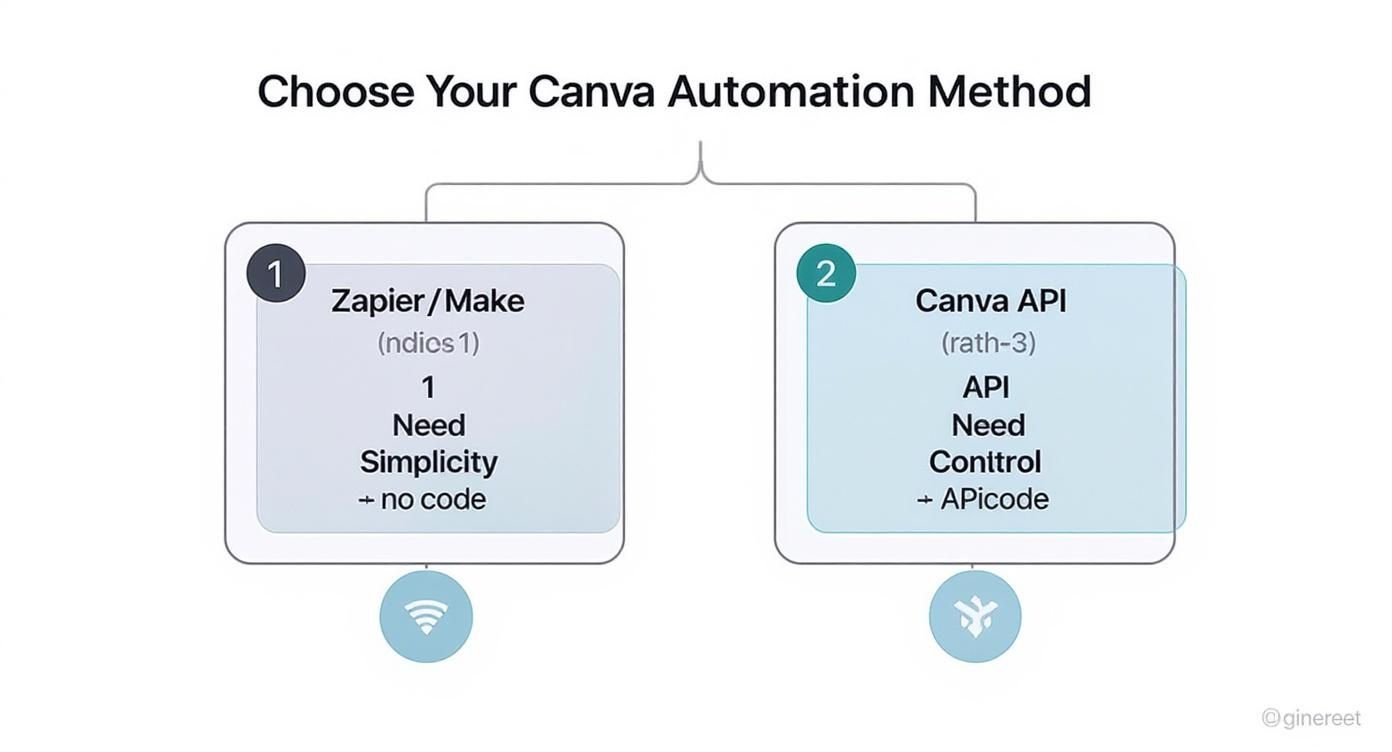
Ultimately, the choice boils down to a classic trade-off: simplicity versus control. No-code tools offer incredible ease of use, while the API delivers maximum flexibility for more complex projects.
Comparing Canva Automation Methods
Here's a quick look at the different ways to automate Canva, helping you choose the best approach for your needs.
| Method | Best For | Technical Skill Required | Typical Cost |
|---|---|---|---|
| No-Code (e.g., Zapier) | Quick, simple workflows; connecting to other apps without code. | Low (Beginner-friendly) | Subscription-based (e.g., $20-$50/mo) |
| Canva API | Custom integrations, high-volume generation, full creative control. | High (Requires development) | Usage-based credits + developer costs |
| Merge-Tag Solutions (e.g., OKZest) | Generating personalized images for email, social DMs, and certificates. | Low to Medium | Subscription-based (e.g., $10-$100/mo) |
Each method has its place. The key is to match the tool to the task you're trying to accomplish and the resources you have available.
The Core Benefits of Automation
No matter which path you take, automating your visual content creation brings some serious advantages that directly impact your brand and your bottom line.
- Scale Personalization: Stop sending generic content. Generate thousands of unique images tailored to individual recipients, making your marketing feel genuinely personal and much more engaging.
- Boost Efficiency: Think of all the hours spent creating repetitive graphics for social media, email campaigns, or event materials. Automation drastically cuts down on that manual work.
- Maintain Brand Consistency: By working from a master template, you ensure every single visual asset automatically adheres to your brand guidelines. This eliminates the small inconsistencies and human errors that creep in with manual design.
Automate Canva with Zapier or Make
If you want to automate Canva without ever touching a line of code, no-code automation platforms are the perfect place to start. Tools like Zapier and Make.com act as digital bridges, connecting Canva to the thousands of other apps you already use every day.
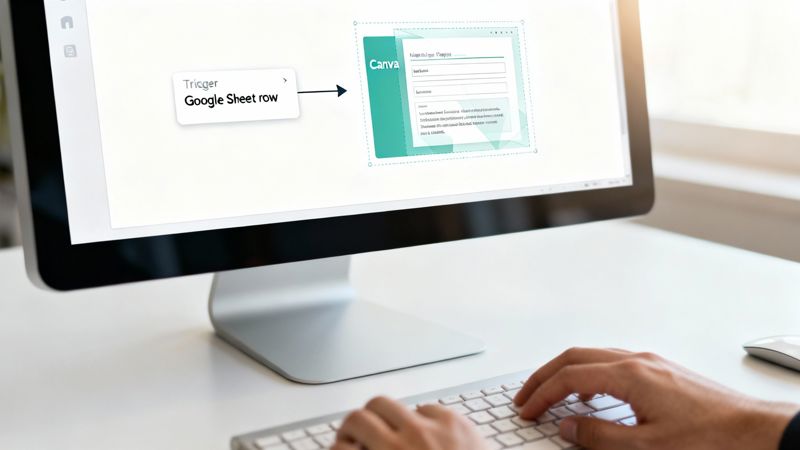
The concept is simple but incredibly powerful. You just define a "trigger" in one app—like a new row appearing in a Google Sheet—and link it to an "action" in another, like creating a new design in Canva. This sets up an automated workflow that just runs in the background, handling all those repetitive tasks for you.
This whole approach gets rid of manual data entry and endless design tweaks, freeing you up to focus on the big picture instead of tedious production work. It’s a really accessible way to build some impressive automations without the headache.
Connecting Your Tools
Getting started is mostly about giving these platforms permission to access your accounts. You’ll connect your Canva account first, then link whatever source application you want to pull data from. This could be anything from your CRM to an e-commerce platform.
The real magic happens when you start mapping your data fields. You’re essentially telling the automation, "Hey, take the info from the 'First Name' column in this spreadsheet and pop it into the 'CustomerName' text field in my Canva template."
Pro Tip: Before you even start building your workflow, design your Canva template with automation in mind. Give every element you plan on changing a clear, descriptive name (e.g., "FirstName", "ProfileImage"). Trust me, this makes the mapping process a breeze and saves you from a lot of potential errors down the road.
This structured setup ensures the right information always lands in the right place, keeping your designs looking sharp and professional. For a deeper dive, our guide on no-code automation tools has more strategies for connecting your favorite apps.
Building a Real-World Workflow
Let's walk through a classic example that’s also highly effective: automatically generating a personalized welcome image for new email subscribers. It’s a small touch, but it can seriously boost engagement right from that very first interaction.
Imagine a new subscriber signs up through a form on your website, and their info gets added to a Google Sheet or your email platform like Mailchimp.
Here’s how the automation would play out:
- The Trigger: The moment a new row is added to your Google Sheet (or a new subscriber joins your Mailchimp list), the whole process kicks off.
- The Action: Zapier or Make immediately detects this trigger and gets to work in Canva, using your pre-designed "Welcome" template.
- Data Mapping: The automation grabs the subscriber's name from the "Name" column in your sheet and slots it into the matching text field in your Canva design.
- The Output: Canva generates a fresh, personalized PNG or JPG file. This new image can then be automatically saved to Google Drive, dropped into a welcome email, or even used for a personalized shoutout on social media.
This entire process happens in seconds, with zero manual effort on your part. You can set up similar workflows for all sorts of scenarios. For instance, you could automatically create a custom "Thank You" graphic when a customer pays through Stripe or generate a branded certificate when a student finishes a course in Teachable. The possibilities are huge.
Using the Canva API for Custom Integrations
No-code tools are fantastic for speed and simplicity. But what happens when you hit a wall? When you need more muscle, more flexibility, or just want to build something completely your own?
That's where the Canva API comes in. It's your direct line into Canva's design engine, letting you create and modify designs programmatically.
Think of an API (Application Programming Interface) as a bridge that lets different software programs communicate. By using the Canva API, you can write your own code to tell Canva exactly what to do—create, edit, and export—all without ever touching the Canva editor by hand.
This is the key to unlocking a much more sophisticated level of visual automation. It’s the engine that powers high-volume, deeply personalized content for serious businesses.
What Is Possible with the API
The API takes you from setting up one-off workflows to building a living, breathing content creation system. It's the perfect fit for projects that need complex logic or need to plug into your company's internal software.
Imagine you run an e-commerce shop with thousands of products. With the API, you could write a script that grabs product images, names, and prices right from your database. That script then injects all that data into a branded Canva template, churning out unique social media posts for every single item you sell. Automatically.
Here are a few other powerful ways people use it:
- Bulk Product Mockups: Generate thousands of product mockups by swapping out text and images on a single core template.
- Custom Event Materials: Automatically create personalized event badges, tickets, or social media shout-outs for every single person who registers.
- Real-Time Data Visualization: Hook up your API script to a live data feed to create charts and infographics that update themselves.
Getting Started with Your First API Call
You don't have to be a hardcore developer to give this a try. Tools like Postman offer a friendly interface for sending API requests without writing a ton of code.
The basic process starts with getting an API key from your Canva account, which is how you prove your requests are legitimate.
Once you have your key, you can start making "calls." A typical workflow looks like this: you find the ID of a Canva template you want to use, then send data (like new text or image URLs) to fill in the editable fields you've set up in the design. We cover this in much more detail in our Canva API guide if you want to go deeper.
The explosive growth of Canva's user base really drives home the need for scalable solutions like its API. As of 2025, the platform has rocketed to over 240 million monthly active users—a huge leap from 135 million in 2023. And those users have created over 35 billion designs. This massive scale is exactly why direct API access is so valuable for businesses that can't afford to create visuals one by one. You can check out more of Canva's incredible growth statistics and what they mean for creators.
Ultimately, yes, the API requires a bit more technical know-how to get started. But the payoff is total control and the ability to scale your visual content strategy infinitely. It's the definitive way to bake Canva's creative power right into your own apps and workflows, making sure your brand can produce amazing, personalized content no matter the volume.
Effortless Image Personalization with Merge Tags
So far, we've looked at no-code tools and the Canva API to automate Canva. But there’s another approach that really hits the sweet spot between simplicity and scale, especially when you need deep personalization. This method uses dynamic URLs combined with merge tags—a technique that lets you modify a Canva design just by changing its web link.
Think of it like Mail Merge, but for images. You create one master design in Canva, and then a tool like OKZest generates a special link for it. By adding simple parameters to the end of this URL, you can swap out text, images, and even colors on the fly. It’s a brilliant way to produce thousands of unique visuals without getting tangled up in complex workflows or custom code.

I've found this is incredibly effective for personalizing communication in places where grabbing attention is everything, like email campaigns, social media DMs, and even automated chatbot interactions.
How Dynamic URLs Work
The core idea is surprisingly straightforward. Your base Canva design gets a unique URL. From there, you just append data to that link using simple parameters—small snippets of text that tell the system exactly what to change.
Each parameter targets a specific, named layer in your Canva template. For instance, a parameter you name text_name might point to a text box where you want a customer's name to appear. The system reads the URL, finds the layer with that name, and instantly inserts the data you provided.
Key Takeaway: This approach cleanly separates your design from your data. Your design stays locked and perfectly on-brand in Canva, while the personalization data comes directly from your email platform, CRM, or spreadsheet via the dynamic URL. It keeps things tidy and manageable, even when you're personalizing for thousands of people.
This is a fantastic way to bridge the gap between easy-to-use no-code platforms and the more technical demands of the API. It gives you a powerful new way to automate your visual content. If you want to dive deeper, you can learn more about how to use merge tags for image personalization to start adding this to your own campaigns.
A Practical Example: Personalized Welcome Images
Let's put this into action. Imagine you want to send a welcome email to every new subscriber. Instead of a generic header, you want an image that greets them by name.
Here's how you'd do it:
- Design Your Template: First, you'll create your "Welcome" graphic in Canva. You'll add a text box where the subscriber's name will go and give it a clear layer name, like
FirstName. - Generate the Dynamic URL: Next, you connect this template to a tool like OKZest, which generates your base URL. This link is the foundation for all your personalized images.
- Add the Merge Tag: Now for the magic. In your email marketing platform (like Mailchimp or Klaviyo), you’ll insert the image using the dynamic URL. But you'll use your platform’s merge tag for the subscriber’s name.
The final URL inside your email template might look something like this:
https://your-dynamic-url.com/image?FirstName={{FNAME}}
When the email goes out, your email platform automatically replaces {{FNAME}} with each subscriber's actual first name. "Welcome!" instantly becomes "Welcome, Sarah!" or "Welcome, David!"—a unique image for every single person on your list.
This technique isn't just for names. It can be used for anything, from creating custom coupon codes to designing effective event tickets with attendee-specific details.
Dynamic URL Parameters for Image Personalization
See how simple URL changes can modify text and images in your Canva designs automatically.
| Parameter | Example Value | Result in Canva Design |
|---|---|---|
text_FirstName |
Maria |
Updates the main heading to "Welcome, Maria" |
image_ProfilePic |
https://.../maria.jpg |
Replaces the placeholder profile picture with Maria's photo |
text_Points |
150 |
Changes the "Your Points" text box to display "150" |
shape_ProgressBar |
75% |
Adjusts the width of a shape to represent 75% progress |
This level of dynamic personalization really helps your messages stand out in crowded inboxes and feeds, making each recipient feel seen and valued.
Best Practices for Your Automation Workflow
Setting up an automated workflow is one thing, but making it truly reliable is another. A great automation is one that just works, humming along in the background without you having to constantly check on it. To get your Canva automations to that level, you need to build a system that anticipates problems and knows exactly how to handle them.
It all starts with how you build your Canva templates. Before you even think about connecting to an automation tool, you need to think like a system. Every single element you plan to change dynamically needs to be ready for whatever data you throw at it.
Design Templates for Automation
Your Canva template is the absolute foundation of your entire workflow. Get this part wrong, and you’re in for endless headaches, broken images, and a lot of manual fixes. But a well-designed template makes the whole process feel like magic.
First thing’s first: name your layers properly. Don't leave them with default names like "Text Box 1." Give them descriptive names that match your data source, like FirstName or ProfileImage. This tiny step makes mapping fields in Zapier, Make, or a custom API integration a breeze and drastically reduces the chance of errors.
You also need to think about the nature of your data.
- Accommodate Variable Text Lengths: A text box that fits "Alex" perfectly might completely break when it gets a name like "Christopher." Make your text boxes wide enough to handle longer names, or better yet, set them to shrink text to fit.
- Plan for Different Image Sizes: If you're swapping out images dynamically, make sure your image frame or container uses a consistent aspect ratio. This prevents awkward stretching or weird cropping.
Building a robust workflow is essential, especially as Canva solidifies its position in the corporate world. With 85% of Fortune 500 companies now using the platform, the demand for scalable, error-proof automation is higher than ever. These large organizations rely on such systems to maintain brand consistency across thousands of assets. You can learn more about Canva’s impressive enterprise adoption.
Handle Errors and Missing Data
Let's be real—no data source is perfect. Sooner or later, your automation will hit a row with a missing first name or a dead image URL. If you haven't planned for this, you're going to send out some seriously unprofessional visuals with awkward empty spaces.
This is where fallbacks save the day. A fallback is simply a default value your system uses when the primary data is missing or broken.
For instance, if a subscriber’s first name field is empty, you can set a fallback to something friendly like "Hello there!" instead of leaving a gaping hole in your design. For images, you could set a default brand logo or a generic stock photo to pop in if a profile picture can't be found. Good automation tools like OKZest have this functionality built right in, making it easy to ensure every single image looks complete and polished.
Test Your Workflow Thoroughly
Whatever you do, don't launch a large-scale automation without putting it through its paces first. Running a small test batch can save you from a massive and very public mistake.
Create a test spreadsheet and load it up with all the weird edge cases you can think of:
- Names that are unusually long or short.
- Names that contain special characters or different scripts.
- Records where multiple data fields are completely missing.
- Broken or invalid image URLs.
Run this test batch through your workflow and then actually look at every single output image. Check for alignment issues, text that's overflowing its box, and broken images. This small investment of time upfront is what ensures your full campaign runs perfectly, delivering a professional, personalized experience to every single person.
Common Questions About Canva Automation
Jumping into any new workflow, especially one with automation, usually brings up a few questions. To help you sidestep common roadblocks, I’ve pulled together the questions I hear most often about automating Canva. These are the straightforward answers you need to get your automation journey started on the right foot.
Can I Automate Canva For Free?
Absolutely. You can definitely get your feet wet without spending a cent. A free Canva account hooks up nicely with the free tiers of automation tools like Zapier or Make.com. These usually give you a certain number of free automated tasks each month, which is more than enough for small-scale projects or just to test out an idea.
The catch? For higher volumes or more complex features, you’ll probably need to upgrade. A Canva Pro subscription is often necessary for specific integrations, and you'll hit the paywall on automation platforms once you run past their free task limits. Direct API access is typically reserved for higher-tier Canva plans, and specialized tools will have their own pricing.
What Are The Most Common Use Cases?
The possibilities are pretty much endless, but a few use cases pop up again and again because they’re just so effective at boosting engagement and saving time.
- Personalized Email Marketing: Think unique header images that greet your subscriber by name or mention their company.
- Social Media Content: Automatically crank out graphics for new blog posts, daily quotes, or when you want to share user-generated content.
- E-commerce Visuals: Create personalized "thank you" images for new customers or whip up dynamic product mockups on the fly.
- Certificates and Awards: Need to generate hundreds of professional-looking certificates for a course or event? This is a perfect job for automation.
- Sales and Outreach: Instantly personalize pitch deck slides or social media DMs with a prospect's name and company logo. It's a small touch that makes a big impact.
These examples really show how automation can make your communication feel way more personal and relevant, even when you're doing it at scale.
What Is The Biggest Mistake to Avoid?
The single biggest mistake I see is people failing to design their Canva template with automation in mind from the very beginning. It's so easy to create a gorgeous design that looks perfect with your test data, only to watch it fall apart when it meets real-world information.
The most common pitfall is not anticipating data variations. A text box that perfectly fits the name "Sue" will look completely broken when it has to accommodate "Alexander." You have to design for the unexpected to ensure your final images always look professional, no matter the input.
Before you even think about building your workflow, put your template through its paces. Test it with long names, short names, and even empty fields to see how the design reacts. Make sure your layer names are clear and descriptive, and have fallback options ready for any missing data. Trust me, a little prep work here saves massive headaches down the road.
Ready to create thousands of personalized images effortlessly? With OKZest, you can use merge tags to dynamically change text and images in your Canva designs for emails, social media, and more. Stop designing one by one and start personalizing at scale. Get started for free at OKZest.com.