At its core, a REST API image service is a way to programmatically create personalized visuals. You send data to an endpoint, and it takes a static design template and merges in unique data—like a customer's name, their company logo, or a special discount code—all in real time. This is the secret sauce for creating personalized marketing at scale, without sinking endless hours into manual design work.
Why Dynamic Images Are a Modern Marketing Must-Have

We live in a world overflowing with generic content, and personalization is no longer just a nice-to-have—it’s what customers expect. Marketers and developers are quickly moving away from one-size-fits-all stock photos because they simply don't grab anyone's attention. Dynamic images, generated on the fly, fix this by turning a broadcast message into a one-to-one conversation.
This is exactly where a REST API image service comes in. Instead of painstakingly creating a unique visual for every single customer, you can automate the whole process. This technology lets you drop hyper-personalized images straight into emails, web apps, and social campaigns, making every user feel like you're speaking directly to them.
The Power of Real-Time Personalization
The concept is simple but incredibly effective: you design a template once and then use an API to fill it with custom data for each person. This forges a powerful connection that static content could never achieve.
Just think about the possibilities:
- Email Marketing: An e-commerce store sends a follow-up email showing an image of the exact product the customer just bought, with their name overlaid on it. You can dive deeper into how a dynamic image API for email marketing works to see the impact.
- Event Invitations: An event company generates personalized digital tickets as images, each featuring the attendee's name, a unique QR code, and their specific seating info.
- SaaS Onboarding: A software platform greets a new user inside the app with a welcome image that includes their name and a "getting started" tip tailored to them.
A great real-world parallel is an AI outfit generator, which lets users visualize clothing items dynamically. All these applications run on the same fundamental idea: using an API REST image service to deliver a custom visual experience.
When you turn raw data into compelling visuals, you're going far beyond basic text personalization. You’re creating memorable, shareable content that drives real action and builds lasting brand loyalty.
To give you a sense of the scale here, the global image recognition market—a field that leans heavily on REST APIs for integration—was valued at a massive USD 45.02 billion in 2022. That number is only expected to climb, highlighting the huge demand for programmatic image manipulation.
Before we get into the technical steps, let's quickly break down the key pieces of this process. This will give you a solid foundation for what's happening behind the scenes.
Core Components of a REST Image API Workflow
| Component | Role and Importance |
|---|---|
| API Endpoint | The specific URL you send requests to. This is the front door to the image generation service. |
| Authentication Key | Your unique key (API key) that proves you have permission to use the service. It keeps your usage secure. |
| Image Template | The base design you create. It contains static elements and dynamic layers (like text or image placeholders). |
| Request Payload (Data) | The unique data (e.g., name, company, date) you send with your API request, usually in JSON format. |
| Generated Image URL | The final output. The API returns a URL pointing to the newly created personalized image, ready to be embedded. |
Understanding these components is the first step. Next, we'll walk through how to put them all together.
The principles of REST (Representational State Transfer) are a perfect match for this kind of task. Its stateless, scalable, and straightforward design makes it the go-to architectural style for serving media efficiently across the web. It creates a reliable and predictable way for your application to ask for a personalized image and get one back, which is the foundation for everything we'll cover in this guide.
Getting Connected to the Image API
Before you can bring a single dynamic image to life, you have to establish a secure connection with the API. This isn't just a technical checkbox to tick; it's the foundation that protects your account, your data, and your service from being misused. Think of it like getting the keys to a new house—you need the right one, and you definitely need to keep it safe.
The heart of this connection is your API key. It's a unique string of characters you get when you sign up, and it acts as both your username and password. It identifies your application and gives it permission to make requests. Without it, the API will simply turn you away.
Finding and Using Your API Key
Most services make finding your key pretty painless. After creating an account, you can usually find it in your user dashboard, tucked away in a section labeled "API," "Developer," or "Settings."
This key is what you'll use for authentication on every single request you make. The most common method you'll run into is a Bearer token. This just means you include an Authorization header in your request, formatted like this: Authorization: Bearer YOUR_API_KEY_HERE. It's a simple, standard way for the server to confirm who’s calling the shots.
Occasionally, a service might use a custom header like X-API-Key, but the idea is exactly the same. The key is your secret handshake, proving you have permission to be there.
The number one rule, and it's a big one, is to never, ever expose your API key in client-side code. That means keeping it out of any JavaScript running in a browser or inside a mobile app's code. If you slip up, anyone can find it and start using your account, which could rack up costs or cause all sorts of headaches.
Storing Your Credentials the Right Way
So, if the key can't go in your frontend code, where should it live? The industry standard is to store it as an environment variable on your server.
This approach neatly separates your sensitive credentials from your application's source code. It’s a crucial practice for a few reasons:
- Security: It stops your key from being accidentally committed to a public code repository like GitHub.
- Flexibility: You can easily swap keys for different environments—like development, testing, and production—without touching a single line of code.
- Maintainability: If you need to change your key, you only have to update it in one spot: your server's configuration.
For a deeper dive into the nuts and bolts of setting up these secure connections, an API integration tutorial can give you a more detailed, step-by-step walkthrough. It's a foundational skill for any developer working with third-party services.
Hitting the Right API Endpoint
Your API key answers "who," but the API endpoint answers "where." An endpoint is just a specific URL that your application sends requests to. A service might have different endpoints for different jobs—say, one for creating image templates and another for actually generating the final images.
For an api rest image service, you’ll most likely be looking for an endpoint that accepts POST requests. This makes sense, as you're sending data (your personalization details) to create a new resource (your custom image).
Your best friend here is the documentation. It will clearly spell out the available endpoints, the required HTTP method for each, and the exact structure of the data you need to send. For some great examples of clear, helpful documentation, check out these AI Virtual Staging API developer resources.
Once you've paired your secure API key with the correct endpoint, you've built a reliable and safe connection. You're all set to start crafting your first dynamic image requests.
Building Your First Dynamic Image Request
Alright, you're connected and authenticated. Now for the fun part—actually crafting the API request that brings your personalized image to life. This is where you'll tell the API how to combine a base template with your dynamic data, creating a unique visual for every single user.
Let's walk through what goes into a request and look at some real-world code you can adapt for your own projects.
Most image generation APIs, including ours, are built around POST requests. This makes perfect sense when you think about it: you're asking the server to create a new resource, which is your finished, personalized image. A POST request also lets you send a structured payload of data in the request body. It's far more secure and flexible than trying to cram everything into a URL with a GET request.
This approach is standard practice. REST APIs are everywhere, holding a massive 93% adoption rate among organizations. Their popularity comes down to a straightforward, HTTP-based design that’s perfect for tasks like creating new images on the fly.
Structuring the API Request Payload
The payload is the heart of your request. It's a JSON object containing all the specific instructions the API needs to customize your image. Think of it as a recipe: you provide the template ID and a list of modifications, like what text to write, which images to insert, and how to style everything.
Each piece of data in the payload corresponds to a dynamic field, or "merge tag," you've already set up in your image template. For instance, your template might have placeholders named user_name, discount_code, and profile_picture.
In that case, your JSON payload would look something like this:
{
  "template_id": "tmpl_a1b2c3d4e5",
  "modifications": [
    {
      "name": "user_name",
      "text": "Alex Rivera"
    },
    {
      "name": "discount_code",
      "text": "SAVE25NOW"
    },
    {
      "name": "profile_picture",
      "image_url": "https://example.com/profiles/alex.jpg"
    }
  ],
  "format": "png"
}
Here, we're telling the API to grab the template with the ID tmpl_a1b2c3d4e5 and apply three specific changes. We’re also asking for the final image to be a PNG. Always double-check the API documentation for the exact payload structure it expects, as this can vary.
Making the Request with cURL
Before you write a single line of code, cURL is your best friend. It’s a simple command-line tool that lets you quickly test API endpoints. It's perfect for making sure your connection, authentication, and payload are all working correctly.
Here’s how to send that request using cURL:
curl -X POST https://api.okzest.com/v1/images \
-H "Authorization: Bearer YOUR_API_KEY" \
-H "Content-Type: application/json" \
-d '{
  "template_id": "tmpl_a1b2c3d4e5",
  "modifications": [
    { "name": "user_name", "text": "Alex Rivera" },
    { "name": "discount_code", "text": "SAVE25NOW" }
  ]
}'
Let's quickly break that down:
- -X POST: This specifies we're making a
POSTrequest. - -H "Authorization: ...": This is the header that passes along your secret API key.
- -H "Content-Type: ...": This header tells the server you're sending data in JSON format.
- -d '': This flag contains the JSON payload we just built.
Fire off that command, and if everything is correct, the API will respond with a URL to your freshly generated image. If you want to dive deeper into different request types, our guide on the REST API GET image method offers some useful context.
The diagram below shows the basic workflow for a secure API connection, from obtaining your key to hitting the right endpoint.
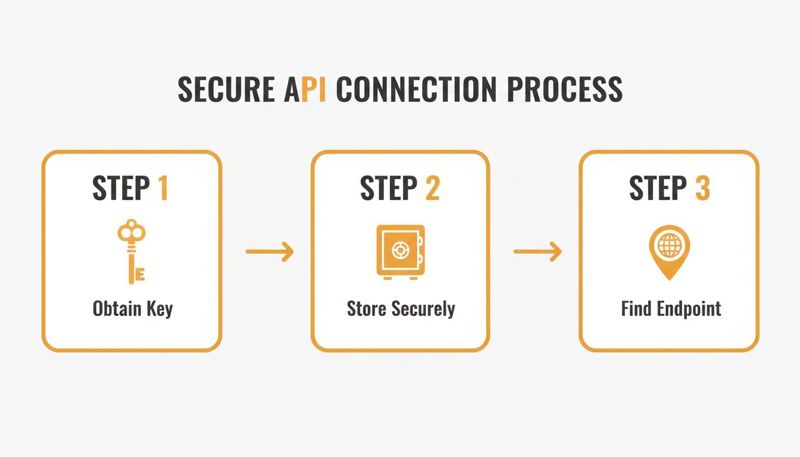
Each of these steps is a critical checkpoint to make sure your requests are both authorized and correctly routed.
Building the Request in Node.js
Once you're ready to integrate this into a web application, you'll want to use a library to handle the HTTP requests. For Node.js, Axios is an incredibly popular choice because of its clean, promise-based syntax.
Here’s a practical example of how to make that same API call in a Node.js environment:
const axios = require('axios');

const apiKey = process.env.OKZEST_API_KEY;
const apiUrl = 'https://api.okzest.com/v1/images';

const payload = {
  template_id: 'tmpl_a1b2c3d4e5',
  modifications: [
    { name: 'user_name', text: 'Alex Rivera' },
    { name: 'discount_code', text: 'SAVE25NOW' }
  ]
};

async function generateImage() {
  try {
    const response = await axios.post(apiUrl, payload, {
      headers: {
        'Authorization': `Bearer ${apiKey}`,
        'Content-Type': 'application/json'
      }
    });
    console.log('Generated Image URL:', response.data.url);
    return response.data.url;
  } catch (error) {
    console.error('Error generating image:', error.response.data);
  }
}

generateImage();
Pro Tip: See how we're loading the
apiKeyfromprocess.env.OKZEST_API_KEY? This is a security best practice. It keeps your secret credentials out of your source code where they could be accidentally exposed.
Crafting the Request in Python
If Python is your language of choice, the requests library is the undisputed champion for making HTTP calls. It’s famous for its simplicity and readability, making it a go-to for developers working on API integrations.
Here’s the same request, but this time in Python:
import os
import requests
import json

api_key = os.environ.get('OKZEST_API_KEY')
api_url = 'https://api.okzest.com/v1/images'

headers = {
    'Authorization': f'Bearer {api_key}',
    'Content-Type': 'application/json'
}

payload = {
    'template_id': 'tmpl_a1b2c3d4e5',
    'modifications': [
        {'name': 'user_name', 'text': 'Alex Rivera'},
        {'name': 'discount_code', 'text': 'SAVE25NOW'}
    ]
}

def generate_image():
    try:
        response = requests.post(api_url, headers=headers, data=json.dumps(payload))
        response.raise_for_status()  # This will raise an HTTPError for bad responses (4xx or 5xx)

        image_url = response.json().get('url')
        print(f"Generated Image URL: {image_url}")
        return image_url
    except requests.exceptions.HTTPError as err:
        print(f"HTTP error occurred: {err}")
    except Exception as err:
        print(f"An error occurred: {err}")

generate_image()
This Python script is robust, includes some basic error handling, and securely pulls the API key from environment variables, just like the Node.js example. With these patterns, you have a solid foundation for building dynamic image requests, no matter which programming language you're using.
Handling Responses and Embedding Your Images
So you’ve sent your request to the API. Now what? The next step is all about catching what the service throws back and putting it to work. This is where the magic happens—turning a successful API call into a real, personalized visual for your customer.
Getting this part right, especially when things go wrong, is the difference between a slick, professional integration and one that feels broken.
Decoding a Successful API Response
When everything goes to plan, you’ll get a 200 OK status code back, along with a tidy little JSON response. Your main job here is to grab the URL for the image that was just created. Most APIs keep this response simple and to the point.
You’ll be looking for a JSON payload that looks something like this:
{
  "success": true,
  "id": "img_1a2b3c4d5e",
  "url": "https://cdn.okzest.com/generated/img_1a2b3c4d5e.png",
  "created_at": "2023-10-27T10:00:00Z"
}
The golden ticket here is the url. That’s the direct link to your brand-new personalized image, ready to go and hosted on a CDN for speedy delivery. Your application just needs to pluck that URL out and get it in front of your user.
You Need a Fallback Strategy
Let’s be real: things don’t always go according to plan. What if the API call fails? It could be a network hiccup, dodgy data in the request, or a temporary server blip. An empty space where a beautiful image should be just looks sloppy.
That’s why having a solid fallback plan isn’t just a nice-to-have—it’s non-negotiable.
Here are a few practical ways to handle errors gracefully:
- Keep a Default Image Handy: If the API call bombs or doesn’t return a URL, your code should be smart enough to swap in a generic, non-personalized image. This keeps your email or webpage layout from breaking.
- Use Conditional Logic: Inside your email template or web framework, run a quick check to see if the image URL actually exists. If it’s empty or null, show the default image instead.
- Retry with Simpler Data: Sometimes, a request fails because of something tricky, like a name with special characters. You could even build in logic to try the request one more time with simpler, default data as a last resort.
The goal is to make your integration resilient. A user should never see a broken image icon. A well-planned fallback ensures that even when the personalization fails, the user experience doesn't.
By thinking ahead about what could go wrong, you build a much more robust system that maintains its professional polish, no matter what’s happening behind the scenes.
Embedding Images into HTML for Web and Email
Once you have that image URL, showing it off is the easy part. It all comes down to the standard HTML <img> tag. You’ll just pop the dynamic URL you got from the API into the src attribute.
The great thing is this technique works almost identically for both websites and HTML emails, making it a super versatile tool for any channel.
For a Web Page
On your website, you'll likely use a bit of JavaScript to ask your backend for the image URL and then inject it right into the page.
<!-- The container for your dynamic image -->
<div id="user-welcome-card"></div>

<script>
  async function displayPersonalizedImage() {
    // This function would call your backend, which in turn calls the image API
    const imageUrl = await getPersonalizedImageUrl(); // Returns 'https://cdn.okzest.com/...'

    if (imageUrl) {
      const imageElement = document.createElement('img');
      imageElement.src = imageUrl;
      imageElement.alt = "A personalized welcome image";
      document.getElementById('user-welcome-card').appendChild(imageElement);
    }
  }

  displayPersonalizedImage();
</script>
For an Email Template
When you’re working inside an email platform like Klaviyo, Mailchimp, or Instantly, you'll lean on merge tags. The process is simple: you save the generated image URL to a custom field for that contact (e.g., personalized_image_url).
Then, inside your email’s HTML, you just drop it in like this:
Hi {{ first_name }}, here is your special offer!
When you hit "send," your email service provider swaps out the {{ personalized_image_url }} merge tag with the unique URL for each person on your list. That’s how you get personalization at scale, sending thousands of unique images in a single campaign without breaking a sweat.
Scaling Your Implementation and Avoiding Pitfalls

Alright, you've got your first personalized images generating. That's a huge step. But moving from a simple test script to a production environment that serves thousands—or even millions—of users requires a different mindset. Your focus has to shift from "does it work?" to "will it work under pressure?"
Building a scalable and robust system is all about planning for success. You need to anticipate the bottlenecks before they bring your service to a screeching halt. That means paying close attention to the rules of the road set by your API provider. A solid api rest image service will perform beautifully, but every service has its limits. Respecting those boundaries is key.
Navigating API Rate Limits
Every API has rate limits—a cap on how many requests you can make in a given timeframe. This isn't there to slow you down; it’s a necessary protection for the service's infrastructure that ensures fair usage for everyone. If you exceed these limits, you'll likely get a 429 Too Many Requests error, which temporarily blocks your access.
To stay on the right side of this, always check the API documentation for its specific policy. A battle-tested strategy is to implement an "exponential backoff" algorithm in your code. If a request fails with a 429 error, your application should wait for a short period—say, one second—before retrying. If it fails again, it waits longer (two seconds), then longer still (four seconds), and so on. This simple logic prevents you from hammering the API and gives it time to recover.
Your goal should be to operate well within the defined rate limits, not to push right up against them. Proactive management, like batching requests or spreading them out over time, is a far better approach than constantly reacting to throttling errors.
Smart Caching Strategies to Save Time and Money
Making an API call for the exact same image over and over is a huge waste of resources. It's inefficient, costs you money, and slows things down for your users. This is where caching comes in.
By implementing a smart caching strategy, you can slash the number of redundant API calls. Here are a couple of ways to do it:
- Server-Side Caching: Store the generated image URL in your own database, linking it to the specific user or data that created it. Before you even think about making a new API call, check your database first.
- CDN Caching: Use a Content Delivery Network (Cloudflare, Fastly, etc.) to cache the images themselves. When a user requests an image, the CDN can serve a stored copy from a server geographically close to them, making everything feel much faster.
This approach doesn't just cut down on your API usage; it significantly speeds up load times for your end-users. It's a win-win.
Troubleshooting Common API REST Image Errors
When things go wrong, a quick-reference guide can save you a ton of time. Most issues you'll run into will return a standard HTTP status code that points you in the right direction. Here are some of the most frequent errors and how to handle them.
| HTTP Status Code | Common Cause | How to Fix It |
|---|---|---|
400 Bad Request |
The data you sent in the request body (the payload) is malformed, missing required fields, or has invalid values. | Double-check your JSON payload against the API documentation. Look for typos, incorrect data types, or missing parameters. |
401 Unauthorized |
Your API key is either missing, invalid, or expired. The server doesn't know who you are. | Verify that your API key is included correctly in the request header (e.g., Authorization: Bearer YOUR_API_KEY). Check your account dashboard to ensure the key is active. |
404 Not Found |
You're trying to access an endpoint that doesn't exist, or you're referencing a template or resource with an incorrect ID. | Check the URL for typos. Make sure you're using the correct HTTP method (GET, POST, etc.) for that specific endpoint. |
429 Too Many Requests |
You've exceeded the API rate limits by sending too many requests in a short period. | Implement an exponential backoff strategy for retries. Consider batching requests or spreading them out over time to stay within the allowed limits. |
500 Internal Server Error |
Something went wrong on the API provider's end. This is not an issue with your request. | This is usually a temporary problem. Wait a few moments and retry the request. If the issue persists, check the provider's status page or contact their support. |
Having this table handy can turn a frustrating debugging session into a quick fix. Always start by checking the status code—it’s the fastest way to diagnose the problem.
Optimizing Image Performance
Finally, the image itself plays a massive role in performance. A beautiful personalized image is useless if it's so large that it slows your website to a crawl or gets clipped by email clients.
Keep these simple optimizations in mind:
- Format Choice: Use JPEG for photographs and complex images with gradients. Use PNG when you need a transparent background or have sharp lines, like in logos or text-heavy graphics.
- Compression: Apply a good level of compression to shrink the file size without a noticeable drop in quality. A smaller file means a much faster download.
- Dimensions: Generate images at the exact size they will be displayed. There's no point in serving a 2000-pixel-wide image if it’s just going into a 500-pixel container on your site.
The world of APIs is always moving forward. By 2025, innovations like OpenAPI 3.1 are expected to slash integration time for developers by 50%. At the same time, 50% of teams are adopting webhooks with REST for more efficient, event-driven image processing. To get a better sense of where things are headed, you can discover more insights about the AI API landscape.
Got Questions About Image APIs? We've Got Answers
Jumping into the world of dynamic images always sparks a few questions. It's totally normal. Whether you're a developer figuring out the technical side or a marketer planning your next big campaign, you want to be sure you're on the right track.
This section tackles the most common questions we get, with straightforward answers to help you get started.
Why Use an API for Dynamic Images Instead of Just Using Canva?
This one really comes down to three things: scalability, automation, and real-time personalization. Manual design tools are fantastic for one-off designs, but imagine trying to create a unique image for thousands of email subscribers or app users. It's just not practical.
An image generation API automates that entire process. You can programmatically pull in user-specific data—like a first name, a custom discount code, or even loyalty points—and drop it right into a template. This is how you create a genuinely personal experience for every single user, at a massive scale.
Not only does this save countless hours of tedious work, but it also drives way more engagement. Personalized visuals consistently crush generic ones, making your campaigns more effective and your user interactions more memorable.
How Do I Keep My API Key Safe on the Frontend?
Great question, and it's a critical one for security. You should never, ever expose your private API key in client-side code, like the JavaScript that runs in a user's browser. If you do, anyone can find it by just peeking at the page source, giving them free rein to use your account.
The standard—and safest—way to handle this is with a backend proxy.
Here’s how that works:
- Your frontend app (the browser) makes a request to your own server.
- Your backend server, where the API key is safely stored as an environment variable, receives that request.
- Your server then makes the real request to the image API, passing along the personalization data.
Think of your server as a secure middleman. It handles the sensitive communication, and your secret API key stays locked down on your server, far away from prying eyes.
Can I Make Images with Really Complex Layouts?
Absolutely. Modern image generation APIs are built for this kind of flexibility. They typically work with pre-designed templates where you can set up multiple placeholders for all sorts of data points. This lets you create some pretty sophisticated layouts.
For instance, a single API call could populate a user's profile picture, their full name, their company logo, and a unique QR code all onto one background image. The request you send would just contain the data for each of those dynamic spots.
Some of the more advanced services even support conditional logic inside the templates. That means you could show or hide certain layers or design elements based on the data you pass in, opening up a whole new level of creative and dynamic visuals. Always check the API documentation to see what's possible.
What's the Difference Between a GET and POST Request for Images?
While a few simple services might use GET requests, POST requests are the industry standard for generating dynamic images. There are good reasons for this, centered around security, functionality, and proper API design.
A POST request bundles all the personalization data (names, colors, image URLs, etc.) inside the request body. This has some major advantages:
- Better Security: It keeps user data out of the URL, where it can be easily logged or seen in browser history.
- More Capacity: URLs have length limits, but a request body can handle much bigger and more complex JSON payloads without breaking a sweat.
- Cleaner URLs: It just looks better. Your URLs stay neat and tidy, pointing to the endpoint without a mile-long string of parameters.
Trying to cram all that data into a GET request would be messy and a poor practice for privacy. For any action that creates something new—like a personalized image—POST is the right tool for the job.
Ready to create stunning personalized images at scale? With OKZest, you can automate the entire process using our powerful no-code editor or our flexible API. Start for free and see how easy it is to boost engagement and build stronger customer relationships. Explore OKZest today and transform your marketing.