Think of automated email content images as your secret to turning a generic, mass email into something that feels like a one-to-one conversation. It’s a simple but powerful shift: instead of a stock photo, you insert a unique image featuring the subscriber's name or other relevant data.
Suddenly, your email is impossible to ignore.
Why Personalized Images Are a Game-Changer

Let’s be honest, getting into the inbox is only half the battle. In a sea of promotions and newsletters, standing out is everything. Most one-size-fits-all emails are the digital equivalent of junk mail—they get a quick glance before being sent to the trash. The real challenge is grabbing and holding someone's attention in those first few critical seconds.
This is where hyper-personalization, especially with automated images, completely changes the game. We're moving way beyond just dropping a {{first_name}} merge tag into a line of text. Imagine embedding that name directly into a high-quality, relevant visual. It creates a "wow" moment that feels exclusive and thoughtfully crafted just for them.
Going Beyond Generic Engagement
Think about a typical "Welcome" email from an e-commerce brand. The standard approach is just plain text. A slightly better one might include the subscriber's name.
But the best approach? Showing an image of a first-purchase coupon with their name beautifully printed right on it. That one detail transforms a routine marketing message into what feels like a personal gift.
Not long ago, this level of personalization was reserved for companies with huge development teams and budgets to match. Now, no-code tools make generating automated email content images something any marketer can do, no technical skills required. It allows you to:
- Cut Through the Noise: An image with a recipient’s name is infinitely more compelling than the same old stock photography everyone else is using.
- Build Real Connections: Personal touches show your subscribers you see them as individuals, not just another entry in a database.
- Drive Action: Personalized visuals can showcase relevant products, display event tickets with their name, or feature dynamic countdowns that create urgency and boost conversions.
"True personalization isn't just about using data; it's about creating a unique experience. When a subscriber sees an image crafted just for them, it breaks the pattern of mass communication and builds an immediate, memorable connection."
The Data Doesn't Lie
This shift toward personalized visuals isn't just a hunch; it's backed by some serious numbers. The adoption of AI-powered image generation in email marketing has seen a staggering 340% increase. This lines up with broader AI trends, where 87% of businesses are applying it to their email workflows.
The results speak for themselves. AI-driven personalization can boost click-through rates by 13% and deliver a massive 41% increase in revenue. If you want to dig deeper into these trends, Knak.com has some great insights.
This guide will walk you through the practical steps to put this strategy to work, from designing your first template to getting it live in your campaigns. You can also learn more about creating impactful custom email images in our related article.
Designing Your First Dynamic Image Template
Alright, this is where the fun begins. Creating effective automated email content images isn’t about being a Photoshop wizard; it’s about building a smart, reusable foundation. You're not just making a single graphic. You're designing a system that can spit out thousands of unique, personalized visuals on its own.
The whole process kicks off in a no-code editor, which is basically a visual canvas for you to build on. This is where you'll mix the static, never-changing parts of your design with the dynamic layers that get personalized for every single person you email.
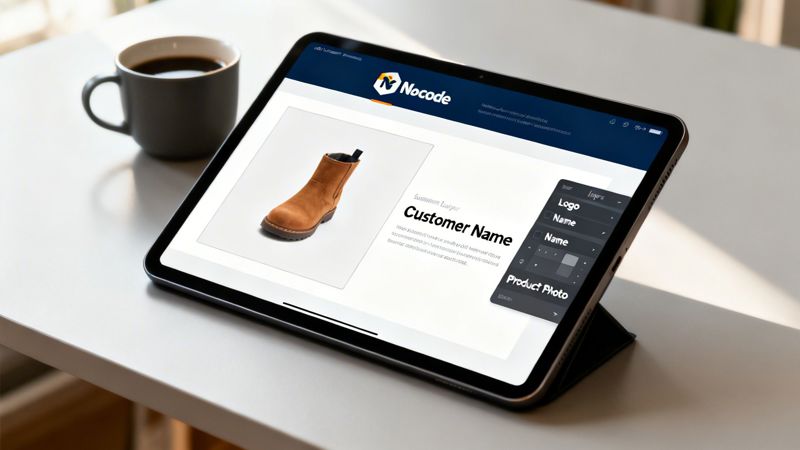
The interface you see above gives you a good feel for how these tools work. It’s a simple drag-and-drop environment where you can construct your visual template piece by piece.
Building the Static Foundation
Before you even think about personalization, you need to lock in your brand’s identity for the image. These are the static elements that will show up for everyone, keeping things looking professional and instantly recognizable. Getting this foundation right is non-negotiable for a cohesive campaign.
First things first, add the parts of your design that won't ever change:
- Your Company Logo: Stick it in a consistent spot, like the top-right or bottom-left corner.
- Brand Colors: Set a background color or use shapes and borders that match your official brand palette.
- Static Text: Drop in any text that stays the same, like a company tagline or a standard call-to-action like "Limited Time Offer."
Think of this as the frame for a picture. It provides structure and context before the main subject gets added. Inside these platforms, you'll usually find a specific area where you can manage your dynamic image template projects, which makes it a breeze to keep your designs organized as you create different versions for various campaigns.
Defining Your Dynamic Layers
Once your static elements are set, it's time to define the dynamic layers. These are just placeholders that will get filled with unique data for each person on your email list. This is the magic step where a generic graphic becomes a one-to-one piece of content.
You'll mainly be working with two types of dynamic layers:
- Text Layers: These are placeholders for any text-based data. You just add a text box and give it a variable, like
{{first_name}}or{{company_name}}. When the email goes out, this placeholder gets swapped with the actual data from your contact list. - Image Layers: These let you pull in unique images for each user. This could be anything from a contact's profile picture to a product they just looked at, or even a QR code that links to their personal landing page.
For instance, a SaaS company could create an onboarding email with a dynamic text layer that says, "Welcome, {{first_name}}!" and an image layer that shows the user’s own profile picture. That small touch immediately makes a new user feel seen and valued.
Pro Tip: Keep your dynamic text short and sweet. Really long names or sentences can completely break your layout. I recommend setting a character limit or using font-size adjustments in your tool to make sure the text always fits neatly.
Practical Design Tips for Impact
Just dropping in placeholders isn't enough. A badly designed dynamic image can look messy or confusing, which completely defeats the purpose. The goal here is to make the personalized bits feel like a core part of the design, not just something tacked on at the last minute.
Here are a few design principles I always follow:
- Go for High Contrast: Make sure the dynamic text (like a person's name) pops against the background. A dark name on a dark background is a rookie mistake that makes the image unreadable and kills the entire effect.
- Use Legible Fonts: Stay away from overly decorative or script fonts for personalized text. A clean, simple font ensures the recipient’s name is easy to read in a split second.
- Guide the Viewer's Eye: Be strategic about where you place personalized elements. Putting someone's name right in the center or near the main call-to-action can make it way more powerful.
Think about an e-commerce brand's abandoned cart email. Instead of a generic "You left something behind," the image could show the actual product left in the cart (a dynamic image layer) with text on top saying, "{{first_name}}, still thinking about this?" That level of specificity is incredibly good at grabbing attention and winning back sales.
Connecting Your Data for True Personalization
A slick dynamic template is a great starting point, but it's the data that really makes it sing. Feeding the right information into your designs is what turns a cool concept into a powerhouse personalization engine. This is how you stop sending generic blasts and start creating genuine one-to-one images that actually connect with people.
The way you hook up your data all comes down to what your campaign needs—whether it's a simple one-off send or a complex, real-time update.
The Easiest Start: Uploading a CSV
For many campaigns, the most direct path is simply uploading a CSV file. This method is perfect for batch sends or segmented campaigns where you already have the data ready to go, like a list of webinar registrants or new loyalty members.
Just export a spreadsheet with columns for each dynamic piece of your image—think first_name, company_name, or coupon_code—and upload it to your image generation platform. The system then just cranks through each row, creating a unique visual for every single contact. It’s fast, requires zero technical setup, and gets the job done.
Connecting to APIs for Real-Time Data
While CSVs are great for static campaigns, the real magic happens when you connect to APIs for live, real-time data. This approach lets your images reflect the most current information available, creating an experience that feels immediate and incredibly relevant.
An API (Application Programming Interface) is basically a messenger that lets your image tool ask another app for information on the fly. This opens up some powerful possibilities.
- E-commerce: A retailer can show an image of a product with its live inventory count ("Only 3 left in stock!") to create genuine urgency.
- Travel: An airline could send a pre-flight email with a personalized image showing the traveler's name, flight number, and a real-time departure gate.
- Real Estate: An agent can email a prospect an image that automatically pulls the latest photo of a property they viewed, along with its current status ("Just Listed" or "Price Reduced").
This method essentially turns your automated email content images into mini-dashboards, customized to each person's specific journey.
The goal is to close the gap between what you know about a customer and what you show them. Real-time API connections make that gap disappear, creating a truly responsive and personalized experience.
Now, let's look at the best data sources for different scenarios.
Choosing the Right Data Source for Image Personalization
This table breaks down the most common data sources for personalizing images. It'll help you pick the best method based on your campaign's complexity, the data you have on hand, and your team's technical comfort level.
| Data Source | Best For | Setup Complexity | Real-Time Capability |
|---|---|---|---|
| CSV Upload | One-off campaigns, segmented lists, event invitations, batch sends. | Low - Just export & upload. | None - Data is static. |
| API Integration | E-commerce (stock levels, prices), travel (flight info), SaaS (user stats). | Medium to High - Requires a developer. | Excellent - Data is live. |
| ESP Merge Tags | Simple personalization like names or company info directly in the email. | Low - Already part of your ESP. | Good - Uses data from your ESP. |
| Zapier/Integromat | Connecting apps without code for semi-automated workflows. | Low to Medium - No-code setup. | Near Real-Time - Depends on plan. |
Ultimately, starting with a CSV is a fantastic way to test the waters, but integrating with an API is where you'll unlock the most dynamic and impactful personalization for your audience.
Why Fallback Rules Are Non-Negotiable
Let's be honest: data is rarely perfect. You're going to have contacts with missing first names, incomplete profiles, or empty fields. Without a backup plan, you risk sending broken images or emails with awkward blank spaces, which immediately kills your credibility.
This is where fallback rules are an absolute lifesaver. A fallback is simply a default value—text or an image—that your system shows when the primary data is missing.
For example, if the first_name field is empty, your image can default to a friendly, generic "Hello there!" instead of showing nothing. If a profile picture URL is missing, you can set it to fall back to your company logo. Easy.
Setting up solid fallbacks ensures every single email looks polished and professional. It protects your brand and keeps the customer experience seamless, no matter how messy your data is. Consider it a critical final check before you start pushing these images into your email service provider.
Getting Your Dynamic Images into Your Email Platform
Okay, you've designed your dynamic image template and hooked up your data sources. Now for the fun part: getting these personalized visuals into your actual emails. This is where all the prep work pays off, and you start seeing real results. The magic behind this is a special dynamic URL from your image generation tool.
This isn't your average image link. It’s a smart URL loaded with merge tags—think of them as little placeholders that your Email Service Provider (ESP) automatically swaps out with each recipient's data. You're essentially telling your ESP, "When this email goes to Sarah, grab her first name from the contact list and stick it right here in the image URL."
The general process is pretty much the same no matter which platform you use. You add an image block to your email template and, instead of uploading a file, you paste in the dynamic URL. The only real trick is making sure your merge tags are formatted correctly for your specific ESP.
How to Set Up Your Dynamic URL in Popular ESPs
While the concept is universal, the exact syntax for merge tags—the {{first_name}} or *|FNAME|* part—can vary a bit. Getting this small detail right is absolutely critical for your automated email content images to show up correctly. Let's walk through how to do this in a few of the big-name email platforms.
For Klaviyo Users
Klaviyo keeps things simple with its person-centric merge tag system. When you're ready to pop in your dynamic image, you'll use their {{ person.property }} syntax.
- First, drag an Image Block into your email template.
- Instead of uploading an image, find the option to insert from a URL.
- Paste your base dynamic image URL.
- Now, just tack on the personalization details using Klaviyo’s merge tags. For example, to personalize by first name, the end of your URL might look like:
?first_name={{ person.first_name }}.
That's it. Klaviyo will handle the rest, pulling the "first_name" from each subscriber's profile right before sending and creating a unique image on the fly.
For Mailchimp Users
Mailchimp uses a slightly different but just as easy-to-use merge tag structure, usually wrapped in asterisks and pipes, like *|FNAME|*.
- Add an Image Block to your Mailchimp email.
- Click "Edit" on that block and select the "URL" option.
- Paste in the dynamic image URL from your generation tool.
- Then, just add the Mailchimp merge tags to the end. To add a first name, you'd append something like:
?name=*|FNAME|*.
The system does the heavy lifting, replacing *|FNAME|* with the first name of each contact in your audience at the moment of send. It’s a simple copy-and-paste that unlocks some seriously powerful personalization.
Crucial Tip: Always, always double-check your ESP's documentation for the correct merge tag syntax. One typo or a misplaced bracket can break the whole thing. A platform might need
{{first_name}},*|FNAME|*, or[firstname]. That small difference is everything.
A Practical Example with Instantly
Let's say you're a sales consultant using Instantly.io for cold outreach. You want to send an email with an image that shows the prospect’s first name and their company name—a surefire way to get their attention.
Your dynamic image URL from a tool like OKZest might start out looking like this: https://img.okzest.com/api/templates/YOUR-TEMPLATE-ID/...
Instantly uses a simple {{variable}} format for its tags. So, to get the personalization working, you'd structure the final URL in your email template like this:
https://img.okzest.com/api/templates/YOUR-TEMPLATE-ID/image.jpg?firstName={{firstName}}&company={{companyName}}
When your campaign goes live, Instantly automatically fills in {{firstName}} and {{companyName}} from your lead list for every single email. Each prospect gets a hyper-personalized image made just for them. For those who want to push the boundaries even further, an email image API can unlock more advanced, real-time personalization.
This chart breaks down the common data flows that make these personalized images work, from simple CSV uploads to more complex API connections.
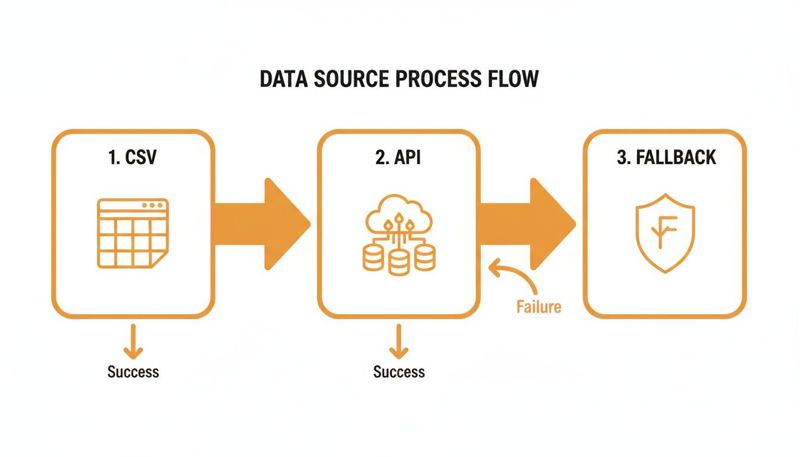
As you can see, the process is designed to be flexible, whether you're using a simple spreadsheet, a live data feed, or need a fallback just in case.
Tying It All Together with Marketing Automation
Dynamic images are even more effective when they're part of a larger automation strategy. By using some of the best small business marketing automation tools, you can connect your data and campaigns seamlessly. These platforms can act as the central nervous system for your marketing, letting you trigger personalized emails based on user actions—like abandoning a cart or signing up for a newsletter—ensuring your dynamic images hit the inbox at the most impactful moments.
Getting Your Images Into the Inbox: A Guide to Deliverability and Performance
You’ve designed a brilliant, personalized visual. That’s the fun part. But if that image clogs up an inbox, gets flagged by spam filters, or just flat-out refuses to load, all your hard work is for nothing. Optimizing your automated email content images is the make-or-break final step that ensures your emails actually land and have the impact you want.
Get this wrong, and the consequences can be brutal. Emails with huge images are a massive red flag for providers like Gmail and Outlook, making it more likely your campaign ends up in the spam folder. And even if it squeezes through, a slow-loading image will have subscribers hitting the delete button before your message ever gets a chance.
Taming File Size Without Sacrificing Quality
The number one enemy of both deliverability and performance is a bloated file size. An email that takes forever to load is an email that gets deleted. The goal is to hit that perfect balance between sharp visuals and a lean file size, so your email loads instantly on any device.
A solid rule of thumb is to keep your entire email's weight under 100 KB. Your images are a big part of that equation. Thankfully, modern tools like OKZest take care of most of the heavy lifting with automatic compression.
Still, it helps to know which tools are right for the job:
- JPEG: Your go-to for photos or any image with tons of colors and gradients. It compresses beautifully, but don't get too aggressive, or you'll start seeing weird visual artifacts.
- PNG: Perfect for graphics with crisp lines, text, or transparent backgrounds—think logos and icons. The quality is top-notch, but the files can be heavier than JPEGs.
- WEBP: This is the modern powerhouse. It offers better compression and quality than both JPEG and PNG. It’s supported by almost all modern email clients and is usually the smartest choice for performance.
A good dynamic image service will be smart about this. It should automatically serve the best format (like WEBP) to clients that can handle it, while sending a fallback (like a JPEG) to older ones. You get the best of both worlds without any extra effort.
The Hidden Power of ALT Text
ALT text (or alternative text) is what shows up if an image can’t load. It’s also what screen readers announce to visually impaired subscribers. But its job doesn’t stop there—it’s also a quiet hero for deliverability.
Spam filters can’t “see” your images, but they can read your ALT text. Missing or generic text like "image.jpg" looks lazy and suspicious. A descriptive ALT text, on the other hand, gives context and signals that you’re sending a legitimate email. Something like, "Your personalized welcome coupon, Sarah!" reinforces the email's purpose and can actually improve your sender reputation. To dig deeper into keeping your sender score healthy, check out our guide on email deliverability best practices.
Test, Test, and Test Again Across Email Clients
Okay, so you've nailed the file size and added thoughtful ALT text. The last check before you hit "send" is to see how your image actually looks in the wild. An image that’s pixel-perfect in Gmail might be a broken mess in Outlook.
- Gmail: Generally has great image support but is notorious for “clipping” messages if the total email size gets too big.
- Outlook: The famously tricky one. It uses Microsoft Word’s rendering engine, which can cause all sorts of headaches with spacing, unsupported formats, and other quirks.
- Apple Mail: Usually the most reliable, with excellent support for modern image formats. It typically renders things just as you designed them.
Use an email testing service or just send a few test emails to your own accounts on different platforms. This simple check will help you spot any rendering problems before your entire audience does. Remember to check how it looks with images both on and off to make sure your ALT text is doing its job.
Got Questions About Automated Email Images?
Once you start thinking about actually using automated email images, a few practical questions always come up. Moving from a cool idea to a real campaign brings up those "what if" scenarios. Let's walk through some of the most common ones we hear from marketers every day.
These are the real-world concerns that can make or break a campaign, so let's get you the answers you need to move forward with confidence.
What Happens if Personalization Data Is Missing?
This is easily the most critical question, and the answer is simple: have a bulletproof fallback plan. No contact list is ever 100% perfect. You're always going to have some contacts without a first name or a complete profile. Without a backup, you're sending broken images or awkward empty spaces, which instantly looks unprofessional.
When you're building your image template in a tool like OKZest, you can set a default value for every single dynamic part of the image.
- For Text: If a
first_namefield is empty in your list, the image won't show an ugly blank. Instead, it can automatically display something friendly and generic, like "Hello There!" - For Images: If you're trying to pull in a profile picture but the URL is missing for a contact, you can have it default to your company logo or a standard brand icon.
Think of fallbacks as your safety net. It's a non-negotiable step that makes sure every single person gets a complete, professional-looking image, no matter what gaps exist in your data. This is how you prevent embarrassing mistakes and keep the brand experience positive for everyone.
Will Dynamic Images Hurt My Email Deliverability?
The short answer is no, provided you're smart about it. Email deliverability is a huge topic, but it mostly boils down to your sender reputation, how people engage with your emails, and whether your content triggers spam filters. The dynamic images themselves aren't the problem—it's huge, unoptimized images that cause trouble.
The key is to use a service that automatically handles compression and optimization. It needs to shrink the file size down for email without making the image look terrible. This keeps your emails light and prevents them from getting flagged for being too big.
Also, always add descriptive ALT text to your images. This isn't just for accessibility (which is super important for screen readers); it also gives email clients like Gmail and Outlook context about what the image is, which can be a positive signal for deliverability.
Can I Use These Automated Images Outside of Email?
Absolutely. While we're focused on email in this guide, the technology behind these images is incredibly flexible. The personalized image is just served up by a dynamic URL, which means you can embed it almost anywhere that can handle HTML. This opens up a ton of creative possibilities across your other marketing channels.
We've seen people get great results using them in:
- Chatbots: Greet website visitors with a personalized welcome image right in the chat window.
- Social Media DMs: Create unique visuals for automated direct messages on platforms like X (Twitter) or in WhatsApp campaigns.
- Website Personalization: Show custom welcome banners or special offers to users when they log into their accounts on your site.
- Event Marketing: Generate personalized digital tickets or completion certificates for event attendees.
The core idea is exactly the same: use data you have to create a unique visual for each person. The channel is just how you deliver it.
How Much Technical Skill Do I Need to Start?
For most use cases, you really don't need much technical skill at all. Modern platforms are designed with no-code, drag-and-drop editors that feel a lot like using Canva. You can design some pretty sophisticated templates without ever touching a line of code.
The integration part is usually just a matter of copying a special URL and pasting it into your email platform. Setting up merge tags is a standard skill for any email marketer.
Sure, if you want to build complex, real-time integrations using an API, some developer knowledge is a big help. But it's definitely not a requirement to get started and see a huge impact on your campaigns.
Ready to create stunning, personalized images that captivate your audience and drive action? With OKZest, you can automate your visual content for emails, social media, and more without writing any code. Start for free on okzest.com and see how easy it is to make every message personal.