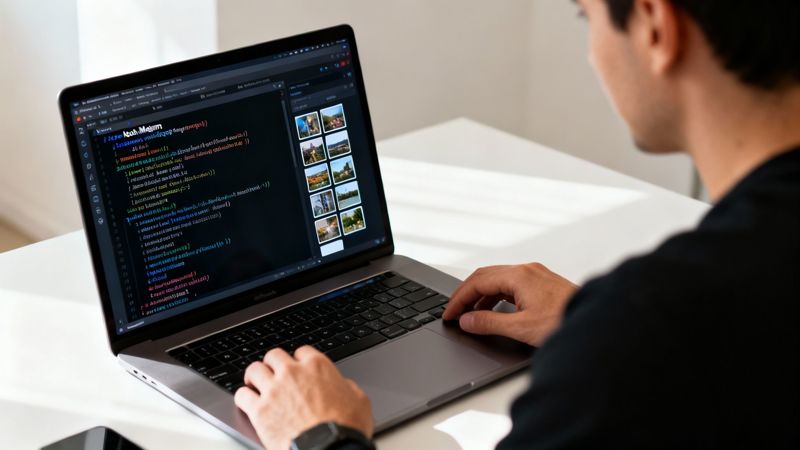
If you've ever had to prep a folder full of images, you know what batch crop image processing is all about. Instead of tediously editing pictures one by one, you apply the same cropping settings to an entire batch at once. It's an absolute game-changer for creating uniform thumbnails, social media posts, or product photos, saving countless hours and making sure every single image is perfectly consistent.
Stop Wasting Time Cropping Images One by One
Manually cropping hundreds of images is a soul-crushing task. It drains creative energy and almost guarantees inconsistencies. Just picture an e-commerce manager trying to get 500 new product shots ready for a site launch, where every single one needs the exact same thumbnail crop. That kind of manual grind isn't just slow—it's a massive bottleneck that delays campaigns and opens the door to human error.

Switching to a batch crop image workflow is more than just a time-saver; it’s a strategic move to scale your content production. What used to take days for large projects can now be knocked out in minutes. For creative teams, that efficiency boost is huge—we're talking a productivity jump of over 70% in some cases.
The True Cost of Manual Cropping
The real problem with one-by-one editing isn't just the time you spend clicking. It's the ripple effect it has on your entire operation. This manual approach hits several key areas hard:
- Brand Inconsistency: Even with guides, slight variations in manual crops can make a website or social feed look amateurish and unprofessional.
- Reduced Scalability: Your ability to launch new products or campaigns is directly tied to how fast your team can manually process images. You can't grow if you're stuck in the weeds.
- Wasted Creative Talent: Talented designers and marketers end up spending hours on mind-numbing, repetitive tasks instead of focusing on strategy and actual creative work.
By automating repetitive editing tasks, creative teams can reduce image processing time from hours to minutes, allowing them to focus on higher-value activities that drive business growth.
Beyond Cropping to Full Automation
Once you get into the batch processing mindset, you'll start seeing opportunities for efficiency everywhere. It doesn't just stop at cropping. Other repetitive image tasks can also be automated, helping you claw back valuable time. For instance, learning about batch image resizing is a natural next step that fits perfectly into this new, smarter workflow.
The goal here is to turn tedious chores into a powerful, automated process. This guide is your starting point for making that change.
Choosing the Right Batch Cropping Tool for You
Before you can start batch cropping images, you’ve got to pick the right tool for the job. Your choice really boils down to your technical comfort level, the scale of your project, and exactly what you need to get done. This decision sets the stage for your entire workflow, so it's worth taking a moment to consider the different paths you can take.
The world of image editing is huge, but for batch processing, it generally breaks down into three camps. Each has its own vibe, catering to different folks—from visual designers who live in creative software to developers who are comfortable writing a few lines of code.
Let’s dig into the options to find the best fit for you.
GUI vs. Command-Line vs. Cloud Services
Your first big decision is how hands-on you want to get. Graphical User Interface (GUI) tools are what most people think of first, offering a visual, click-based experience that’s super easy to learn.
GUI Tools (e.g., Photoshop, GIMP): These are perfect for designers, marketers, and photographers who prefer seeing their changes happen in real time. The typical workflow involves recording an "action"—like a specific crop—and then replaying that action across an entire folder of images. It's incredibly accessible and requires zero coding.
Command-Line Interfaces (CLI) (e.g., ImageMagick): For developers or more technical users, the command line offers some serious power and flexibility. You can write scripts to perform complex, conditional crops that GUI tools just can't handle. This approach is fantastic for server-side processing or weaving image manipulation into bigger automated workflows.
Cloud-Based Services: Online tools give you the convenience of processing images without installing a single piece of software. You just upload your photos, set your cropping rules, and download the results. These are great for quick, one-off tasks or for teams that need a shared, easy-to-access solution.
The best tool isn't the one with the most features; it's the one that slips right into your existing workflow and matches your skills. A simple, repeatable process you actually use is always better than a complex one that gathers dust.
Comparing Batch Cropping Methods
Here’s a quick breakdown of the different approaches to help you choose the best fit for your projects.
| Method | Best For | Technical Skill | Pros | Cons |
|---|---|---|---|---|
| GUI Tools | Designers, marketers, photographers, visual tasks. | Low | Easy to learn, visual feedback, great for creative tasks. | Can be slow for very large batches, less flexible automation. |
| Command-Line (CLI) | Developers, technical users, server-side automation. | High | Powerful, scriptable, handles complex logic, fast. | Steep learning curve, no visual interface, easy to make mistakes. |
| Cloud/Online Services | Quick tasks, team collaboration, users without software. | Low | No installation needed, accessible anywhere, easy to use. | Can have privacy concerns, potential costs, reliant on internet. |
Ultimately, the right choice depends entirely on your needs. A visual-heavy workflow screams for a GUI, while a developer building an automated pipeline will feel right at home in the command line.
Getting a handle on batch cropping is a foundational skill that opens the door to more advanced and interesting work. For example, once you’ve mastered this, you can easily prep hundreds of image variations for personalization. You can learn more about how to automate your designs for dynamic content and see how this one skill connects to much bigger marketing strategies.
Deciding between these options often comes down to a simple trade-off: ease of use versus automation power. A designer might live in Photoshop and find that creating an Action is the fastest route to get things done. On the other hand, a developer might prefer a script that runs automatically every time a new image hits the server. Think about your daily tasks and pick the path of least resistance for you and your team.
Your Guide to Batch Cropping with Visual Tools
If you’re someone who prefers seeing what you’re doing rather than staring at a command line, then batch cropping with visual tools is for you. This approach is perfect for designers, marketers, and photographers who are already comfortable inside their favorite editing software and just need a repeatable, reliable process.
Instead of tediously cropping images one by one, we’re going to set up a simple, automated workflow. The big idea here is to record your cropping actions just once, then have your software apply that exact same sequence to hundreds or even thousands of images automatically. It’s a massive time-saver and guarantees every single image is perfectly consistent.
Your choice of tool really comes down to your technical comfort level and the specific demands of your project, with options ranging from straightforward visual editors to more advanced, scriptable solutions.

As you can see, GUI tools are the most common starting point. But as your needs grow, command-line and cloud-based services offer much more power for serious automation.
Creating a Photoshop Action for Batch Cropping
Adobe Photoshop is the industry heavyweight for a reason, and its "Actions" feature is practically built for this exact task. Think of an Action as a mini-recording of all your clicks and edits that you can "play back" on any other file. Let's create a simple "Crop and Save" action.
Here's how I get it right every time:
- Prep your workspace: First, open a sample image that represents the rest of your batch. This will be your guinea pig.
- Create a new Action: Go to the Actions panel (Window > Actions). It's good practice to create a new folder for your own custom actions to keep things organized. Click the "Create New Action" icon and give it a clear name, like "1080x1080 Center Crop."
- Hit Record: As soon as you press "Record," Photoshop starts watching.
- Crop the image: Grab the Crop Tool. In the options bar at the top, enter your exact dimensions—for example, 1080 px by 1080 px. Drag the crop box into position and press Enter.
- Save your work: This is the most important step. Go to File > Save As (or Export). Choose your format (JPEG, PNG, etc.) and save it to a brand-new, empty folder. Never save over your originals.
- Stop Recording: Click the square "Stop" icon in the Actions panel. Your action is now saved and ready to go.
With that Action locked and loaded, you can unleash it on an entire folder using Photoshop's built-in batch processor.
Key Takeaway: Always, always record your "Save As" step to a separate output folder. It’s a non-destructive workflow that protects your original files and gives you a safety net if you ever need to start over with different settings.
Applying Your Action to a Whole Folder
Now for the fun part. Navigate to File > Automate > Batch.
In the pop-up window, just point Photoshop in the right direction. Select the Action you just made, choose your source folder (where the originals are), and then choose your destination folder (the empty one you set up). Click OK, sit back, and watch Photoshop do all the heavy lifting for you.
This mindset of automating repetitive creative work isn't just limited to Photoshop. If you're looking for more ways to create assets at scale, you might be interested in our guide on how to automate Canva designs.
GIMP and BIMP: A Free Alternative
No Creative Cloud subscription? No problem. The free and open-source GIMP is a fantastic alternative, especially when you pair it with the BIMP (Batch Image Manipulation Plugin).
Once you've installed the BIMP plugin, you'll get a simple batch processing window where you can stack up different edits—like cropping—and apply them to a whole set of images at once. The workflow is very similar: define your crop dimensions, pick your files, and tell it where to save the output.
It's also worth noting that specialized tools have been around for ages in other fields. For instance, BatchCrop was created way back in the early 2000s for scientific research, letting scientists process hundreds of microscopy images by applying proportional crops, like trimming 20% off the borders of an entire batch in seconds.
Unlocking Automation with Command-Line Workflows
When you need serious speed and the ability to weave image processing into a bigger automated system, the command line is your best friend. GUI tools are fantastic for many jobs, but they just can't compete with the raw efficiency of a well-written script. This approach is definitely for the more technical crowd—developers, sysadmins, and power users who want to build a truly automated batch crop image pipeline.
For this kind of work, we'll lean on ImageMagick, the undisputed workhorse for scripted image manipulation. It’s free, open-source, and so reliable that it’s probably running behind the scenes on many of the web services you already use.
Core ImageMagick Commands for Cropping
The real magic of ImageMagick is how you can chain simple commands together in scripts to perform incredibly complex tasks on thousands of images in seconds. Let's walk through a few practical examples you can copy and paste.
Imagine you've got a folder packed with product photos, and your task is to create 200x200 pixel thumbnails, perfectly cropped from the center of each one. A single command can handle every JPEG in that folder.
Just run this from your terminal: mogrify -path ../thumbnails -gravity center -crop 200x200+0+0 +repage *.jpg
Let's quickly break down what’s happening here:
mogrify: This is the command for modifying files in place or, like we're doing here, creating new ones in another directory.-path ../thumbnails: Tells ImageMagick to save the new cropped images in a folder namedthumbnailsone level up.-gravity center: This is the key part. It anchors the crop to the dead center of the image, so you don't have to calculate coordinates.-crop 200x200+0+0: This sets the crop dimensions—a 200x200 box with no offset from our center anchor point.+repage: A useful little command that strips out "virtual canvas" data, ensuring the new file is only the cropped area.*.jpg: The wildcard that tells the command to process every single file ending in.jpg.
Advanced Cropping Techniques
But what if your logic is more complicated than a simple center crop? Maybe you need to trim a 10% border off every image to clean up inconsistent framing.
This requires a bit more scripting, but the principle is the same. You'd write a small loop to go through each image, calculate the new dimensions based on percentages, and then feed those values into the crop command. Getting comfortable with this logic is how you build truly custom automation.
The real power of command-line tools isn't just in running single commands; it's in scripting them. You can integrate image processing with other system tasks, trigger crops when new files are uploaded, or even connect them to an API for dynamic image generation.
This is exactly where automation becomes a game-changer for developers. If you're building a system that programmatically generates personalized content, knowing how to control these image assets via a script is a must. You can see this concept taken even further when you explore using a REST API for personalized image generation, which moves the automation into the cloud.
For a deeper dive into how artificial intelligence is pushing these boundaries, this guide on AI for photography workflows offers a great overview.
Once you master a few of these core commands, you can adapt them to just about any scenario, creating a fast and powerful solution for any batch crop image challenge that comes your way.
Preparing Your Images for Personalization and AI
Learning how to batch crop images is more than just a time-saver; it’s a foundational skill for anyone serious about modern marketing and AI. The techniques you’ve just picked up are your ticket to building powerful, data-driven visual campaigns.
This is where you move beyond simple task automation and into strategic asset preparation. Batch processing is the engine that feeds today's most advanced marketing platforms.
Fueling Dynamic Creative Optimization
Think about a Dynamic Creative Optimization (DCO) campaign. These platforms churn through hundreds of ad variations, mixing and matching headlines, CTAs, and—most importantly—images to find what works. Manually cropping one product shot into five different aspect ratios is a drag. Now, imagine doing that for a hundred products.
This is where a batch crop workflow becomes a lifesaver. You can instantly generate all the sizes and focal points you need for a hero shot, creating a massive asset pool for A/B testing across different audiences. The DCO algorithm can then quickly learn what resonates, making your ad spend smarter and pushing up conversion rates.
Think of batch cropping as providing the raw ingredients for a personalization engine. Without a well-organized, consistent supply of image assets, the system simply can't do its job of finding the winning creative.
Building Clean Datasets for Machine Learning
The same logic applies directly to the world of AI and machine learning. A model is only as good as the data it’s trained on. If your images are inconsistent, poorly framed, or incorrectly sized, you’re just creating "noise" that will confuse the algorithm and tank its performance.
Batch cropping is often the first critical step in cleaning up and normalizing data for computer vision tasks. By making sure every single image in your dataset is a uniform size and resolution, you’re creating a clean, consistent foundation for the training process. This is true whether you're building a model to spot products in photos or detect defects on a factory line.
The impact of getting this right is huge. For example, recent breakthroughs in crop image classification have seen accuracy jump dramatically. One model, Lap-FEHRNet, uses batch processing to analyze features and has hit 98.8% accuracy on general datasets—blowing past older methods. You can dive into the full study on machine learning and image processing to see the nitty-gritty details.
Ultimately, precise image preparation at scale isn't optional anymore. It’s the backbone of smart personalization and a non-negotiable for building reliable AI. Your ability to batch crop image files efficiently has a direct line to the success of these advanced systems.
Common Questions About Batch Cropping Images
When you first start batch cropping images, a few hurdles almost always pop up. It's totally normal. Think of this as your quick-start guide to smoothing out those initial sticking points.
Getting these details right is the difference between a slick, automated system and a frustrating, time-sucking one.
How to Maintain Image Quality
One of the first things people worry about is losing image quality. Good news: cropping itself doesn't damage your image. It’s just redefining the visible area.
The real risk comes from the re-saving process, especially if you're working with a lossy format like JPEG.
To keep your images looking sharp, always start with high-quality originals and follow a few best practices when you export.
- Pick the Right Format: If you need absolute perfect clarity, save your cropped images in a lossless format like PNG or TIFF. You'll see zero quality degradation.
- Use High JPEG Settings: For web use, JPEGs are often the practical choice. Just make sure to save them at a high-quality setting—I usually stick with 90 or above out of 100. This keeps compression artifacts to a minimum.
- Work Non-Destructively: This is a big one. Never overwrite your original files. Your batch process should always save the newly cropped images into a separate folder.
Creating a separate output folder is your safety net. If you decide you need a different crop size or want to try new export settings, you can just re-run the process on your pristine originals without any data loss.
Finding the Right Tool and Tackling Complex Crops
Another question I hear all the time is, "What's the best free tool for this?" If you prefer a visual, hands-on approach, you can't go wrong with GIMP and the BIMP (Batch Image Manipulation Plugin). It gives you a ton of Photoshop-like power without the monthly fee.
If you're comfortable working in a terminal, ImageMagick is the undisputed champion. It’s powerful, scriptable, and completely free.
But what if your project is more complex? What if you need to batch crop images to different sizes all in one go? This is where visual tools start to feel clunky. Making a separate action in Photoshop for every single size is a recipe for a headache.
This is a perfect example of where command-line tools really pull ahead. With a simple script, you can have ImageMagick read a list of filenames and their specific crop dimensions straight from a spreadsheet (like a CSV file). The script just loops through each file, applies the unique crop, and saves it.
It's the ultimate flexible setup for those big, multi-size projects that would be a nightmare to handle by hand.
Ready to stop resizing images one-by-one and start creating personalized visuals at scale? OKZest helps you automate the creation of thousands of unique images for your email campaigns, social media, and websites. See how it works.