To really scale your marketing, you can use no-code tools like OKZest to turn a single design template into thousands of personalized visuals. It's the perfect way to create custom images for social media, email campaigns, or e-commerce promotions without needing a huge design team or sinking endless hours into manual work.
Why Manual Design Is Holding You Back
If you're still creating every single marketing visual one by one, you aren't just wasting time—you're actively capping your own growth. This old-school process turns your marketing team into a design factory, churning out assets instead of focusing on strategic results.
The cycle is painfully familiar: tweak a name here, update a stat there, change an image for another campaign variation. It’s a repetitive loop that creates a massive bottleneck. This constant, low-value work keeps your team from focusing on the bigger picture, like campaign strategy, data analysis, and genuine creative development. The result is a sluggish, inefficient workflow that can't possibly keep up with the modern demand for personalized content.
The True Cost of Inefficiency
The problem runs deeper than just wasted hours. A manual design workflow introduces some serious business risks that can quietly undermine your efforts.
- Brand Inconsistency: When different people create visuals by hand, tiny variations in fonts, colors, and layouts are bound to happen. Over time, this dilutes your brand identity.
- Inability to Scale: Let's be honest, you can't create thousands of personalized images for an email list or a targeted ad campaign by hand. It's just not realistic.
- Slow Turnaround Times: Simple requests can drag on for days, causing your marketing campaigns to miss out on timely opportunities.
This isn't a problem unique to marketing. Just look at the Electronic Design Automation industry, which focuses on automating complex chip designs. That market is projected to hit $16.5 billion by 2025, with an 8.4% CAGR since 2015. It's a clear signal that automation is the only way to manage complexity and scale effectively.
Let’s take a look at how a tool like OKZest offers a straightforward solution to this challenge.

This screenshot shows exactly how it works: a single, well-designed template is automatically filled with different data points to generate unique visuals in an instant.
Manual Design vs Automated Design: A Quick Comparison
To put it in perspective, let's break down the key differences between sticking with the old way and moving to an automated system. The contrast in efficiency and potential is pretty stark.
| Aspect | Manual Design Workflow | Automated Design Workflow |
|---|---|---|
| Scalability | Extremely limited. Each new visual requires manual effort, making large campaigns impossible. | Nearly infinite. Generate thousands of unique visuals from a single template and data source. |
| Personalization | Basic and time-consuming. Personalizing for individuals is impractical beyond a handful of clients. | Deep and instantaneous. Each visual can be tailored with unique names, stats, images, or offers. |
| Speed & Turnaround | Slow. Requests can take hours or days, creating bottlenecks for marketing campaigns. | Instant. New visuals are generated on-demand in seconds, enabling real-time marketing. |
| Consistency | Prone to errors and brand deviations as different designers introduce slight variations. | Perfectly consistent. Every image adheres strictly to the brand guidelines set in the template. |
| Team Focus | Team spends time on repetitive production tasks, limiting strategic thinking. | Team is freed up to focus on high-impact activities like strategy, testing, and analysis. |
By embracing automation, you can shift your team's focus from tedious, repetitive tasks to scalable, high-impact marketing. For a deeper dive into the mechanics, check out our guide on what is no-code automation.
Setting Up Your First Automated Template
Alright, let's move from theory to practice. Getting your first automated design template up and running is way easier than you might think. This isn't just about creating a design file; it's about building the engine that will power all your personalization.
The whole idea is to create one "master" template. From there, you just need to decide which parts will change for each person. For example, if you're making a personalized webinar invite, you'd want the attendee's name, their company logo, and maybe a unique QR code to be dynamic. Everything else—your background, your branding, the main message—stays the same.
Defining Your Dynamic Fields
First things first, you need to pinpoint which parts of your design will be personalized. This means looking at your design and thinking strategically about the data you have.
- Text Layers: These are the most common. You can set up fields for things like
{{first_name}},{{company_name}}, or even a custom stat you want to show off, like{{conversion_rate}}. - Image Placeholders: This is perfect for swapping in logos, profile pictures, or product shots on the fly. You just define an area in your design where a unique image URL will be dropped in for each new version.
- Conditional Elements: For more advanced setups, you can even have certain layers show or hide based on the data you send. Imagine displaying a "VIP" badge only for your top customers—it's totally possible.
A quick pro-tip: get into the habit of naming your layers clearly. Using names like "Dynamic - First Name" or "Static - Background" will save you a ton of headaches down the road. If you're new to this, getting a handle on the basics of overlaying text on an image is a great place to start. It helps you understand how these different layers work together.
A well-structured template is the absolute foundation of successful design automation. Spending an extra 10 minutes organizing your layers now can easily save you hours of troubleshooting when it's time to connect your data.
This graphic breaks down the simple flow, from creating your template to generating personalized images at scale.
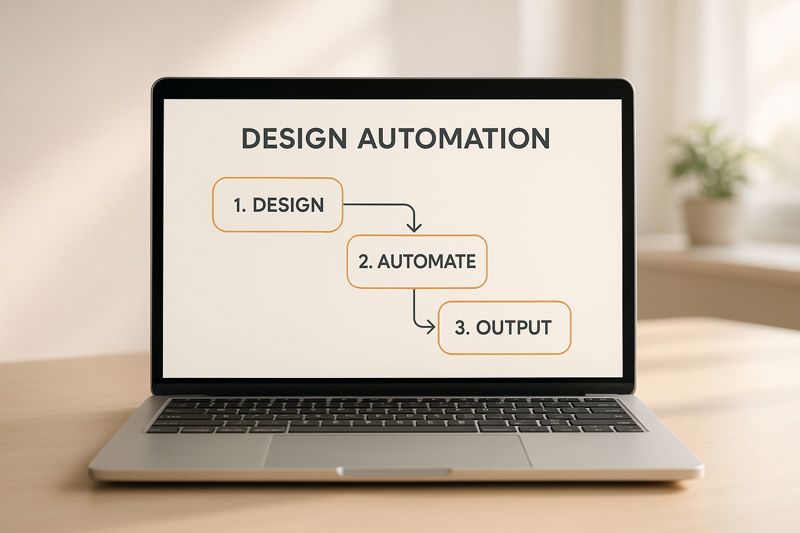
As you can see, it’s a pretty straightforward cycle: design it once, connect your data, and then you can generate unique images forever. Now that your template is built, you're ready for the really exciting part—hooking up a data source to bring your visuals to life.
Connecting Data to Generate Images at Scale
Once your master template is nailed down, it’s time for the real magic: connecting it to a data source. This is where you flip the switch on automation, turning a single design into thousands of unique, personalized images without lifting a finger.

Whether you’re a marketer who lives in spreadsheets or a developer who speaks in API calls, the process is surprisingly straightforward. The core idea is simple: you feed information into your template, and OKZest does all the heavy lifting.
No-Code Workflows for Marketers
For anyone who isn't a coder, the quickest way to get going is with a no-code automation tool like Zapier or Make.com. These platforms are the perfect bridge between your data and your OKZest template, letting you build a seamless workflow in minutes.
Imagine you have a Google Sheet for a new customer welcome campaign. Each row has the key details:
- Column A: Customer's first name
- Column B: Their company name
- Column C: A URL to their company logo
You can set up a simple "Zap" that kicks off every time a new row is added. The workflow grabs the data, sends it to your OKZest template, and instantly generates a personalized welcome image. It’s a perfect setup for automating social media shout-outs or creating custom email headers on the fly.
API Integration for Developers
If you've got development resources, our API gives you total control. A simple API call lets you bake image generation right into your app, website, or backend system. Just structure a request with the data needed for your template’s dynamic fields, and you're set.
The real power of the API is in handling real-time data. Think about generating social media graphics with live sports scores on the fly or creating dynamic e-commerce images that flash personalized discount codes to shoppers.
Getting started is easy. For a detailed guide, our API integration tutorial has all the examples and best practices you need to get up and running.
This kind of automation isn't just a cool marketing trick; it’s part of a huge industrial shift. The global market for industrial automation is projected to hit $226.8 billion in 2025, and companies are already seeing an average 22% drop in operating costs. When you automate your designs, you're tapping into the very same principles of efficiency and scale.
Real-World Scenarios for Design Automation
It’s one thing to talk about automating designs, but seeing how other teams are actually doing it is where the real lightbulbs go off. Forget the abstract theory for a minute—let's dig into some practical, proven workflows that are getting real business results right now.
Think about an e-commerce brand trying to win back shoppers who ditched their carts. Instead of the usual "You left something behind!" email, they're now automatically generating personalized coupon images. Each visual pulls in the shopper's name and the exact product they were eyeing, creating an offer that’s impossible to ignore in a crowded inbox. The result? A direct, measurable lift in their cart recovery rates.
Personalized Outreach That Actually Gets a Reply
Sales and marketing folks are always fighting for attention, especially on a platform like LinkedIn. One sales team I know completely changed their game by ditching generic connection requests for hyper-personalized images.
Their process is surprisingly simple but incredibly effective:
- They start with a basic spreadsheet listing a prospect's name, company, and a link to their company logo.
- That data gets fed into an OKZest template, which pops out a clean, professional image. It might say something like, "Hi [Name], loved your recent post on [Topic]!" and includes the prospect’s company logo.
- The sales rep then just drops this unique image into their direct message.
That small touch makes their outreach feel custom-made and thoughtful, and it has massively boosted their response rates. It proves they did a little homework instead of just copy-pasting a template to hundreds of people. The setup is quick, but the payoff in engagement is huge.
The big takeaway here is that design automation isn't about pumping out bland, robotic visuals. It's about using data to make your communication feel more human and one-to-one, even when you're doing it at scale.
Automating Certificates and Credentials
Another fantastic use case comes from the online education world. An ed-tech platform offering professional development courses was drowning in the manual work of issuing completion certificates to thousands of graduates.
They solved it by connecting their student database directly to a certificate template. Now, the moment a student finishes a course, their name, the course title, and the completion date are automatically placed onto a beautifully designed certificate. Not only does this save hundreds of hours of admin work, but it also gives students an instant, shareable credential they can blast on social media—which in turn promotes the course. A tedious task just became a powerful, self-fueling marketing engine.
Pro Tips for a Smarter Automated Workflow
Once you’ve got the basics down, you can really start having fun and fine-tuning how you automate your designs. This is where you go from simple image generation to building a sophisticated, intelligent content engine. It's all about thinking strategically about testing, efficiency, and security.
A great place to start is by setting up multiple templates for A/B testing. For instance, you could create two versions of a social media promo visual. One might have a bold, high-contrast color scheme, while the other uses a softer, more subtle design. Run both through your workflow, track the engagement, and you'll get real data on what actually grabs your audience's attention. That's how you optimize future campaigns based on performance, not guesswork.
Streamline Your Workflow Logic
Another powerful technique is to build conditional logic right into your templates. This makes them much smarter. You can set up rules to show different icons or text based on the data you feed into them.
Imagine a real estate agency. They could automatically display a "Just Sold" banner on a property image the moment its status changes in their database. This keeps all their marketing materials up-to-the-minute without anyone having to lift a finger.
To really get your head around the possibilities, it helps to see what others have built. For some great inspiration on putting together more effective automation, check out these advanced marketing automation workflow examples.
Key Takeaway: Always, always keep your API key secure. Treat it just like a password. Store it somewhere safe and never, ever expose it in client-side code or public repositories. This is critical to prevent anyone from using your account without permission.
This kind of design automation isn't a new concept; it's a principle that has driven massive industries for years. Just look at the Electronic Design Automation (EDA) market, which is essential for creating complex semiconductors. That market is projected to hit $17.9 billion by 2032. This explosive growth just underscores how vital automation is for handling complex, repetitive design work at scale. You can find more insights on the EDA tools market here.
Got Questions About Automating Your Designs?
Dipping your toes into design automation for the first time usually brings up a few common questions. It’s completely normal to wonder about the skills you'll need, how much it costs, and what the technical limits are before you jump in.
A lot of people think you have to be a professional designer to pull this off, but that's a common misconception. The real design work happens upfront when you create one solid master template. Once that’s set, the system takes over from there, so you don't need any ongoing design skills.
How Complex Can Automated Designs Get?
So, what about more advanced visuals, like charts and graphs? While many automation tools are built around swapping text and images, you can absolutely automate dynamic charts.
A really effective way to do this involves a simple two-step workflow:
- First, generate your chart or graph using a tool built for that purpose and save it as an image.
- Then, just pass that image's URL into your design automation platform. It will dynamically place the chart right into your master template.
This approach gives you a polished final product that looks seamless, even with sophisticated data visualizations.
The real magic of automation isn't just about saving a few hours. It’s about making your entire visual communication process more scalable and agile. If you want to dive deeper into the ideas behind this, check out this great read on what is workflow automation.
Finally, let's talk about the price tag. Most services are priced based on what you actually use—typically, how many images you generate. This model is incredibly flexible. You can often start with a free tier for smaller projects and then scale up to a paid plan as your needs grow.
When you stack that against the cost of paying for manual design hours, automation almost always delivers a significant and immediate return on your investment.
Ready to stop wasting time on repetitive design tasks? Start creating personalized images at scale with OKZest. Explore our no-code and API solutions at https://okzest.com.