When we talk about image URL personalization in an email, we're talking about dynamically swapping out an image for each person on your list based on the data you have about them. This is how you move beyond sending the same static, one-size-fits-all graphic to everyone.
Instead, you can show a subscriber their name on a coffee cup or display the exact product they were just looking at—all right inside the email. It's an incredibly effective way to make every single email feel like it was sent just to them.
Why Personalized Images Are A Must for Engagement
Let’s be real: the generic marketing email is dying a slow death. Our subscribers' inboxes are a warzone, and their attention is the prize. To win, you can't just keep sending another mass email blast. You have to create an experience that feels personal and intentional.
This is where image URL personalization completely changes the game. It shifts your strategy from broadcasting a message to starting a conversation.
The psychology here is simple but incredibly powerful. When someone opens an email and sees an image with their name, a unique discount, or a product tailored to their browsing history, it cuts through the noise. It immediately signals that this message isn't just more marketing fluff—it was made for them. That sense of recognition builds an instant connection and makes your subscriber feel seen.
Moving Beyond {{First_Name}}
Basic text personalization, like dropping in a subscriber's first name, is just the price of entry these days. Everyone expects it. Personalized images take that concept and make it visual, which is far more impactful. Instead of just reading their name, your subscribers see it woven into a compelling graphic. That grabs attention in a way plain text never could.
Just think about the possibilities:
- E-commerce: Show an image of the exact item a customer abandoned in their cart.
- Events: Display a personalized event ticket with the attendee's name already on it.
- SaaS: Create a custom screenshot of a dashboard featuring the user's actual data or profile picture.
- Travel: Feature a stunning destination photo with the subscriber's name on a piece of luggage.
These visual cues make your offer feel tangible and exclusive, directly fighting the inbox fatigue that kills so many campaigns. Using AI tools for marketing images can help create these visuals even faster, amplifying the impact of your efforts.
The Proven Impact on Key Metrics
Switching to personalized visuals isn't just about creating a cool "wow" moment; it delivers real, measurable results. When your campaigns are more relevant, people are simply more likely to act. This translates directly into higher engagement and, most importantly, a better return on your investment.
To give you a clearer picture, let's look at how the numbers typically stack up.
Standard vs Personalized Email Image Performance
| Metric | Standard Email (Industry Average) | Email with Personalized Images (Observed Lift) |
|---|---|---|
| Open Rate | 18-22% | 25-30% (+5-8%) |
| Click-Through Rate (CTR) | 2-3% | 4-7% (+50-150%) |
| Conversion Rate | 1-2% | 3-5% (+100-200%) |
| Unsubscribe Rate | 0.2-0.5% | 0.1-0.3% (-25-50%) |
As the data shows, the lift is significant across the board. By making emails feel more individual, you're not just improving one metric—you're boosting the entire performance of your campaign.
By embedding dynamic content directly into the visual fabric of an email, you're not just personalizing a message—you're personalizing the experience. This fundamental shift is what drives clicks, conversions, and long-term customer loyalty.
This data makes one thing crystal clear: visual personalization isn't a gimmick. It’s a smart strategy that taps into basic human psychology to drive action. You can dive deeper into more strategies in our guide on personalized images for email marketing.
By making each email feel like a one-to-one communication, you build stronger relationships and turn passive subscribers into loyal, engaged customers. In the next sections, we'll show you exactly how to do it.
Setting Up Your First Dynamic Image with OKZest
Alright, let's move from theory to practice. Creating your first dynamic image in OKZest is surprisingly quick, even if you’ve never touched image personalization before. We'll walk through the entire setup, from getting your base image ready to defining the dynamic layers that make each email feel one-of-a-kind.
The whole point here is to build one reusable image template that can spin out thousands of unique variations automatically. You’ll walk away with a single, powerful URL ready to drop right into your email campaigns.
Preparing and Uploading Your Base Image
Every great personalized image starts with a solid foundation—your base template. This is the static part of your design: the background, branding, and layout that stays the same for everyone. Think of it as the canvas you'll paint the personalization onto.
For instance, if you're making a welcome image for new subscribers, your base image could be a nicely designed graphic with your logo and a friendly background. The key is to leave a designated empty space where the subscriber's name will eventually go.
Before uploading, just make sure your image is:
- Web-Optimized: Save it as a JPG or PNG and run it through a compressor to keep the file size down. This is crucial for fast load times in emails.
- Correctly Sized: Design the image at the exact dimensions you need. A width of 600px is a safe bet for most email hero images.
- Visually Clear: Check that there's enough contrast and clean space for your dynamic text or images to be easily readable.
Once your base image is good to go, you'll upload it to your OKZest dashboard. This is step one.
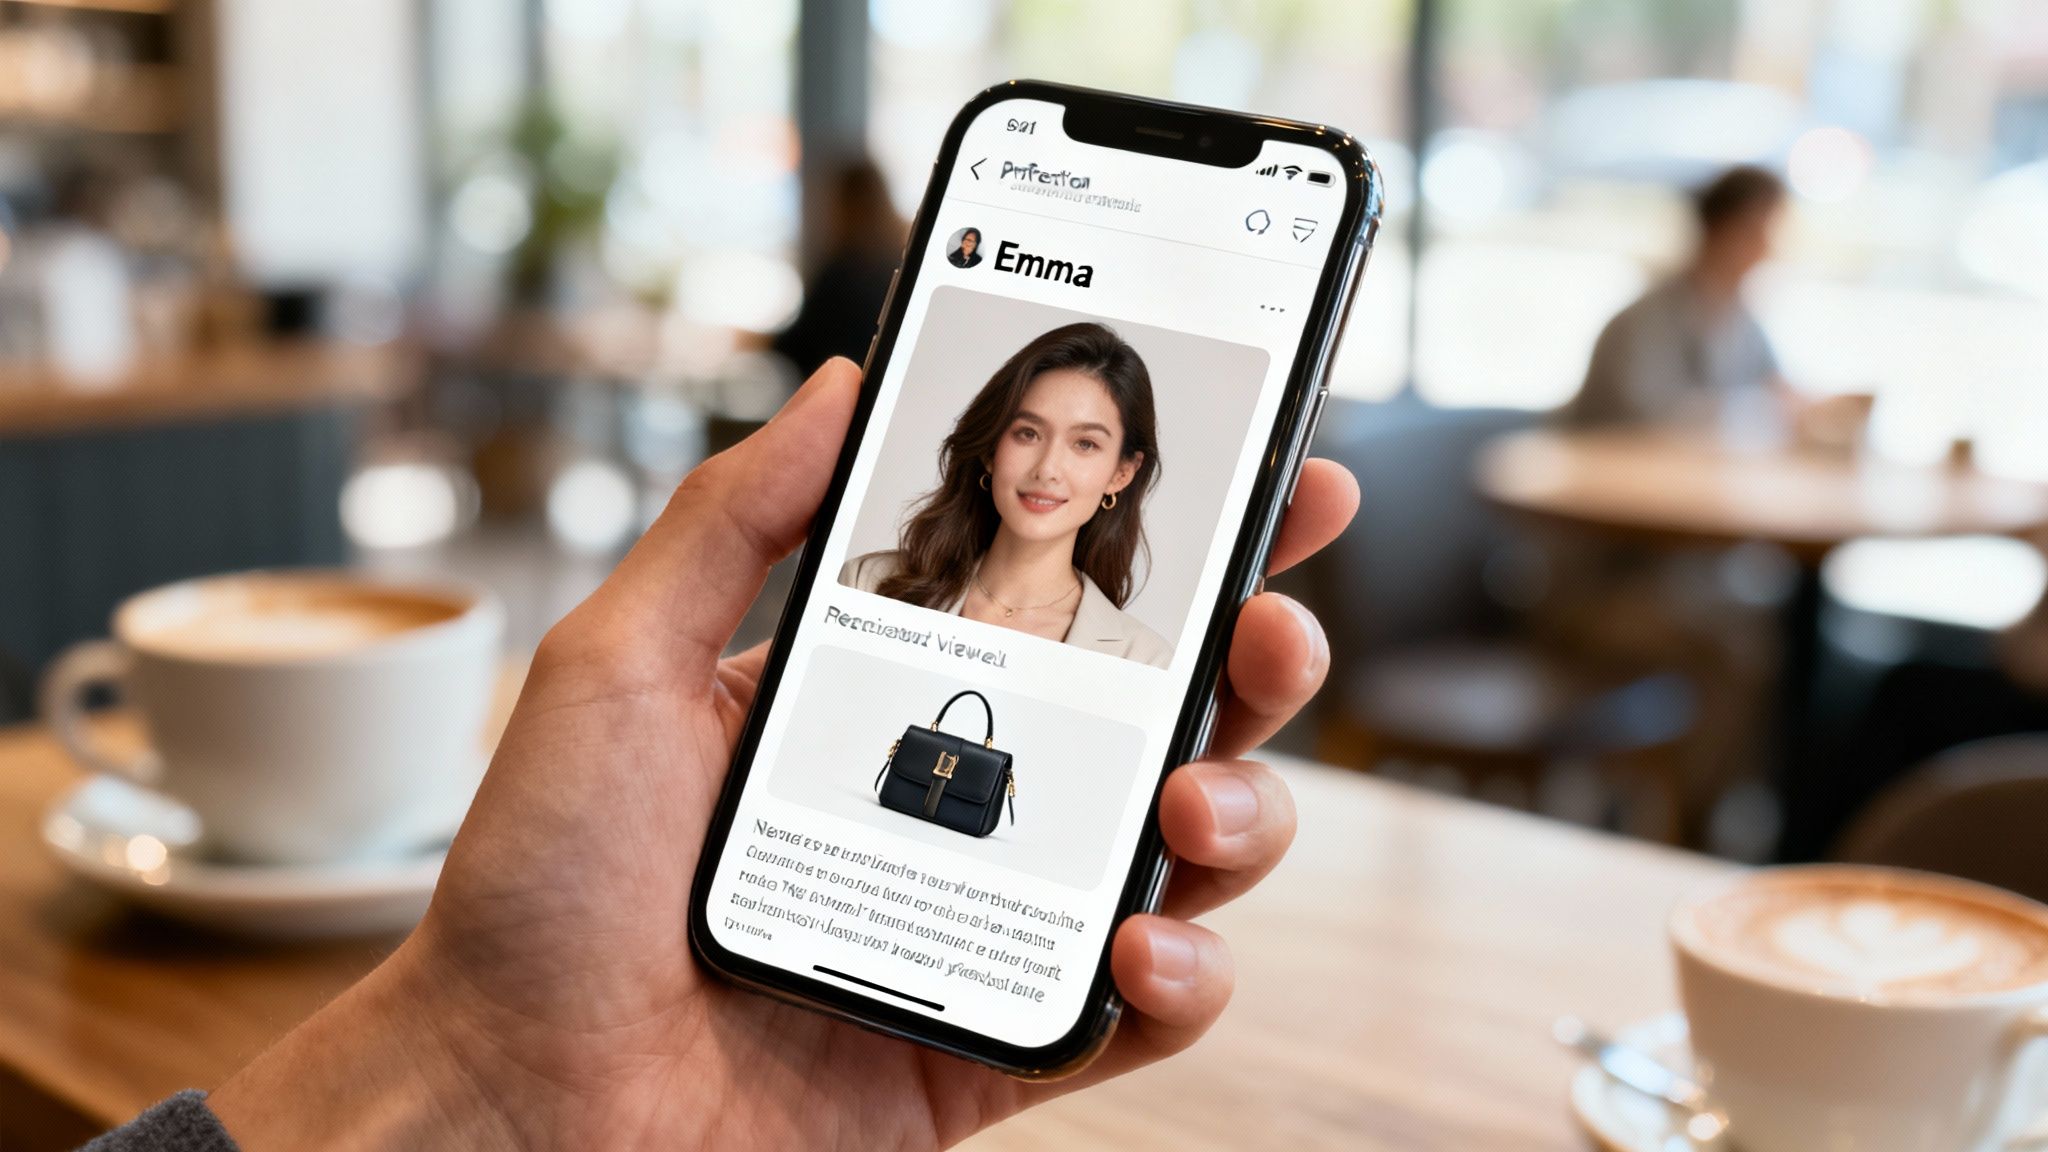
The OKZest interface gives you a visual editor where you can see your base image and start adding layers right on top. This is where the magic happens.
The screenshot above gives you an idea of what a finished personalized image looks like, with "Sarah" dynamically added to the template. The visual editor makes it easy to position and style every element before you generate the final URL.
Defining Your Dynamic Layers
With your base image in place, it’s time to define the layers that will change for each person. These are the elements that pull in your subscriber data. OKZest supports several layer types, but for email, you'll most often use text and image layers.
A text layer is perfect for things like a subscriber’s name, their company, or a unique discount code. You simply draw a text box over your base image, pick your font and color, and give it a parameter name like name.
An image layer lets you overlay one picture on another. This is a game-changer for e-commerce, where you could show a user’s profile picture or an image of a product they just looked at. You’d assign this a parameter like product_image.
A quick pro-tip: Name your parameters logically. If you're adding a first name, call the parameter
first_name. It makes connecting it to the merge tag in your ESP so much easier down the road.
Globally, with nearly 4.5 billion people on email and projections hitting 4.8 billion by 2027, the potential impact of this is huge. Each dynamic layer you add creates a more personal experience for this massive audience, helping your message cut through the noise.
Generating Your Personalized Image URL
Once you've added and styled all your dynamic layers, OKZest generates a single base URL for your image template. This URL is the engine driving your entire personalization setup.
It'll look something like this:
https://okzest.com/image/your-template-id
By itself, this URL just shows the base image. The real power is unlocked when you add your parameters to it. By tacking on query parameters that match the layer names you defined, you tell OKZest what content to inject.
For example, to add the name "Alex" and a specific product image, your final URL would look like this:
https://okzest.com/image/your-template-id?name=Alex&product_image=url-to-product.jpg
This structure is what enables infinite variations from a single template. Every time your email platform sends a message, it will build a unique URL like this for each subscriber, telling OKZest to generate a custom image on the fly. You can dive deeper into the technical side by learning how an image API URL works. With this dynamic URL ready, you can now embed it straight into your campaigns.
Embedding Dynamic Images in Your Email Platform
Okay, you've built your dynamic image template in OKZest and have the base URL ready to go. Now for the fun part: plugging it into your email platform to bring those personalized visuals to life for every single subscriber. This is where your image URL personalization email strategy really comes together.
The whole process boils down to taking your OKZest image URL, dropping it into your email's HTML, and then tacking on special placeholders. You probably know them as merge tags or personalization tokens. Your Email Service Provider (ESP) does the rest, automatically swapping those tags with real subscriber data right before hitting send. The result? A completely unique image URL for each person on your list.
This simple workflow shows the core steps involved. You upload, define your dynamic layers, and generate the URL you'll use in your email.
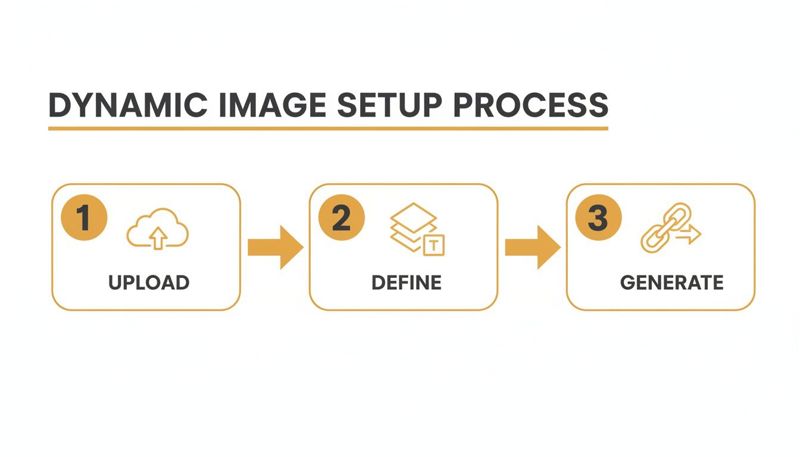
It’s a straightforward path from a base design to a flexible URL—the key to unlocking truly personalized content.
Integrating with Popular Email Service Providers
While the concept is universal, the exact syntax for merge tags changes from one platform to another. Nailing this small detail is absolutely crucial for the personalization to work. Let's break down how to structure your URL for a few of the big players.
Let's assume your base OKZest URL is:
https://okzest.com/image/YOUR-TEMPLATE-ID
And you've set up a dynamic text layer in your image named name.
Here’s how you’d build out the final image source URL for each platform.
For Mailchimp
Mailchimp uses its classic *|FNAME|* merge tags. To get it working, you just append this to your URL as a query parameter.
- Final URL Structure:
https://okzest.com/image/YOUR-TEMPLATE-ID?name=*|FNAME|* - HTML Snippet:
<img src="https://okzest.com/image/YOUR-TEMPLATE-ID?name=*|FNAME|*">
When the email goes out, Mailchimp will find *|FNAME|* and replace it with the subscriber's first name from your audience data. Simple.
For Klaviyo
Klaviyo prefers a double curly brace syntax, like {{ first_name }}. The setup is just as easy.
- Final URL Structure:
https://okzest.com/image/YOUR-TEMPLATE-ID?name={{ first_name }} - HTML Snippet:
<img src="https://okzest.com/image/YOUR-TEMPLATE-ID?name={{ first_name }}">
Pay attention to the space inside the curly braces; Klaviyo's syntax often includes it, so precision matters.
For HubSpot
With HubSpot, personalization tokens follow a {{ contact.property }} format. To pull in a first name, you'd use {{ contact.firstname }}.
- Final URL Structure:
https://okzest.com/image/YOUR-TEMPLATE-ID?name={{ contact.firstname }} - HTML Snippet:
<img src="https://okzest.com/image/YOUR-TEMPLATE-ID?name={{ contact.firstname }}">
This direct integration is what makes dynamic images so powerful and scalable. You set it up once, and your ESP does all the heavy lifting for thousands of recipients.
The Critical Role of Fallback Values
So, what happens if you don't have a first name for someone on your list? Without a backup plan, your image might show an error or just an awkward blank space. This is why setting up fallbacks is non-negotiable for any professional campaign.
A fallback value is simply a default you set in OKZest for what to show if the data is missing. If the name parameter comes up empty, you could have it default to something like "Valued Customer" or "A Special Offer for You."
Never launch a personalized image campaign without configuring your fallbacks. It's the safety net that ensures every single subscriber, regardless of data completeness, receives a polished and professional-looking email.
You can set these defaults right inside the OKZest image editor. It's a small step that protects the user experience and your brand's reputation, preventing broken-looking emails from ever reaching an inbox. This is the kind of careful planning that separates amateur personalization from the pros.
Why This Method Drives Engagement
The mechanics are simple, but the impact is huge. By turning a generic graphic into a one-to-one communication, you instantly make your content more relevant and impossible to ignore. This isn't just a hunch; the data backs it up.
Marketers consistently point to improved open rates (82%) and higher click-through rates (75%) as the top benefits of their personalization efforts. These numbers get a serious boost when dynamic images are in the mix, because visuals just grab attention better than text ever could. You can dig into more numbers in this breakdown of email marketing statistics.
Ultimately, embedding a dynamic image URL is about more than just slapping a name on a graphic. It’s about showing your subscribers you see them as individuals. That recognition builds a much stronger connection, which in turn drives the metrics that actually matter to your business.
Automating Your Image Personalization Workflows
Setting up a single dynamic image is a great start, but the real magic happens when you scale. Automation is how you graduate from manual campaign-building to creating real-time, hyper-contextual experiences with almost zero effort. This is where you plug OKZest into the rest of your marketing stack and make your image URL personalization email strategy a seamless, "always-on" part of your operation.
Whether you're a marketer who lives in no-code tools or a developer ready to get your hands dirty with an API, automation lets you trigger personalized images based on what your users actually do. Imagine a new subscriber getting a welcome email with their name on a custom graphic—instantly, without you lifting a finger. That's the goal.
No-Code Automation for Marketers
For most marketing teams, tools like Zapier and Make (which used to be Integromat) are the quickest way to build powerful automations without touching a line of code. These platforms are basically the glue between your apps, letting you create simple "if this happens, then do that" recipes.
You can connect your email platform, CRM, or e-commerce store directly to OKZest. This opens up a ton of possibilities for triggering personalized images at just the right moment in the customer journey.
A few powerful workflow examples include:
- New Subscriber Welcome: When someone new signs up in Mailchimp, kick off a workflow that generates an OKZest image with their first name and pops it into a welcome email.
- Event Registration Confirmation: If someone registers for a webinar on Eventbrite, create a personalized ticket image on the fly with their name and maybe even a unique QR code.
- Loyalty Program Updates: When a customer hits a new loyalty tier on your Shopify store, send them a congratulatory image showing off their new status.
Getting a handle on building marketing automation workflows gives you a fantastic foundation for adding these kinds of visual triggers. The trick is to find those high-impact touchpoints where a personalized image can really make someone stop and take notice. If you want to dive deeper, our guide on how to automatically send personalized emails breaks down the whole setup.
Real-Time Generation with the OKZest API
For developers or businesses with more complex setups, the OKZest API gives you total control and flexibility. Instead of working through a third-party connector, you can programmatically generate image URLs right from your own application or server. This is the ultimate way to create truly dynamic, real-time personalization based on live data.
The most powerful use case here? Abandoned cart recovery.
Imagine a customer leaves a product in their cart. Within an hour, your system can programmatically cook up an image URL that includes the exact product they left behind, their name, and a unique discount code, then fire it off in an email. That level of real-time relevance is incredibly hard to ignore.
This approach turns a generic "Hey, you forgot something!" reminder into a highly specific and persuasive nudge. The API lets you pull data from anywhere—your product database, user profiles, live inventory—and inject it straight into an image. This is how leading brands create experiences that feel less like marketing and more like a genuinely helpful, personal service.
This strategy is especially powerful in e-commerce. In fact, 60% of retail companies now personalize content based on past purchases, a huge jump from just 38% in 2019. This focus on behavioral data is a major reason why segmented, personalized campaigns can boost revenue by as much as 760%.
Whether you go the no-code route or jump into a full API integration, automation is what makes image personalization scalable. It lets you deliver that personal touch consistently, at every stage of the customer lifecycle, building stronger relationships and, ultimately, driving better results for your business.
Testing and Measuring Campaign Performance
Launching a campaign with personalized images is a huge step forward, but hitting "send" is just the starting point. The real value comes from knowing your efforts are actually driving results.
Without a solid way to test and measure, you’re just guessing. Let's move from hoping it works to knowing it works. A sloppy pre-send check is a deal-breaker—one broken merge tag can instantly ruin that personal connection you're trying to build.
Your Pre-Launch Testing Checklist
Think of this as your final quality check before go-time. Running through this for every single campaign is the best way to guarantee a flawless delivery.
- Preview with Real Data: Use your ESP’s preview tool to see the email exactly as a subscriber would. Check a few profiles: one with complete data, one with missing data (to test your fallbacks), and even one with an unusually long first name.
- Test Every Single Link: Click on all the personalized images in your test emails. Do they point to the correct landing page? Are the links tracking properly? Don't skip this.
- Check Different Email Clients: An email that looks perfect in Gmail can fall apart in Outlook. Use a tool like Litmus or Email on Acid to see how your email renders across dozens of different clients and devices.
- Verify Your Fallbacks: Send a test to an account where you know the personalization data is missing. Make sure your default text or generic image shows up correctly. This ensures everyone gets a professional-looking email, no matter what.
A systematic approach like this helps you find and squash bugs before they ever see a customer’s inbox.
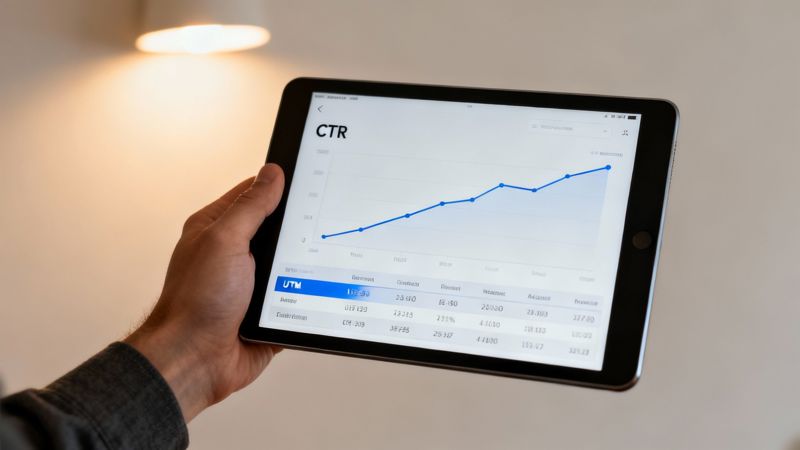
Tracking the Impact on Click-Through Rates
Okay, your campaign is live. Now what? You need to know exactly how many clicks your dynamic images are generating. The easiest and most effective way to do this is with UTM parameters.
When you add a link to your personalized image, don't just paste in a URL. Append UTM tags to track the source, medium, and campaign. Most importantly, use the content tag to isolate the image's performance.
For instance, your link might look like this:
https://yourwebsite.com/landing-page?utm_source=email&utm_medium=newsletter&utm_campaign=welcome_series&utm_content=personalized_hero_image
By setting utm_content to something descriptive like personalized_hero_image, you can filter your analytics and see exactly how much traffic and how many conversions came directly from that dynamic graphic. This gives you the hard data to prove the value of your image URL personalization email strategy.
Proving ROI is the ultimate goal. Isolating the performance of your personalized images with specific UTM tracking is the clearest and most effective way to demonstrate their direct impact on your campaign’s success.
Proving ROI with Simple A/B Tests
To truly understand the lift you're getting from personalization, you need something to compare it to. This is where A/B testing comes in. It's the most straightforward way to prove that your dynamic images are outperforming the old static ones.
The setup is simple:
- Create Two Versions: Make an "A" version of your email with a standard, static hero image. Then, create a "B" version that's identical in every way except it uses your new dynamic, personalized image.
- Split Your Audience: Send version A to one half of your audience (or a smaller test segment) and version B to the other half.
- Measure the Results: Once the campaign has run its course, compare the key metrics. Pay close attention to the unique click-through rate (CTR) for each version.
The data from the wider industry already shows this effort pays off. Personalized emails can deliver 29% higher unique open rates and 41% higher unique click rates than their generic counterparts. You can dig into more email marketing statistics that back this up.
By running your own A/B tests, you’ll have your own proof, making it much easier to justify investing more in personalization down the road.
Of course, here is the rewritten section with a more natural, human-written tone, following the style of the provided examples.
Common Questions Answered
As you dive into personalizing images, a few questions are bound to pop up. It happens to everyone. This section is here to give you straight, clear answers to the most common queries we hear, so you can get back to building your campaign with confidence.
What Happens If I'm Missing Some Subscriber Data?
This is probably the most important question to ask. A smart personalization strategy has to plan for gaps in the data. What if you don't have a first name for every single person on your list?
A professional tool like OKZest handles this by letting you set a "fallback" value for any dynamic part of your image.
For instance, if the first_name field is empty for a subscriber, the image won't show a weird blank space. Instead, it can automatically swap in a generic greeting you've already chosen, like "Valued Customer." Or, you can just have that text element disappear completely. Setting up these fallbacks properly is the secret to making sure every single recipient gets a polished, complete image—never a broken one.
Will Personalized Images Slow Down My Emails?
It’s a fair concern. Nobody wants to be the reason an email takes forever to load.
The good news is that modern personalization platforms are built for speed. These dynamic images aren't being created from scratch every time someone opens their email. They're generated instantly from a cached template and then delivered across the globe using a Content Delivery Network (CDN).
This whole process is so fast that the delay is basically unnoticeable to your subscribers. The huge lift you get in engagement and clicks from a personalized image easily makes up for any tiny impact on load time. For the best results, always make sure your base image is optimized for the web before you even upload it.
The performance trade-off is minimal, while the engagement benefit is substantial. Focus on creating compelling personalized content, and let the CDN handle the fast delivery.
How Do I Track Clicks on a Personalized Image?
You need to know what’s working, right? Tracking performance is how you prove the value of putting in this effort. The best way to do this is to treat your personalized image just like any other link in your email.
It’s a simple, two-part process:
- Wrap the Image in a Link: In your email's code, just place your dynamic
<img src="...">tag inside a standard link (<a>) tag that points to your landing page. - Add Specific UTM Parameters: This is the crucial part. Tag that landing page URL with UTMs to isolate the traffic. For example, you could add something like
utm_content=personalized_hero_image.
With that setup, you can hop into your analytics platform, filter by that specific utm_content tag, and see exactly how much traffic, how many leads, and how much revenue came directly from that dynamic image. It's the cleanest way to measure the ROI of your image personalization strategy.
Ready to create visuals that speak to every customer individually? With OKZest, you can automate personalized images for your email campaigns, social media, and more. Try it for free and see how easy it is to boost your engagement. Learn more and get started at https://okzest.com.