When you fetch an image with an API, you’re essentially sending an HTTP GET request to a specific web address (an endpoint). In return, the server sends back image data, usually as a URL. This simple exchange lets your applications pull in and show personalized or real-time visuals, breaking free from the old way of using static, hardcoded image files.
Why Fetching Images With an API Is a Game Changer
Before we jump into the code, it’s worth understanding why this is such a big deal. Moving past static URLs completely changes how modern apps and websites deliver content. This dynamic approach is the engine behind many of the personalized experiences we now take for granted.
Think about an e-commerce store where product images update automatically across the entire site the moment a new photo is uploaded. Or imagine a marketing email that pulls in a unique profile picture for every single recipient, creating a one-to-one connection that feels personal, even at scale. These scenarios are only possible when you can get images from an API on the fly.
The Core Mechanics of an Image Request
At its core, an API request for an image is just a quick conversation between your app (the client) and a server.
- The Client's Request: Your application sends an
HTTP GETrequest to a specific URL, known as an endpoint. It’s like asking the server, "Hey, can you give me the image for this specific user or product?" - The Server's Response: The server gets the request, finds the right image in its database, and sends it back. The response usually contains a direct URL to the image file, which your app can then display.
This back-and-forth is what makes APIs so flexible. Instead of hardcoding a link to a fixed image file like /images/product-A.jpg, you ask an API for the image belonging to product_id=123. If that product's photo changes tomorrow, the API automatically serves the new version. You don’t have to touch a single line of your code.
Key Takeaway: The real power of an API is that it separates the content from the presentation. Your code just needs to ask for what it needs (like the avatar for user 456), and the API handles the rest, making sure the content is always up-to-date and relevant.
Building Your First Image API Request From Scratch
Making your first API call to fetch an image is a lot less intimidating than it sounds. It really just boils down to assembling a few key pieces into a single request, kind of like putting together a puzzle. We'll start with the most important part—authentication—before digging into the structure of the endpoint URL itself.
First things first, you need to prove you have permission to access the API. This is where authentication comes in. Most APIs you’ll run into use one of two common methods:
- API Keys: This is usually just a unique string of characters you include in the request header (e.g.,
Authorization: Bearer YOUR_API_KEY). Think of it as a simple password for your application. - OAuth Tokens: A more secure, temporary token that’s granted after a user authorizes your app. You see this a lot when an app needs to access data on behalf of a specific user.
For most image personalization APIs, a straightforward API key is all you'll need to get up and running.
Dissecting The API Endpoint
Once you've got your key, the next step is to understand the API endpoint. An endpoint is basically just a specific address that tells the server exactly what you need. It’s typically made up of three parts: a base URL, a path, and some parameters.
Here’s a structure you’ll see all the time: https://api.example.com/v1/images?user_id=123
- Base URL:
https://api.example.com/v1/is the foundation of every request you'll make. - Path:
/imagestells the server you want to access the 'images' resource. - Parameters:
?user_id=123are the key-value pairs that filter or customize the request. In this case, it’s telling the API to grab an image specifically for user 123.
The parameters are where the real magic happens. They let you dynamically request different images without ever changing the core endpoint. You could easily swap user_id for product_id, event_name, or any other unique identifier that makes sense for your data. As you start building your first image API request, it's a good idea to also explore broader essential front-end developer technologies that often go hand-in-hand with API integrations.
This whole process is a simple handshake between your application and the server, as shown below.
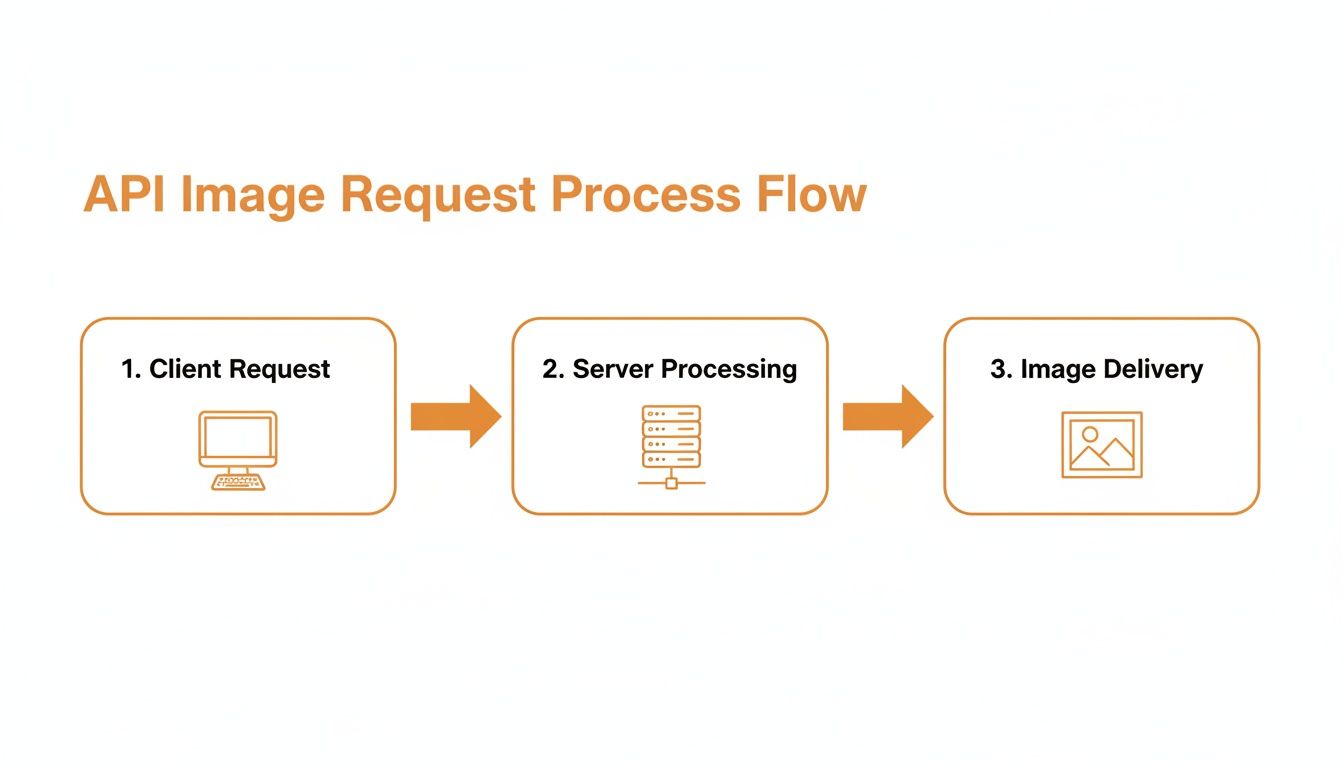
Your specific request parameters are what determine the unique image the server sends back. Simple as that.
Putting It All Together
When you combine these elements, you have a complete, working request. The demand for these skills is exploding. The global image recognition market was valued at USD 45.02 billion in 2022 and is expected to grow at a 13.4% CAGR through 2030. This growth is fueled by the widespread use of cloud-based APIs for everything from e-commerce product searches to content moderation.
Pro Tip: Always, always consult the API documentation first. It's the official instruction manual. It will lay out the exact endpoint structure, required parameters, and authentication method. Guessing will just lead to headaches and errors.
With your API key and a properly structured endpoint, you’re ready to make a successful call and pull dynamic images into your projects. For a deeper dive, check out our guide on a complete REST API get image example that walks through more advanced scenarios.
How to Handle API Responses and Image Data
Making a successful API call is just the beginning. The real magic happens when you get the response back from the server and know exactly what to do with it. A solid application is built to handle both success and failure, ensuring your users get a smooth, professional experience every time.
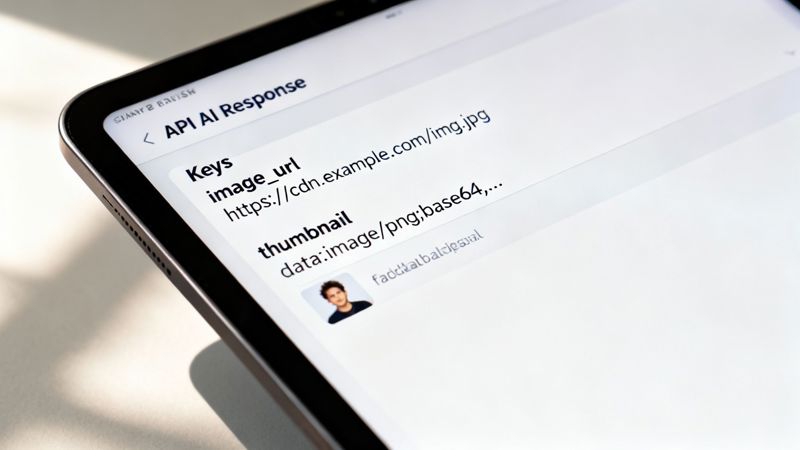
When you api get images, the data usually comes back in one of two main flavors. The most common (and easiest to work with) is a JSON object that includes a direct URL to the image file. It's clean, lightweight, and simple to parse. Less often, you might get the image data encoded directly into the response using something like Base64, which is basically the entire image converted into a long string of text.
Whether you're fetching user avatars or pulling in modern digital photo booth image data, you'll need to know how to work with whatever the API throws at you.
Parsing Common Response Types
Let's break down a typical JSON response. Say you just requested a user's profile picture and the API sends back something like this:
{ "status": "success", "data": { "user_id": 123, "image_url": "https://cdn.example.com/avatars/123.jpg", "alt_text": "Profile picture for Jane Doe" } }
If you're using JavaScript, you'd simply parse this JSON and grab the image_url to pop into your webpage. The process is pretty straightforward: you'd access the nested image_url property and set it as the src attribute of an <img> tag.
The logic is almost identical in Python. You'd use a library like requests to make the call, parse the JSON into a Python dictionary, and then pull out the URL from response.json()['data']['image_url'].
Key Insight: Always, always, always check the API documentation first. Knowing the expected JSON structure ahead of time will save you from countless parsing errors and make your code far more reliable down the road.
APIs can return image data in several ways. Here’s a quick rundown of what you might encounter and how to deal with each format.
Common API Response Structures for Images
| Response Type | Description | Primary Use Case | Handling Method |
|---|---|---|---|
| Direct URL | The API returns a JSON object containing a public URL to the image file. | Most common method for web applications, CDNs, and media services. | Parse the JSON, extract the URL string, and use it as the src for an <img> tag. |
| Base64 String | The image is encoded as a long string of text directly within the JSON response. | Small icons, offline applications, or when you need to avoid extra HTTP requests. | Decode the Base64 string and embed it directly in an <img> tag using a data URI. |
| Binary Data | The API response itself is the raw image file (e.g., JPEG, PNG), not JSON. | Direct image downloads, server-to-server image processing. | Set the correct Content-Type header and display the response directly in the browser or save to a file. |
| Signed URL | A temporary, secure URL that provides access to a private image for a limited time. | Securely serving private assets from cloud storage like AWS S3 or Google Cloud Storage. | Handle like a direct URL, but be mindful that the link will expire. Do not cache it long-term. |
Understanding these patterns will prepare you for virtually any image API you work with.
Building Resilience with Error Handling
So, what happens when things go wrong? And trust me, they will. Servers go down, images get deleted, and auth keys expire. A truly robust application doesn't just crash and burn; it handles these hiccups with grace.
This is where your fallback logic becomes absolutely critical. For example, what if you request a profile picture for a brand-new user who hasn't uploaded one yet? The API will likely shoot back a 404 Not Found error or a response payload indicating the image is missing.
Instead of displaying that ugly broken image icon, your code should be ready to step in and:
- Display a Default Image: Keep a generic placeholder avatar on hand to use when the requested image isn't available.
- Use Initials: A nice touch is to generate a simple image with the user's initials as a personalized fallback.
- Show Nothing: In some UI contexts, it might make more sense to simply hide the image element entirely.
This kind of proactive error handling is what separates a professional, polished application from a fragile one. When you plan for missing data, you ensure your UI stays clean and functional, preserving the user experience even when the backend isn't perfect.
Getting Your Dynamic Images into Websites and Emails
Alright, you’ve mastered fetching images from an API. Now for the fun part: actually using them. This is where all that technical setup pays off, whether you’re jazzing up a web app or sending out a killer email campaign. The methods are a bit different for each, but the goal is the same—show the right image to the right person.
For websites, the most straightforward route is using client-side JavaScript. Once you get that API response back, you can just find an <img> element on your page and update its src attribute on the fly. It's perfect for things like user dashboards, e-commerce product galleries, or any spot where you need fresh content without forcing a page reload.

Adding Dynamic Images to Your Website
Let's say you're building a user profile page. You've just hit your API and received a JSON object with a user's avatar URL. Your mission is to get that picture displayed.
First, you’ll want a placeholder <img> tag in your HTML, ready and waiting with a unique ID:
<img id="user-avatar" src="" alt="User Profile Image">
Then, in your JavaScript, after you’ve successfully fetched the data, you just grab that element by its ID and plug in the image URL you received. It’s a simple but incredibly powerful way to make your pages feel dynamic and alive with real-time data.
Pro Tip: Always set up a fallback. Either add a default
srcor use theonerrorevent on your image tags. This lets you show a placeholder image if the API call messes up or the URL is dead, which looks a lot more professional than that ugly broken image icon.
Personalizing Emails with Merge Tags
Email is a different beast entirely. You can't just run JavaScript in someone's inbox—most email clients will block it for security reasons. Instead, all the magic has to happen on the server before the email is sent. This is where merge tags come into play.
A merge tag (you might also hear it called a personalization tag) is a simple placeholder you stick in your email template. When it's time to send, your Email Service Provider (ESP) swaps that placeholder with real data from your contact list. For example, a tag like {{user.profile_image_url}} is a signal to fetch and insert a specific image URL for each person you're emailing.
It’s a three-step dance:
- Build Your Template: In your HTML email, you’ll place the image merge tag right inside the
<img>tag’ssrcattribute, like this:<img src="{{user.profile_image_url}}">. - Connect Your Data: You need to make sure your ESP can talk to your data source where all those image URLs are stored.
- Launch the Campaign: As the ESP sends out the emails one by one, it looks up the correct image URL for each recipient and injects it into the HTML.
This technique is a game-changer for creating hyper-personalized emails that grab attention and drive engagement. If you really want to go deep, understanding server-side image rendering for email opens up even more advanced possibilities. It’s how you turn a mass email blast into what feels like a one-on-one conversation, with an image tailored perfectly for every single recipient.
Strategies for Performance and Scalability
Making a single API call to fetch an image is straightforward. But what happens when you need to serve thousands, or even millions, of them? Without a smart approach, you're looking at sluggish load times, unhappy users, and a server bill that’ll make your eyes water. Building for scale means thinking about efficiency from the get-go.
The Power of Smart Caching
Your first and most effective tool is caching. Caching simply means storing a copy of an image after you've fetched it once, so you don't have to keep asking the API for the same thing. This is a game-changer, and you can implement it in two key places:
- Client-Side Caching: Tell the user's browser to hang onto a copy of an image for a while. When they revisit a page, the image loads instantly from their local machine instead of making another trip across the internet. It's the fastest delivery possible.
- Server-Side Caching: Your own server can keep frequently requested images in a high-speed storage layer like Redis or Memcached. This drastically cuts down on the calls you make to the external API, saving you both time and potentially a lot of money.
A multi-layered caching strategy like this is fundamental. It minimizes redundant work and ensures your images pop up on screen as quickly as possible.
Don't Fetch More Than You Need
Beyond caching, you need to be smart about the images themselves. I see this mistake all the time: developers fetch a massive, high-resolution image only to shrink it down to a tiny thumbnail on the page. That's a huge waste of bandwidth and a drag on performance.
A much better way is to request images at the exact dimensions you plan to display them.
Many modern image APIs let you specify dimensions right in the URL using parameters. A request might look something like .../image.jpg?width=300. This is brilliant because it tells the API to resize the image before sending it over, meaning you only transfer the data you actually need.
Also, don't forget about modern image formats like WebP. It often provides much better compression than old-school JPEGs and PNGs, giving you smaller file sizes and faster loads without a noticeable drop in quality.
Key Takeaway: Never serve an image that's bigger than its display size. Using API parameters to resize images on the fly is one of the single most effective performance boosts you can make.
Stay Within the API's Limits
Every API has rules. Rate limits define how many requests you're allowed to make in a certain amount of time. If you ignore them and make too many calls, you'll likely get your access temporarily blocked, which could grind parts of your application to a halt.
Always, always check the API documentation for its rate limit policies. It's your responsibility to build logic into your code to track how often you're making requests. If you get a 429 Too Many Requests error, you should have a plan, like using an exponential backoff strategy to gracefully retry later. Staying within the API's rules is a cornerstone of building a reliable system. For a deeper dive, check out our complete guide on API integration best practices.
Building for scale isn't just a technical exercise; there's a real financial incentive. The market for network APIs is on track to become a multi-billion dollar opportunity by 2030, and image-heavy GET requests are a major part of that. You can find more insights into this growing API economy in recent telecoms connectivity research.
Frequently Asked Questions
When you start pulling images through an API, a handful of questions almost always come up. I've put together answers to the most common ones to help you skip the roadblocks and get building faster.
What’s the Difference Between a Static Image and an API Image?
Think of a static image as a simple, direct link to a file. It has a fixed URL, something like /images/logo.png, that points to one specific image on a server. If you want to change that logo, you have to physically upload a new file and replace the old one. It’s a one-to-one deal.
An API image, on the other hand, is much smarter. You request it from an endpoint, like /api/users/123/avatar. The API on the other end can then intelligently serve up a different image based on who's asking or other parameters you send. This opens the door for real-time personalization and data-driven visuals without ever touching your frontend code, making everything far more dynamic.
How Do I Handle API Rate Limits When Fetching Lots of Images?
Bumping into an API's rate limit can grind your application to a halt, so managing your requests is key.
First off, get serious about caching. There's rarely a good reason to fetch the same image over and over again. Next, implement 'lazy loading' in your app. This clever technique only requests an image when it’s about to scroll into the user's view, which is a lifesaver for long pages packed with visuals.
If you do get slapped with an HTTP 429 "Too Many Requests" error, don't just hammer the API again. The best approach is an exponential backoff strategy. Wait a second before retrying, then two seconds, then four, and so on. This gives the server a chance to breathe and shows you're a considerate API citizen.
Finally, always read the documentation to see if the API supports batch requests. Grabbing data for multiple items in a single call is way more efficient than making dozens of individual ones.
Can I Request Specific Image Sizes From an API?
Absolutely, and you definitely should. It's a huge win for web performance. Most modern image APIs and CDNs are built to handle on-the-fly image transformations just by adding a few parameters to the URL.
For instance, you might see a URL with something like ?w=500&h=300&format=webp tacked on the end. This tells the server to resize the image to your exact needs—and maybe even convert it to a next-gen format like WebP—before it sends it over. It’s incredibly efficient because you only download the pixels you actually need, which can dramatically speed up your page loads. Always check the API's docs to see what transformations they support.
What Are the Security Risks of Using an Image API?
The single biggest risk is accidentally exposing your secret API key. Never, ever put it directly in your client-side JavaScript or any other code that a user can see in their browser.
All your authenticated API calls should happen on a secure backend server. Your server can make the request with the key, get the image URL, and then safely pass that URL to the client. Also, make sure you're only using APIs that serve images over HTTPS. This encrypts the connection and prevents anyone from snooping on the data as it travels.
And if you’re working with images uploaded by users, you’ll want to have a solid content moderation plan to avoid displaying anything inappropriate or malicious.
Ready to create stunning, personalized images without writing a single line of server-side code? At OKZest, we make it simple to generate dynamic images for your emails, websites, and social media campaigns using powerful merge tags and API solutions. Start automating your visual content today at OKZest.com.