You’ve probably heard of an API, but what about API pictures? They’re exactly what they sound like: images generated or changed on the fly through an Application Programming Interface. This allows developers to create dynamic, data-driven visuals for all sorts of applications.
Instead of just serving up the same static, pre-made image to every single person, an image API builds them in real-time based on specific inputs or data points.
Why Dynamic API Pictures Are a Game Changer

Let's face it, static images are a relic of a less personal web. In a world where every single interaction is a chance to connect with a customer, sending the same generic visual to everyone is a huge missed opportunity. Dynamic API pictures change all of this by turning images into responsive assets that adapt to the user, their context, and the exact moment.
Just imagine a new user signing up for your app. Instead of a generic "Welcome!" banner, they see an image featuring their own name. This isn't just a cool gimmick; it's a powerful psychological hook. It makes the user feel seen and valued from their very first interaction.
This idea goes way beyond simple greetings. Developers are using API pictures to create incredibly relevant, real-time visuals that actually drive engagement and provide real value.
Practical Applications in Modern Development
The true power of dynamic imagery is its versatility. Being able to generate custom visuals programmatically opens up a whole world of high-impact uses that static images just can't touch. An e-commerce platform, for example, can automatically create product images with real-time sale prices or "low stock" overlays, creating urgency without any manual design work.
Consider these other real-world scenarios:
- Social Media Automation: You can auto-generate unique social media cards for every new blog post, pulling the title and featured image right into a branded template. The growth in AI social media content creation has made these kinds of workflows accessible for businesses of all sizes.
- Personalized Email Marketing: Think about embedding custom charts into weekly report emails. You could show a user's specific progress or usage stats, making dry data much more personal and easy to digest.
- Event Management: Instantly create personalized event tickets with the attendee's name, seat number, and a unique QR code the second they register.
The core benefit here is scalability. You design one solid template, and the API takes care of creating hundreds, thousands, or even millions of unique variations. This saves an immense amount of design and development time while delivering a far better user experience.
Using image APIs in e-commerce and digital media has become a cornerstone of modern online experiences. Platforms are increasingly relying on these tools to generate, enhance, and manage their visual content. It's not just about aesthetics—it's driving higher conversion rates. Mastering this tech is no longer just an advantage; it's essential.
Building Your First Image Generation Template
To get started with api pictures, you first need to create a reusable template. This isn't about diving into heavy code right away. Instead, think of it as creating a blueprint that the API will use to pump out endless personalized visuals. It's like a stencil: you design the fixed parts once, and the API fills in the unique details for every single user.
The first move is to pick an image generation platform that works for you. Many services, like OKZest, offer friendly visual editors that handle the technical side. This lets you focus on the creative stuff first—like setting up your canvas and designing the static layout—before you even think about code.
Designing the Base Canvas
Your canvas is the absolute foundation of your image. This is where you'll set the dimensions—say, 1200x630 pixels for a sharp social media card—and decide on the background. You can go with a solid color, a nice gradient, or a static background image that stays the same across every version.
Imagine you're creating a template for a personalized event ticket. The base canvas would be the ticket's overall shape and background design. This part never changes, whether you're making one ticket or ten thousand of them.
Key Takeaway: The whole point of a template is efficiency. When you establish a solid base with static elements, you only need to send the unique data with each API call. This massively reduces the payload size and complexity, making the entire process faster and way more scalable.
Adding Static and Dynamic Elements
With the canvas ready, it's time to layer on the different elements. They really fall into two buckets: static and dynamic.
- Static Elements: These are the fixed pieces of your image. For our event ticket, this would be the event logo, the name of the venue, and any other branded graphics. They are baked into the template and look identical on every image.
- Dynamic Elements: These are the placeholders, often called merge tags, that get filled with data from your API call. This is where the magic of personalization happens.
For our ticket example, the dynamic placeholders are what create a unique experience for every single attendee.
| Element Type | Example Placeholder | What It Does in the Template |
|---|---|---|
| Text | {{attendee_name}} |
Shows the ticket holder's full name. |
| Text | {{seat_number}} |
Displays the assigned seat, like "Section A, Row 12". |
| Image | {{qr_code_url}} |
Embeds a unique QR code for scanning at the gate. |
This clean separation is exactly what makes template-based image generation so powerful. You can see how these parts work together in more advanced situations in this deeper dive into creating a custom image API.
Setting up these placeholders in a visual editor is usually as simple as dragging a text or image box onto the canvas and giving it a unique name. That name becomes the key you'll use in your API request to inject the personalized data—we'll get to that part next. By defining these dynamic zones, you’re giving the API a perfect map of where to place each piece of personalized content, guaranteeing a perfectly composed result every time.
Bringing Images to Life with Dynamic Data
Once your template is set up, the real fun begins: connecting it to live data. This is the moment your static blueprint becomes a dynamic, personalized visual for every single user. The magic happens through merge tags—you might also call them dynamic parameters—which you use within an API call to fill in the placeholder fields you created.
Think of it like a mail merge, but for images. Your template has placeholders like {{first_name}}, and your data source (maybe a CRM, a database, or even user input) supplies the actual values like "Sarah" or "David." The API is the engine that instantly combines the two, generating unique api pictures on the fly.
Mapping Data to Your Template
The key is to structure your API request so that your data maps perfectly to your template's dynamic fields. This usually means sending a payload in JSON format, where each key matches a placeholder name in your template.
Let's look at a real-world scenario. Imagine an e-commerce platform wants to generate promotional images instantly. The template might have placeholders for the product's name, its picture, and the current price.
The API call would then include a JSON object that looks something like this:
{
  "template_id": "promo-banner-123",
  "data": {
    "product_name": "Retro Bluetooth Speaker",
    "product_image_url": "https://example.com/speaker.jpg",
    "current_price": "$79.99"
  }
}
When the API gets this request, it grabs the "promo-banner-123" template and injects the data right where it belongs, creating a custom promotional graphic in milliseconds.
This process separates the fixed design from the variable data, which is what makes templating so powerful and scalable.
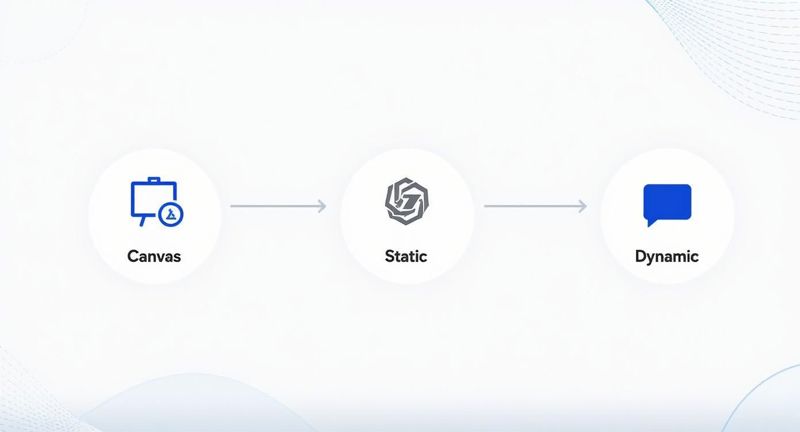
As you can see, a base canvas is layered with both static and dynamic elements to produce the final, personalized image.
Common Dynamic Data Types and Use Cases
You can pass all sorts of data to an image API to create rich, personalized experiences. Here’s a quick look at some common data types and how they’re typically used.
| Data Type | Example Merge Tag | Common Use Case |
|---|---|---|
| Text | {{first_name}} |
Greeting a user by name, adding a custom title, or displaying a unique code. |
| Image URL | {{profile_picture_url}} |
Populating a user's profile photo, a product image, or a company logo. |
| Number | {{loyalty_points}} |
Showing a user's current point balance, a sales price, or a ranking number. |
| Date | {{event_date}} |
Displaying an event date, an expiration date for an offer, or an anniversary. |
| Boolean | {{is_vip}} |
Conditionally showing or hiding an element, like a VIP badge or special banner. |
This is just the tip of the iceberg, but it shows how versatile dynamic image generation can be, moving far beyond just adding someone's name.
Best Practices for Data Integration
To make sure your dynamic images render perfectly every time, clean data is non-negotiable. It's always a good idea to sanitize and validate your data before sending it over to the API. For example, you’ll want to trim extra whitespace from names or make sure prices are consistently formatted with a currency symbol.
Here are a few practical tips I've learned for smooth data mapping:
- Use Descriptive Names: Give your placeholders clear names (
user_first_nameinstead oftext1). It makes your API calls much easier to read and debug later on. - Handle Missing Data: Always have a plan for when data is missing. Good API platforms let you set default fallback values (like "Valued Customer" if a first name isn't available) right in the template. This prevents broken-looking images.
- URL Encode Special Characters: If you're passing text that might have special characters like "&" or "#" as a URL parameter, make sure it's properly URL-encoded. This simple step prevents broken requests.
A well-structured API request is the bridge between your raw data and a perfectly rendered, personalized image. Taking a moment to format your data correctly prevents rendering errors and ensures a seamless experience for the end-user, reflecting a high level of professionalism.
By mastering this connection between data and design, you unlock the ability to generate countless variations of api pictures at scale. You're no longer just sending images; you're creating a one-to-one visual communication channel with your audience.
Embedding API Pictures in Your App and Emails

Creating your dynamic image is a huge step, but the job isn't done until that image is actually in front of your user. Whether you're integrating api pictures into a web app or an email campaign, the embedding process is what brings your hard work to life. The methods are a bit different for each, but the goal is the same: a seamless, fast, and reliable experience for the end-user.
The explosion of cloud-based APIs has completely changed how businesses think about visual media. It's no surprise the API management market is projected to hit $9.7 billion by 2025. Today, a staggering 74% of organizations consider themselves "API-first," building their entire digital strategy around this kind of seamless integration.
Dynamic Integration for Web Applications
When it comes to websites and web apps, JavaScript is your best friend for embedding dynamic images. The basic idea is to build the image URL based on user data and then dynamically set the src attribute of an <img> tag on the fly. This approach is perfect for things like personalized dashboard headers, custom welcome banners, or user-specific charts.
Imagine a SaaS dashboard that greets each user with a personalized header showing their name and profile picture. Here’s a quick look at how you might pull that off with JavaScript:
// Assume 'userData' is an object with the user's details
const userData = {
  firstName: 'Maria',
  profileImageUrl: 'https://example.com/user-avatar.png'
};

// Construct the dynamic image URL with URL-encoded parameters
const baseUrl = 'https://api.okzest.com/v1/image';
const templateId = 'dashboard-header-template';
const encodedName = encodeURIComponent(userData.firstName);
const encodedAvatar = encodeURIComponent(userData.profileImageUrl);

const dynamicImageUrl = `${baseUrl}?template=${templateId}&name=${encodedName}&avatar=${encodedAvatar}`;

// Find the image element and set its source
document.getElementById('user-header-image').src = dynamicImageUrl;
This little snippet builds a unique URL for every user and updates the image source in real-time, delivering a truly personal touch right when they log in.
Pro Tip: Always, always use
encodeURIComponent()for any data you pass in a URL. This function escapes special characters (like spaces or ampersands in a name), preventing broken URLs and ensuring your API requests are correctly interpreted every single time.
Crafting Flawless Images for Email
Embedding api pictures in emails requires a completely different mindset. Since you can't run JavaScript in most email clients, you have to construct the entire dynamic URL before the email even gets sent. This is where the merge tags or personalization syntax from your Email Service Provider (ESP) comes in handy.
The process involves building a complete <img> tag where the src attribute is a URL containing the recipient's unique data, piped in via merge tags.
For example, using a common merge tag format, your HTML would look something like this:
<img src="https://api.okzest.com/v1/image?template=promo-offer&name={{firstName}}&points={{loyaltyPoints}}" alt="Your special offer!">
When the email is sent, your ESP automatically replaces {{firstName}} and {{loyaltyPoints}} with each recipient's actual data. The result? Everyone on your list gets a custom-generated image meant just for them.
You can learn more about how to make dynamic visuals work in your campaigns, including clever tricks like embedding QR codes in emails. And to get more familiar with the entire process from start to finish, check out our complete API integration tutorial, which breaks down all these steps in greater detail.
Advanced Techniques for Robust Image Generation
Once you've got the hang of generating and embedding dynamic images, it's time to build a system that's truly robust and can scale with you. Moving beyond the basics means planning for those moments when things don't go as expected, optimizing for speed, and making sure your whole process is secure. These advanced techniques are what separate a good setup from a great one, ensuring your api pictures deliver a seamless and professional user experience.
A huge part of this is building resilience into your workflow. APIs are incredibly powerful, but they aren't infallible. Network hiccups, server errors, or even just bad data can cause a request to fail. If you don't have a backup plan, your users could be left staring at a broken image icon—which instantly looks unprofessional and erodes trust. This is where fallback images become an absolute necessity.
Implementing Graceful Fallbacks
So, what’s a fallback image? It’s simply a default, generic image that your application shows if the API call to generate a personalized one fails. It's your safety net. For instance, if your system can't create a personalized welcome banner for "Jane Doe," it should automatically serve a generic "Welcome!" banner instead. Simple, but effective.
There are a few ways you can pull this off:
- Client-Side Handling: You can use a bit of JavaScript to listen for the
onerrorevent on an<img>tag. If the dynamic URL fails to load, your script can simply swap thesrcattribute to a predefined fallback image URL. - Server-Side Logic: Your backend can try to make the API call before sending the image URL to the client. If the call fails or times out, your server just sends back the URL of a static fallback image instead.
- API-Level Defaults: Many image generation platforms, including OKZest, let you set default values for merge tags right inside the template. This is a great way to handle missing data gracefully without the entire API call failing.
Key Insight: A well-designed fallback system should be completely invisible to the user. They just see a relevant, branded image instead of a broken one, maintaining the quality of their experience without ever knowing an error happened behind the scenes.
Performance and Security Essentials
As you start using api pictures more heavily, performance and security suddenly become a much bigger deal. Slow-loading images can kill user engagement, and an exposed API key can lead to some seriously costly abuse.
First, let's talk speed. Optimizing image delivery is crucial. Choosing the right format makes a huge difference; WebP usually offers a fantastic balance of quality and small file size for web use. Beyond that, using a Content Delivery Network (CDN) to cache your generated images can slash load times by serving them from a server that's geographically closer to your user.
On the security front, protecting your API keys is non-negotiable.
- Environment Variables: Never, ever hardcode API keys in your client-side code. Store them as environment variables on your server so they stay out of public view.
- Server-Side Proxies: A great practice is to create a proxy endpoint on your own server. This endpoint receives the request from the client and then forwards it to the image API. This approach completely hides your API key from the end user's browser.
- Usage Monitoring: Keep an eye on your API usage dashboards. If you see any unusual spikes in activity, it could be a sign that a key has been compromised.
These practices are the foundation of a professional-grade image generation workflow. You can dive deeper into more strategies for dynamic image generation in our detailed guide.
Don't forget that API-driven image processing is also a critical tool for compliance and brand safety, as cloud APIs can automate tasks like content moderation and logo recognition. It’s no surprise that over 50% of companies in key sectors troubleshoot API issues, and a whopping 88% report doing so every single week. These numbers really underscore how vital it is to maintain a solid API infrastructure. You can learn more about how companies are using cloud APIs for image processing in this report.
Common Questions About API Pictures
As you start working with dynamic visuals, a few common questions tend to pop up. Getting these sorted out early on will save you a ton of time and help you build a much more solid, scalable system for generating images through an API. Let's walk through some of the most frequent things developers ask.
One of the first hurdles is often internationalization. How do you deal with different languages and character sets when you're generating text on an image? Good news: most modern APIs are built to support UTF-8 encoding. This lets you pass data in all sorts of languages, even those with special characters like Japanese or Arabic.
The trick is to make sure your data is properly URL-encoded in the API request. It’s also absolutely crucial to pick fonts in your template that actually support the specific character sets you need. If you don't, you'll just end up with blank squares or rendering errors instead of text.
Costs and Print Quality Considerations
Another big practical question is about cost. Pricing models for these services can be all over the place. A lot of platforms offer a free tier with a limited number of monthly API calls, which is perfect for development and smaller projects. After that, paid plans are usually tiered by volume, so the cost-per-image gets cheaper as your usage scales up.
Always take a close look at the pricing page. You'll want to pay special attention to the limits on your plan and any overage charges you might hit. This simple check can save you from a surprise bill down the road.
Finally, can you actually use these dynamic images for print materials? While you technically can, most image APIs are optimized for digital screens, usually generating images at 72-96 DPI. For high-quality print, you need a much higher resolution—we're talking 300 DPI or more. You might also need a CMYK color profile instead of the standard RGB. Always check the API’s documentation to see what it says about print-quality output before you commit to using it for brochures, certificates, or anything physical.
Ready to create stunning, personalized visuals in minutes? With OKZest, you can automate image creation with our powerful no-code editor and flexible API. Start for free at https://okzest.com and see how easy it is to boost engagement with dynamic images.