A Canva automate maker workflow is all about taking a single design template and using data to automatically generate hundreds of unique, personalized images. Think of it as your secret weapon for cranking out visuals for campaigns, social media, or email marketing without the mind-numbing manual work.
It’s about creating visuals at scale, but without ever sacrificing quality or that personal touch.
Why Automated Visuals Are a Game Changer

Let’s be honest: manually creating a personalized visual for every single customer, event attendee, or social media post is a huge task. It’s not just time-consuming—it eats up creative energy that you could be using for bigger, better things like strategy and innovation.
Imagine your team spending hours just swapping out names, dates, or product images on the same basic design. It’s a bottleneck. It just doesn’t scale.
This is exactly where an automated workflow flips the script. Instead of treating each image as a one-off project, you build one master template. This template acts as your blueprint, with placeholders ready for dynamic info like names, profile pictures, or unique discount codes.
The Core Benefits of Automation
Once you connect that template to a data source—even something as simple as a spreadsheet—you unlock some serious capabilities. Here are the main wins:
- Hyper-Personalization at Scale: Finally, you can give every single person in your audience a unique experience. A personalized image in an email campaign feels exclusive and can seriously boost your engagement rates.
- Unbreakable Brand Consistency: Every single image that gets generated follows your brand guidelines to the letter. Fonts, colors, and logos stay exactly where they should be, building a stronger, more recognizable brand.
- Massive Time and Resource Savings: The work that used to take your team days can now be done in minutes. This frees everyone up to focus on activities that actually move the needle.
The real power here isn't just about speed. It's about being able to run a highly personalized marketing strategy that would have been completely impossible otherwise. You can finally talk to your audience as individuals, not just a faceless crowd.
The explosive growth of platforms like Canva, which now serves around 180 million users worldwide, shows just how critical visual content has become. That user base has tripled since 2021, proving that businesses of all sizes need good design to compete.
By layering automation on top of this, you’re giving your team a massive competitive edge. If you want to dive deeper, check out our guide on the benefits of using https://okzest.com/blog/dynamic-images.
Designing Your Automation-Ready Template

The success of your entire automation setup rests on how well you build your master template. This is more than just making a pretty design; it’s about constructing a smart, flexible foundation that won’t fall apart when you feed it real-world data. A solid template is your first, most important step toward a smooth Canva automate maker workflow.
Think of your template as a smart container. Every part that needs to change—a customer's name, a product picture, a unique discount code—needs its own dedicated placeholder. The whole idea is to design for variation right from the start.
Strategic Layer Naming
One of the most critical steps people often skip is naming their layers correctly. It seems small, but it's a huge deal. When your automation tool looks at your design, it needs to know exactly where to put the data. Generic names like 'Text Layer 1' or 'Image 2' are completely useless for this.
Instead, you need to use descriptive names that match your data source. If your spreadsheet has a column called "FirstName," then the text layer in your template where that name goes should also be named 'FirstName'. This one-to-one mapping makes connecting your data practically foolproof.
Let's say you're creating a template for an event ticket:
- Guest_Name: For the attendee's full name.
- Event_Date: To pull in the specific event date.
- QRCode_Image: A placeholder for the unique QR code you'll generate for each person.
This simple habit will save you from massive headaches down the road. It turns your design from a static picture into a dynamic framework that’s ready to receive data.
Don’t just design for the perfect scenario. Your template has to be tough enough to handle the unexpected, like exceptionally long names or even missing data. Planning for these edge cases is what separates a fragile template from a reliable one that just works.
Designing for Dynamic Content
You have to anticipate how different data will look in your design. A name like "Christopher Montgomery" is going to need a lot more room than "Ann Li." If your text box isn't big enough, that longer name might get cut off, shrink until it’s unreadable, or just overflow and wreck your whole visual.
To sidestep these common problems, stick to a few ground rules. Always leave plenty of whitespace around your dynamic text fields to give longer entries some breathing room. Pick fonts that stay legible even when they have to shrink a bit, and set your text boxes to auto-size or wrap text whenever the design tool allows.
For images, think about the different shapes and sizes your source pictures might be. A square placeholder could awkwardly crop a wide, rectangular product shot. You can design your layout with more flexible image containers or just make sure the images you're pulling from all have a consistent style. Building this kind of resilience into your template ensures every single image you generate looks polished and professional, no matter what data you throw at it.
You've designed a killer template. Now, let's talk about the data that will bring it to life.
Your automation is only as good as the information you feed it, and setting up your data source correctly is what makes the magic happen. This is where you ensure the right name, the right product image, and the right discount code flow directly into the correct design element, every single time.
The simplest and most common way to do this is with a CSV file, which you can easily create in Google Sheets or Microsoft Excel. Think of this spreadsheet as the brain of your whole image generation campaign.
Each row in your sheet will become one unique, personalized image. Each column header needs to match a layer name in your OKZest template.
Structuring Your Data for Success
Let's say you're whipping up personalized graphics for a flash sale. You’ll want your spreadsheet organized with clear, descriptive column headers that line up exactly with the dynamic layers in your template. This one-to-one mapping is the secret sauce—it's non-negotiable for the automation to work.
A good setup would look something like this:
- FirstName: To add a personal "Hey, Sarah!" to the graphic.
- ProductImageURL: To pull in the specific product shot for that person.
- DiscountCode: For displaying a unique, one-time-use code.
- SaleEndDate: To inject a bit of urgency with a clear deadline.
This clean structure gives the automation a perfect roadmap, telling it exactly where to slot each piece of data from your sheet onto the canvas. A few minutes of organization here will save you from a world of headaches down the road.
We actually have a whole guide on the power of using merge tags for dynamic content if you want to dive deeper into how this works.
The goal is to make your data file a perfect mirror of your template's dynamic fields. This alignment is what enables the automation to function flawlessly, turning rows of data into a gallery of personalized, on-brand visuals without any manual intervention.
Advanced Data Connection Options
While CSV files are fantastic for many campaigns, sometimes you need something a bit more powerful or automated. As your operations grow, you might want to connect your workflow directly to other platforms.
For a more technical look at how you can integrate various data sources, this API-based data collection automation guide is an excellent resource that covers the more advanced stuff.
To help you decide what's best for your project, here’s a quick rundown of the most common ways to connect your data.
Comparison of Data Integration Methods
| Method | Best For | Technical Skill | Scalability |
|---|---|---|---|
| CSV (Excel/Sheets) | Batch campaigns, one-off projects, and getting started. | Low | Moderate |
| Airtable | Collaborative projects and managing complex data sets. | Low-Medium | High |
| API Connection | Real-time generation integrated into apps or websites. | High | Very High |
Whether you kick things off with a simple spreadsheet or have big plans for a future API integration, getting your data structure right is the foundational skill for mastering automated visual content.
Running Your First No-Code Automation Workflow
Alright, this is where the magic happens. We're about to take your template and data and churn out a whole batch of personalized images. This is the core idea of a Canva automate maker brought to life, and the best part is, you won't touch a single line of code. We’ll be using a no-code tool like OKZest, which boils the whole process down to a few simple clicks.
First up, you’ll upload the master template you just designed. Then, you'll connect your data source—for this first run, that’s the CSV file we prepared earlier. The platform makes this super intuitive, guiding you through the upload and getting it ready for the most important step.
The Magic of Data Mapping
Think of data mapping as the central nervous system of your whole operation. It’s simply you telling the tool which column from your spreadsheet goes into which specific layer of your design template. You're giving the software a clear set of instructions.
In the tool's interface, you'll typically see a preview of your template on one side and your spreadsheet columns on the other. Your job is to connect the dots. You'll literally drag your "FirstName" column and drop it right onto the "Guest_Name" text layer in your design. It's that simple.
This visual approach takes all the guesswork out of the equation and gives you confidence that your data is flowing exactly where you want it.
Setting Up Fallbacks for Flawless Output
So, what happens if some cells in your spreadsheet are blank? It happens. Maybe you're missing a profile picture for a few contacts or don't have a discount code for everyone. Without a backup plan, you could end up with awkward blank spots or broken images.
This is where setting up fallbacks—or default values—is absolutely critical. A good automation tool will let you define a default for any dynamic layer in your design.
- For Text: If a "FirstName" cell is empty, you can set a fallback like "Valued Customer" to pop in instead.
- For Images: If a "ProfileImageURL" is missing, you can have it default to your company logo or a generic avatar.
This simple step ensures every single image that gets generated looks complete and professional. It’s your safety net against looking sloppy because of a few gaps in your data.
Think of data mapping and fallbacks as your quality control system. Taking a few extra moments here guarantees a polished, consistent result across hundreds or even thousands of images, preventing embarrassing errors before they happen.
The process flow below shows how different data sources, from a basic CSV to a more complex API, can feed into the automation engine.
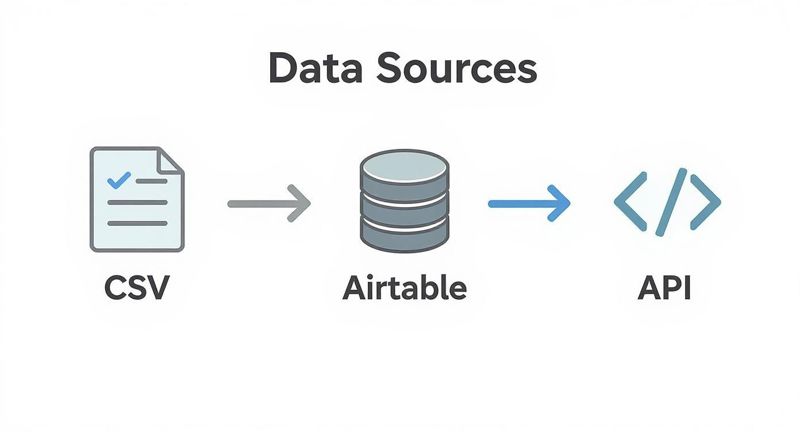
This visual really highlights the flexibility of a modern Canva automate maker. You can start small with a spreadsheet and scale up to sophisticated, real-time data integrations as your needs grow.
Once your data is mapped and your fallbacks are locked in, the only thing left to do is hit "Go." You'll press the "Generate" button and watch the system work its magic, creating a unique image for every single row in your spreadsheet. In just a few minutes, you’ll have a full set of personalized visuals, ready to launch.
If you're thinking about how this fits into your wider marketing efforts, exploring different Campaign Automation strategies can give you the bigger picture. The impact of these workflows is massive. In fact, automation has been a huge driver in content creation, with Canva users generating over 35 billion designs in 2025 alone. That number speaks for itself.
With your images generated, you're all set to deploy them across your marketing channels and give every recipient a truly personal experience.
Leveraging the API for Real-Time Image Generation
While no-code workflows are fantastic for batch projects, the API is where a Canva automate maker really shines and scales. This is a more developer-focused path that lets you bake image generation right into your website, app, or internal systems for some seriously powerful, on-demand personalization.
Think of it as the difference between preparing a batch of images for a campaign ahead of time versus creating one instantly, in real time, the moment a user takes an action. It completely changes the game.
Imagine a new user signs up for your platform and immediately gets a welcome email with a custom image featuring their name and profile picture. That’s the kind of magic the API makes possible.
Understanding the API Workflow
For a developer, the process is actually pretty straightforward. Instead of dealing with a CSV upload, your application simply sends an HTTP request to an endpoint. This request carries a JSON payload that holds all the instructions for creating the image.
This payload is essentially a recipe. It tells the image generation service:
- Which template to use: This is done with a unique template ID.
- What dynamic data to insert: These are key-value pairs that match the layer names in your template. For example,
"FirstName": "Maria"or"ProfileImageURL": "https://.../image.jpg".
The service then whips up the image on the fly and sends back a URL to the finished visual. Your app can grab that URL and use it right away—embedding it in an email, showing it on a webpage, or saving it for later. The whole thing happens in seconds.
An API connection transforms your visuals from static assets into responsive, interactive parts of your user experience. It lets personalization happen at the exact moment it's most impactful, creating a far more memorable interaction.
Real-World API Use Cases
The possibilities here are huge, especially for businesses that need to deliver tailored communication on the spot. We've all seen the influence of platforms like Canva, which now holds a 12.47% market share in graphic design software and is used by 85% of Fortune 500 companies. That demand for high-quality, scalable visual content at the corporate level is precisely what an API helps you deliver. If you're curious, you can discover more insights on Cropik.com about Canva's market dominance.
Here are just a few scenarios where an API-driven approach is a clear winner:
- Automated Social Previews: You can generate unique Open Graph images for every single blog post or product page dynamically. Just pull the title and featured image into a branded template automatically.
- Personalized E-commerce Banners: Imagine showing a customer a website banner that features the last product they looked at. It’s a simple but powerful way to nudge them toward completing a purchase.
- Instant Event Tickets: When someone signs up for your webinar, you can instantly generate a personalized ticket with their name and a unique QR code. No more manual work.
For anyone ready to jump in and start building, our complete API integration tutorial has all the detailed steps and code examples you'll need to get your first real-time image generation workflow off the ground. This is the ultimate in flexibility, letting you plug a powerful Canva automate maker directly into the heart of your digital products.
Common Questions About Canva Automation
Jumping into a new workflow always brings up a few questions. Using a Canva automate maker is a game-changer, but you might run into a couple of head-scratchers when you're just starting out. I've put together this quick-reference guide to tackle the most common issues people run into.
Getting these things cleared up from the start means you can get past any little hurdles and stay focused on what matters: creating incredible, personalized visuals at scale.
Can I Use Custom Fonts and Pro Elements?
This is usually one of the first things creative teams want to know. The short answer is yes, but there’s a key detail to keep in mind. If you design your template with Canva Pro elements or your own custom uploaded fonts, the automation tool will render them perfectly in the final images.
The thing to watch out for is licensing. Make sure your font licenses allow for server-side or automated use, as that's often different from a standard desktop license. With Canva Pro elements, the images you generate are all yours to use, but you can't extract or resell the individual elements themselves.
What If My Data Doesn't Fit Properly?
It’s a classic problem: you've got everything hooked up, but some names are getting cut off or the text is wrapping in a weird way. This almost always comes back to how the template was designed in the first place. The best solution is to build flexibility right into your design from the get-go.
Here are a few tips I've learned from experience:
- Be Generous with Text Boxes: Always make your text containers wider than you think you'll need. This gives longer names or headlines plenty of breathing room.
- Align to the Middle: Set your text to be middle-aligned vertically. That way, if a long name wraps onto a second line, it still looks centered and intentional.
- Test with the Extremes: When you're designing, don't just use a simple placeholder like "John." Throw a long name like "Christopher Montgomery-Smythe" in there to see how your layout really holds up under pressure.
The trick is to design defensively. Think about the messiest data your spreadsheet could possibly throw at you and build a template that's robust enough to handle it without breaking. That little bit of foresight makes all the difference.
Handling Errors in Data or Missing Images
So, what happens if a URL in your spreadsheet is broken, or a cell you were counting on is just empty? If you don't have a backup plan, you'll end up with ugly blank spots or error icons in your images. This is exactly why setting up fallbacks is so important.
A good automation tool will let you set a default value for every dynamic piece of your template. If an image URL is missing or broken, you can have it automatically use your company logo or a generic brand pattern instead. If the "FirstName" field is empty, it could default to something like "Valued Customer." Taking a minute to set these defaults is your safety net, making sure every single image looks polished, no matter how messy the source data is.
Ready to stop creating visuals one by one and start automating? With OKZest, you can generate thousands of personalized images from a single template, using either our simple no-code tool or our powerful API. Start for free on okzest.com and see how easy it is.