When you’re creating a certificate, you're doing more than just stamping a name on a template. You're aiming to reinforce your brand, establish credibility, and provide a secure, valuable credential. This means moving beyond the basics.
With a tool like OKZest, you can design professional templates, customize them deeply, and automatically generate them for large groups. It’s about transforming a simple piece of paper into a powerful statement of accomplishment.
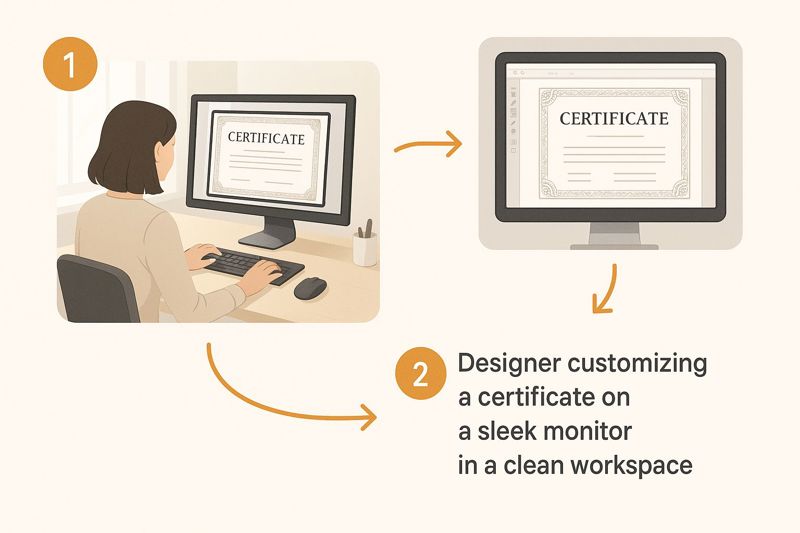
Why a Great Certificate Is More Than Just Paper

Before we jump into the "how," let's talk about the "why." A polished, professional certificate is far more than a simple acknowledgment; it's a powerful statement of value. It serves as tangible, shareable proof of new skills, boosting credibility for both the individual and your organization. When you create a certificate, you're not just making a document—you're crafting a lasting impression.
This tangible reward reinforces your brand’s authority every time it's displayed on a desk or shared on professional networks like LinkedIn. A well-designed certificate acts as a silent ambassador, broadcasting your organization's commitment to quality.
Reinforcing Value and Credibility
In a world where skills and qualifications are always under a microscope, a certificate provides instant validation. It’s a verifiable record that gives recipients confidence in their new abilities and a concrete tool to help them advance their careers. For you, this builds a reputation for creating meaningful, industry-recognized learning experiences.
The demand for this kind of professional validation is massive and still climbing. The global business certification market, valued at $52.12 billion in 2025, is projected to keep growing steadily. This boom is fueled by the ever-increasing need for formal credentials to ensure competence and safety across countless industries.
To make a certificate that truly carries weight, you need to include the right elements. Each component plays a specific role in building its authority and professional look.
Anatomy of a Credible Certificate
| Element | Its Role in Building Credibility |
|---|---|
| Organization's Name & Logo | Immediately establishes the issuing authority and reinforces your brand. |
| Recipient's Full Name | Personalizes the achievement and makes it specific to the individual. |
| Title of Achievement | Clearly states what was accomplished (e.g., "Advanced SEO Specialist"). |
| Date of Issuance | Provides a timestamp for the achievement, adding context and relevance. |
| Unique Certificate ID | A crucial element for verification, preventing fraud and confirming authenticity. |
| Authorizing Signature(s) | Lends official weight and a human touch from key figures in the organization. |
| Description of Skills | Briefly details the competencies gained, adding substance beyond the title. |
Getting these details right transforms a generic award into a trusted credential that people are proud to show off.
A thoughtfully designed certificate is a powerful marketing asset. It doesn't just recognize an individual's achievement; it showcases your organization's standards and builds a visual legacy of success that resonates with future learners and partners.
The Shift to Secure Digital Credentials
The move to digital-first everything has completely changed how we think about credentials. A static PDF just doesn't cut it anymore. Today’s environment demands certificates that are not only visually appealing but also secure and easy to verify.
This is where modern tools are essential. Platforms like OKZest help you create a certificate that is both authentic and dynamic. You can embed unique identifiers or QR codes that link back to a verification page, instantly confirming the credential's legitimacy. It’s about building an unbreakable layer of trust.
Designing a Standout Certificate Template

This is where your brand’s identity really shines. When you craft a certificate template in the OKZest design canvas, you’re not just making something that looks nice. You're building a reusable asset that feels custom-made every single time. A solid template saves countless hours and reinforces your professionalism with every award you issue.
The aim is to create a master design that's both beautiful and functional. It's a balancing act between visual appeal and the official design cues that give a certificate its authority. Think of it as the blueprint for all your future recognition efforts.
Balancing Brand and Authority
First things first, you need to infuse your brand's personality into the design. Start with your color palette and typography, making sure they’re consistent with your organization’s overall branding. A certificate that feels disconnected from your visual identity just won’t have the same impact.
But brand consistency shouldn't sacrifice authority. A certificate needs to look official. That means using clean layouts, readable fonts, and plenty of white space to avoid a cluttered look. For instance, you might use a bold, serif font for the recipient's name to give it prominence, but stick with a clean sans-serif for the descriptive text.
A great certificate design finds the perfect middle ground. It should be instantly recognizable as coming from your brand, yet formal enough to be proudly displayed as a credible achievement.
Strategically placing your core elements is crucial. The OKZest canvas lets you position placeholders for dynamic content—the details that change for each recipient. These are the fundamental building blocks of your template.
Positioning Core Certificate Elements
Certain elements are non-negotiable for any professional certificate. Where you put them determines the visual flow and hierarchy, guiding the viewer's eye to what matters most.
Here are the essential components to position in your template:
- Your Company Logo: This is your stamp of authority. It’s typically placed at the top center or top left.
- Recipient Name: This is the star of the show. Use a large, prominent font and center it to make the recipient feel seen and celebrated.
- Achievement Title: Clearly state what was accomplished (e.g., "Masterclass Completion"). This usually goes right below the recipient's name.
- Issuance Date: This adds a crucial timestamp to the achievement. It's often placed in a lower corner.
- Unique Certificate ID: A small but vital detail for verification, often placed discreetly at the bottom. This is essential when you want to create a certificate that’s secure and verifiable.
By setting these up as dynamic fields in OKZest, you create an incredibly robust template. You design it once, and the system automatically populates the personalized details for hundreds or even thousands of recipients. It’s a powerful approach that saves a massive amount of time.
Ultimately, your template is a strategic tool. It combines your branding with the timeless structure of an official document, creating a powerful and scalable way to acknowledge achievement.
Putting Your Certificate Generation on Autopilot
Once you have a polished template, you can shift from tedious manual work to smart automation. This is where OKZest really flexes its muscles—generating certificates at scale by pulling in dynamic data. The aim is to turn a repetitive, time-consuming task into a completely hands-off, automated workflow.
Forget about creating certificates one by one. Instead, you can hook up a data source directly to your master template. This could be a simple spreadsheet of your course graduates, a list of webinar attendees, or even a live connection to your application's API. This step is what bridges the gap between your recipient data and your beautiful design.
The image below gives you a clear picture of this streamlined flow, from a single data source to a finished, personalized certificate.
As you can see, a single, well-designed template can be paired with a data source to automatically pump out unique certificates, with each one perfectly customized.
Mapping Data to Your Dynamic Fields
The secret sauce to this automation is mapping. You're essentially telling OKZest which column in your data source should connect to each dynamic field in your certificate template. It’s a lot like doing a mail merge, but for images.
For example, a column in your spreadsheet labeled FullName would be mapped to the recipient's name field on the certificate. Another one called CourseTitle would automatically fill in the achievement description. It's this simple but powerful connection that makes sure every single detail is accurate and personalized.
Think about these common scenarios:
- Webinar Completion: Use a list of attendees from your webinar platform to issue certificates of attendance. Just map the
AttendeeNameandWebinarDatecolumns. - Employee Training: Take a spreadsheet from HR that tracks completed training modules. You can map
EmployeeName,ModuleName, andCompletionDate. - Course Graduates: Export a list from your learning management system (LMS) to feed the system. Simply map
StudentNameandCourseName.
This ability to pull data from different places is what makes scaling your recognition efforts possible. For those who want to achieve true automation and personalization on their websites, mastering Elementor dynamic content is a great skill to develop, as it follows a similar principle of populating unique data—a concept that mirrors what we’re achieving here with images.
A Real-World Automation Scenario
Let's walk through a real-life example. Imagine you just wrapped up a successful webinar with 500 attendees. You promised every single one a personalized certificate of completion. Creating 500 individual certificates by hand? That would take days and be a recipe for typos and mistakes.
With an automated workflow, the process looks completely different.
First, you export the attendee list from your webinar software into a simple CSV file. This file will have columns for each person's full name and maybe the event date.
Next, you connect this CSV file to your certificate template inside OKZest. You map the 'Full Name' column from your file to the recipient name placeholder on your design. With a single click, the system gets to work.
In just a few minutes, OKZest generates 500 unique, personalized certificates. Each one has the correct attendee's name placed perfectly, looking as though you spent hours designing it just for them.
This isn't just about being fast; it's about precision and scale. What used to be a logistical nightmare is now a simple, repeatable process. You can apply this same logic to any situation, whether you need to create a certificate for ten employees or ten thousand event participants. This is how you put your certificate generation on true autopilot, freeing you up to focus on creating more great experiences for your audience.
Of course. Here is the rewritten section, crafted to sound like it was written by an experienced human expert, following all your specified requirements.
Getting Your Certificates Seen: Sharing and Embedding
A beautifully designed certificate is one thing, but its real power comes alive when it’s shared, displayed, and easily verified. Once you’ve created your certificate in OKZest, the final piece of the puzzle is getting it to your recipients in a way that feels both immediate and meaningful. This is where OKZest’s unique URLs come in—they turn a simple image into a dynamic, shareable asset.
Instead of just attaching a PDF to an email and hoping it gets opened, you can embed the personalized certificate image directly into the body of your message. By using a simple merge tag, each person sees their own unique certificate the second they open the email. That instant "wow" factor makes the achievement feel more tangible and special, and it’s a great way to boost engagement from the get-go.
Weaving Certificates into Your Platform
Beyond email, one of the most powerful ways to deliver lasting value is to display credentials right on a user’s profile page within your app, course platform, or community portal. Think of it as creating a permanent "trophy case" that users can revisit and others can see, which builds a strong sense of accomplishment and social proof.
For example, imagine a student completes a course on your platform. Instead of just getting an email, their new certificate automatically appears on their public profile. This doesn't just reward the student; it also subtly markets the value of your courses to anyone visiting the site. And the best part? Implementing this with OKZest is surprisingly straightforward.
The goal here is to make the certificate an integrated part of the user experience, not just a forgotten attachment. When credentials are woven into your platform, they become a living record of a user's journey with your brand.
This kind of integration uses the same unique image URL you’d use for an email. Your developers can simply embed this URL into the user profile template. Because the URL is dynamic, it always pulls and displays the correct, personalized certificate for that specific user. Simple as that.
Practical Tips for a Smooth Hand-Off
To make sure your certificates land perfectly, you need to think about how and where they’ll be viewed. An embedded certificate has to be accessible and, crucially, verifiable to be seen as legitimate.
Here are a few tips I've learned from experience:
- Make Sharing Effortless: Place a "Share" button right next to the embedded certificate. This should let users instantly post it to places like LinkedIn, X (formerly Twitter), or other relevant social networks.
- Link to a Verification Page: The certificate image itself should be a clickable link. Have it point to a dedicated verification page that confirms the credential's authenticity. This adds a critical layer of security and trust.
- Prioritize Mobile: Your user profiles and emails must be responsive. Make sure the certificate image looks great and scales properly on every device, from a big desktop monitor to a smartphone screen.
This focus on secure, verifiable delivery isn’t just a nice-to-have; it's a core principle in the world of digital credentials. You can see this trend everywhere online. For instance, the SSL certification market is projected to skyrocket to nearly $9.6 billion by 2032. This growth is fueled by a massive rise in cybersecurity awareness—a principle that applies just as much to professional credentials as it does to websites. You can dive deeper into these trends in this detailed report on SSL certification growth from DataIntelo.
By planning out the delivery and display ahead of time, you ensure every certificate you create isn't just a pretty picture, but a useful and credible asset for your recipients.
Pro Tips for Creating Unforgettable Certificates
Alright, let's take your certificates from good to genuinely unforgettable. Getting beyond a standard design just takes a few extra touches—the kind of pro moves we've picked up from helping people create a certificate that really makes an impact.
These tips will help you craft a final product that’s not just beautiful, but also secure, credible, and truly professional.
It all starts with high-resolution graphics. This is non-negotiable. You want your digital certificates to be print-perfect, with sharp text and crisp logos, no matter how someone views them. Nothing says "amateur" faster than a pixelated logo or blurry text when a recipient proudly prints their award.
Fortify Trust with Dynamic Security
In a world where digital credentials have to be trustworthy, adding security features is a must. A simple but incredibly effective way to do this is by including a dynamic QR code on your certificate.
With OKZest, you can easily set up this QR code to link straight to a live verification page. When someone scans it, they land on a URL that confirms the recipient’s name, the achievement, and when it was issued. This one move massively cuts down the risk of fraud and instantly builds a layer of trust.
Think of a QR code as more than just a convenience; it's a modern-day seal of authenticity. It tells recipients and potential employers that this isn't just a pretty picture—it's a verifiable, legitimate achievement backed by your organization.
This practice reflects a bigger trend. Just look at the global ISO certification market—it's projected to jump from USD 16.14 billion in 2024 to an estimated USD 57.48 billion by 2033. Why? Because the demand for verifiable, trusted standards is exploding. You can see more on these ISO market growth trends on Business Research Insights.
Optimize for Instant Gratification
Finally, let's talk performance. Your beautifully designed, secure certificate needs to load instantly, whether it's embedded in an email or viewed on a webpage. Slow-loading images kill the excitement and can make your whole communication feel clunky.
Here are a few best practices we live by for image optimization:
- Choose the Right Format: Use modern formats like WebP whenever you can. They offer fantastic quality at much smaller file sizes.
- Compress Smartly: Use tools to compress your background images and logos before you upload them to your template. Shaving off even a few kilobytes can make a huge difference.
- Balance Resolution and Size: High resolution is key for printing, but you need to find that sweet spot that keeps file sizes manageable for quick loading online.
By weaving together sharp design, solid security, and smart optimization, you don’t just create a certificate; you create an experience.
For more ideas on crafting the perfect design, check out our guide on using personalized certificate templates to make your awards shine.
Common Certificate Creation Questions Answered
When you start digging into creating certificates, a few practical questions always pop up. We get them all the time. This section is all about tackling those common hurdles head-on with clear, straightforward advice to get you moving.
The idea is to clear up any confusion around things like keeping your brand looking sharp, dealing with huge lists of recipients, and, most importantly, making sure your certificates are trustworthy.
Can I Use My Own Fonts and Logos?
Yes, you absolutely can. Any modern certificate tool worth its salt should never box you into a generic, cookie-cutter design. Deep customization is key, and with a platform like OKZest, you have total control over how your credentials look and feel.
You can easily upload and use your brand’s specific assets, including:
- Custom Fonts: Make sure the typography is a perfect match for your brand guidelines.
- High-Resolution Logos: Drop in your official logo for instant brand recognition.
- Digital Signatures: Add an authenticating signature from a CEO, instructor, or another key person in your organization.
This means every single certificate you send out is a true extension of your brand, looking professional and consistent every time. It’s all about making your certificate unmistakably yours.
What’s the Best Way to Handle Hundreds of Certificates?
When you're dealing with a large batch—say, for a webinar, a big online course, or a company-wide training—automation is your best friend. Trying to create hundreds of certificates by hand isn't just painfully slow; it's a recipe for embarrassing and costly mistakes, like typos in names or the wrong dates.
The most efficient way to tackle this is to let a data source do the heavy lifting.
Just prep a simple spreadsheet (a CSV file works perfectly) with all your recipient data neatly organized in columns—one for
FullName, another forCourseName, and so on. Connect that file to your template in OKZest, and you can generate a unique, personalized certificate for every single person on your list with one click.
This automated workflow gets rid of all that tedious manual entry, ensures everything is accurate, and turns what could be a multi-day headache into a job that takes just a few minutes.
How Can Recipients Prove Their Certificate Is Authentic?
Authenticity is everything. In a world where digital documents can be faked in a heartbeat, you have to give people a clear way to verify that a credential is legit. It’s fundamental for building trust. The best way to do this is by adding a dynamic element that links back to a single source of truth.
A fantastic way to achieve this is by embedding a dynamic QR code right onto your certificate template. You can set up this code to link to a dedicated verification page on your own website. When someone scans it, the page can instantly show the recipient's name, their specific achievement, and the date it was issued. This provides immediate, trustworthy proof that the certificate is real and hasn't been tampered with. It's a simple feature that adds a powerful layer of security.
Ready to stop wrestling with manual awards and start generating beautiful, secure, and on-brand certificates automatically? With OKZest, you can put your entire certificate creation process on autopilot. Explore OKZest today and see just how easy it is to create professional credentials at scale.