If you want to create an email image that actually boosts engagement, you have to move past the same old static visuals. It's all about creating dynamic, personalized content that speaks to each individual subscriber. This means using a specialized tool or API to drop unique data—like a first name or a recent purchase—right into the image itself, turning every email into a one-to-one conversation.
Why Personalized Images Win in the Inbox
Let's be honest, a crowded inbox is full of noise. Generic stock photos just add to the clutter. To really grab someone's attention, your visuals need to connect with them on a personal level, and dynamically generated images are the perfect way to do that. This isn't just about slapping a name on a picture; it's about crafting a relevant, memorable experience that a standard email blast can't even touch.
Think about the psychological impact for a second. When a customer sees an image with their name beautifully woven into a product photo or an event ticket, it creates an instant sense of recognition. That small touch transforms a mass-market email into a personal message, making them feel seen and valued. This is a core part of building an effective email marketing strategy that actually nurtures leads and drives people to act.
The Power of Personalization in Numbers
The data doesn't lie: visual, personalized content blows generic approaches out of the water. Emails that include images see open rates of 21%, a nice jump from the 15% for text-only campaigns.
But when you personalize those visuals, the results get even better. For instance, when Virgin personalized images based on subscriber data, they saw a massive 29% increase in their click-through rate.
These numbers point to a simple truth: personalization isn't a gimmick. It’s a serious engagement driver. Dynamically generated visuals help your brand:
- Cut Through Inbox Clutter: A unique, personal image stands out immediately against a sea of boring text and bland photos.
- Boost Brand Recall: Memorable content makes your brand stick in your subscriber's mind long after they’ve closed the email.
- Improve Click-Through Rates (CTR): When an image is directly relevant to the subscriber, they are far more likely to click and see what you're offering.
The core idea is simple: stop sending emails to a list and start talking to individuals. When you generate an email image tailored to each person, you’re not just sending a promotion; you’re building a relationship.
Ultimately, using personalized images is a strategic move that fosters real connections with your audience. It shows that you understand their interests and are invested in giving them a better experience—which is exactly what builds long-term customer loyalty and drives conversions.
Your First Personalized Image with No-Code Tools
You don't need to be a developer to create stunning, dynamic visuals for your emails. Thanks to no-code platforms, anyone can generate email image assets personalized for every single person on their list. These tools give you a simple drag-and-drop editor, turning what used to be a complex technical job into something you can master in an afternoon.
The concept is pretty simple. You start with a base image—your background—and then stack layers on top of it. Some layers might be static, like a headline, while others are dynamic. These dynamic elements are the cool part; they can change based on your data, pulling in a customer's first name, their company logo, or even a unique QR code.
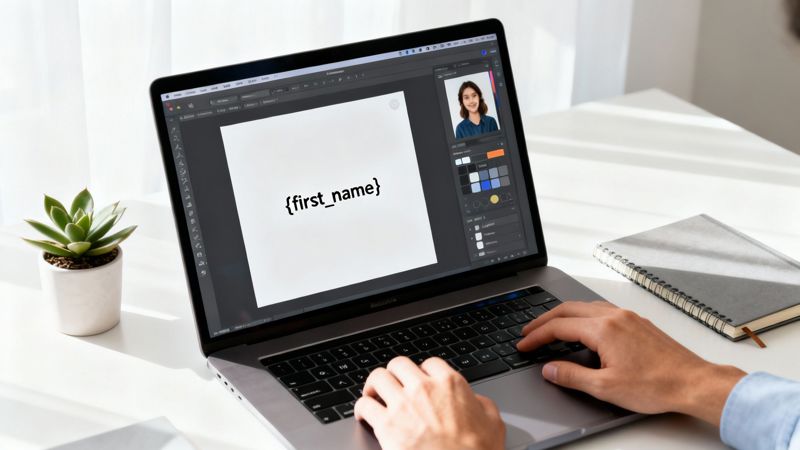
Here's a look at a typical no-code editor. As you can see, the user is adding a dynamic "First Name" layer to a welcome email banner. It’s a great example of just how easy it is to place and style personalized text right on top of an image, creating a template you can reuse again and again.
Building Your Dynamic Template
First things first, you need to choose your foundation. This is the static background image that all your personalized versions will be built from. It could be anything—a product photo, an event banner, or just a simple graphic with your brand colors.
Once you have your background image uploaded, the real magic begins with layers. Think of them like transparent sheets you can place on top of your image, with each one holding a different element.
- Static Text Layers: Use these for text that never changes, like "Welcome Back!" or "Your Weekly Update."
- Dynamic Text Layers: This is where the personalization happens. You add a text layer, but instead of typing a name, you use a placeholder like
{{first_name}}. This tells the tool where to slot in the unique data for each recipient. - Image Layers: You can even overlay other images, such as a company logo or a profile picture. These can be dynamic, too!
Imagine a real estate agent using this. They could start with a beautiful photo of a house and add dynamic layers for the recipient's name ("Hey, Sarah!"), the property address, and even their own headshot, all pulled from their CRM. If you're looking for a simple way to create professional agent photos, many of the best AI headshot generators can give you great-looking options to work with.
Defining URL Parameters for Personalization
After you've designed your template, the no-code tool gives you a single master URL. This link is the key to generating all your image variations. You create different versions just by adding parameters to the end of this URL.
Each dynamic layer you created corresponds to a specific URL parameter. So, if your dynamic text layer used {{first_name}}, you’d just add &first_name=Jessica to the URL to create an image personalized for Jessica.
Your master URL is the blueprint. The parameters you add are the specific instructions that tell the blueprint how to customize the final image for each person. It’s a powerful one-to-many system that you control with simple text.
This approach is incredibly flexible. You can even change things like fonts, colors, and text size directly through URL parameters without ever having to go back into the editor. For more advanced ideas on design automation, check out our guide on how you can automate Canva designs to streamline your broader marketing efforts.
Testing and Finalizing Your Image
Before you push this live in a campaign, you absolutely have to test it. No-code tools usually have a live preview where you can plug in different values for your parameters and see the image update in real-time.
This is your chance to catch common problems:
- Long Names: How does the design handle "Christopher" versus "Alex"? Does the text wrap correctly or shrink down?
- Missing Data: What happens if you don't have a first name for someone? You need a fallback value, like "Friend," so you don't end up with an awkward blank space.
- Special Characters: Try out names with hyphens or apostrophes to make sure they show up properly.
Once you’re confident the template is solid, your dynamic URL is ready to go. The next part is plugging this URL into your email service provider using their merge tags, which we'll get into later. This is the final step that connects your slick, personalized design to your subscriber data, making sure every single person gets their own unique visual.
Automating Image Generation Using an API
While no-code tools are fantastic for getting your feet wet, an API (Application Programming Interface) is the real powerhouse for scaling up your personalization. If you need to generate email image assets in large volumes and weave them directly into your existing workflows, an API is your best bet. It lets you programmatically create one-of-a-kind visuals for thousands—or even millions—of users on autopilot.
The main advantage here is a direct, automated connection. You can link the image generation process right into your CRM, user database, or e-commerce platform. The moment a new user signs up, buys something, or hits a milestone, your system can fire off an API call to create the perfect image for their next email.
The API-Driven Workflow Explained
When you get down to it, the process is pretty simple. Your server or marketing automation tool sends a request to the image generation API, packed with specific user data. The API takes that data, applies it to a template you’ve already designed, and instantly sends back a unique URL for the new image.
This all happens in the blink of an eye, enabling real-time personalization that can handle massive scale. For instance, a travel company could automatically generate a "Welcome Aboard" image with the customer's name, destination, and flight date right after they book.
The real magic of an API is its ability to turn raw data into compelling visuals on the fly. It transforms static information sitting in your database into dynamic, engaging content that elevates the customer experience—all without anyone lifting a finger.
If you want to get into the nitty-gritty of the technical side, our deep dive on how to use an API to create a dynamic image breaks down the entire process step-by-step. This approach ensures every email feels like a personal conversation, crafted just for the person reading it.
Making Your First API Call
So, what does this actually look like? An API request is just a structured message you send to a server. This message holds all the info needed to generate the image, like which template to use and the dynamic data for the personalized bits.
Most image generation services rely on simple HTTP requests, which are straightforward to build in just about any programming language. Let’s walk through a common example using cURL, a handy command-line tool for web requests.
Say you have a template for welcoming new users with a dynamic layer for their first name. The API call would look something like this:
curl -X POST "https://api.okzest.com/v1/images"
-H "Authorization: Bearer YOUR_API_KEY"
-H "Content-Type: application/json"
-d '{
"template_id": "tpl_12345abcde",
"modifications": [
{
"name": "first_name_layer",
"text": "Maria"
}
]
}'
In plain English, we're telling the API:
- Grab the template with the ID
tpl_12345abcde. - Inside that template, find the layer named
first_name_layer. - Change the text in that layer to "Maria".
The API will then process this, and in return, you’ll get a JSON response with a unique URL pointing to Maria's personalized welcome image, ready to pop into your email.
Integrating with Your Existing Stack
The biggest win with an API is its sheer flexibility. You can plug it in anywhere in your tech stack that can make an HTTP request, opening up a whole world of automation possibilities.
- Email Service Providers (ESPs): More advanced platforms like Klaviyo or Customer.io with scripting capabilities can make API calls directly from their campaign builders.
- Customer Relationship Management (CRMs): You can trigger image generation automatically when a customer's record is updated in a CRM like HubSpot or Salesforce.
- Backend Systems: Embed image creation right into your user onboarding flows or e-commerce transaction confirmations from your own servers.
This programmatic approach means your personalization isn’t just powerful—it's also efficient and built to scale. As your user base grows, your ability to generate email images grows right along with it, making sure every single customer gets a unique and relevant experience.
Getting Your Dynamic Images into Email Campaigns
Okay, you've got your dynamic URL. Now for the fun part: actually getting it into your emails so each subscriber sees their own personalized visual. This is where it all comes together.
The magic ingredient here is the merge tag (you might also see it called a personalization tag). Every Email Service Provider (ESP)—whether you're using Mailchimp, Klaviyo, or HubSpot—uses these as placeholders. When you send a campaign, the ESP automatically swaps the tag with the right subscriber data. Simple as that.
Here's a quick look at how that data flows from your database, through the API call, and ends up as a unique image for each person.
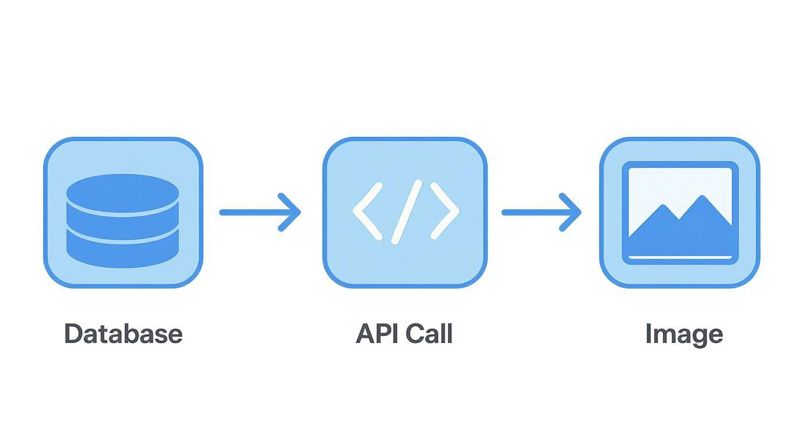
This whole process turns static data points into engaging visuals without you having to lift a finger for every single subscriber.
Building the URL with Merge Tags
Think of your dynamic image URL as a recipe. It has a base that always stays the same and a dynamic part that changes depending on who you're sending it to. All you need to do is replace the placeholder text in the URL with your ESP's specific merge tag.
Let’s say your image generation tool gives you a URL that looks something like this:
https://images.okzest.com/template_123?name=PLACEHOLDER
To get this working, you just find the merge tag for "first name" in your ESP and pop it in.
It would look a little different depending on your platform:
- Mailchimp:
https://images.okzest.com/template_123?name=*|FNAME|* - Klaviyo:
https://images.okzest.com/template_123?name={{ first_name }} - HubSpot:
https://images.okzest.com/template_123?name={{ contact.firstname }}
Once you paste this full URL into the image source field of your email editor, the ESP does the heavy lifting. As it sends the email out, it replaces *|FNAME|* or {{ first_name }} with the actual name from your contact list. Everyone gets their own unique version.
If you want to make those personalized visuals clickable, our guide on creating links from images has some great pointers.
Why You Absolutely Need a Fallback Image
So, what happens if you don't have a first name for someone on your list? If your URL is counting on that data, the link will be incomplete, and your subscriber will see that dreaded broken image icon. It looks unprofessional and instantly chips away at your brand's credibility.
This is why setting up a fallback image isn't just a "nice-to-have"—it's a must.
A fallback is simply a default, non-personalized image that shows up whenever the data you need is missing. It guarantees that everyone on your list has a clean, professional experience, even if you don't have complete data for them.
A broken image screams "our automation failed." A well-designed fallback image, on the other hand, maintains a seamless brand experience. It's a simple safety net that protects your campaign's integrity.
Most image generation platforms, OKZest included, let you set a default value right in the URL. Some ESPs even have built-in logic to show a completely different image block if a data field is empty. Always check your tool's documentation to find the best way to set this up.
Does This Stuff Actually Work?
The short answer is yes. Personalization has become a cornerstone of effective email marketing, and the results speak for themselves. Campaigns tailored to individuals consistently show a measurable lift in performance.
For instance, when Virgin used personalized images, they saw a 29% increase in click-through rates. Even small touches, like adding a photo to an email signature, can result in 32% more replies.
These numbers highlight a simple truth: when you talk to people like individuals, they're far more likely to listen. By embedding dynamic images, you're not just sending another email; you're creating a moment of personal connection that builds stronger relationships and drives real results.
Nailing the Details: Best Practices and Common Mistakes
Executing a campaign with dynamic images is all about the details. It’s the little things—like optimizing file sizes, writing great ALT text, and doing a ton of testing—that really separate a high-impact campaign from one that just falls flat. When you get these things right, your personalized visuals create the best possible experience for every single subscriber.
Think of this as your final checklist. It covers the essential do's and don'ts to help you sidestep common issues and make sure your campaign is a success from the get-go.
Performance and Accessibility Come First
Slow-loading emails are an engagement killer. Since dynamic images are generated in real-time, keeping them lightweight is non-negotiable. Always start with a web-optimized base image and make sure the final personalized version stays well under 100KB. This guarantees a snappy experience, especially for people checking their email on mobile data.
Just as important is accessibility. ALT text is the copy that shows up if an image doesn't load and is also what screen readers announce. Please don't leave it blank.
- Bad ALT text:
image.jpg - Good ALT text:
A welcome banner personalized for you, Sarah!
Writing descriptive, helpful ALT text makes sure your message lands with everyone, no matter how they access their email.
Always Design for Mobile
The vast majority of emails are opened on a phone, which means your personalized images have to look fantastic on a small screen. This is pretty straightforward: use large, legible fonts and steer clear of cluttered designs. If someone has to squint to read the text on their phone, you've lost them.
Before you even think about launching, test how your dynamic text wraps with different name lengths. A short name like "Jen" will look totally different from "Christopher," and your design has to handle both without breaking the layout.
The golden rule of email design today is mobile-first. If your personalized image isn't clear and compelling on a phone screen, it needs a rethink. A positive mobile experience is non-negotiable.
Test, Test, and Test Again Across All Major Email Clients
This is probably the most critical step, and ironically, it's the one people skip most often. An image that looks perfect in Gmail might be a broken mess in Outlook. Every email client renders HTML and images a bit differently, and those differences can cause some serious headaches.
Your testing process has to include the big ones:
- Gmail: The most popular client out there, and generally pretty good with image support.
- Apple Mail: Also very reliable, but it’s smart to check on both iOS and macOS.
- Outlook: This is the tricky one. Different versions behave in their own unique, and often frustrating, ways. This is usually where you'll find rendering problems.
The only way to be sure your dynamic images will show up correctly for everyone is to send test emails to real accounts on these platforms. To make life easier, use a tool like Litmus or Email on Acid to automate this and catch issues before your subscribers do.
Dodge These Common Personalization Pitfalls
Getting personalization right is a balancing act. It’s surprisingly easy to make a wrong move that undermines your hard work or, even worse, comes across as a bit creepy.
One of the biggest mistakes is over-personalizing. Using a first name is friendly and effective. Referencing someone’s exact location or recent browsing history right in an image? That can feel invasive. Stick to data points that genuinely add value to their experience.
Another classic error is forgetting the fallback. We've touched on this before, but it's so important it's worth repeating. If you have a missing name or data point in your list, it can lead to a broken-looking image. Always have a generic, non-personalized fallback image ready to go. It’s a simple safety net that protects your brand and ensures a good experience for every subscriber, no matter what.
Frequently Asked Questions
When you start generating dynamic images for your emails, a few questions almost always pop up. Here are some quick, straightforward answers to the things we hear most often.
Will Dynamic Images Slow Down My Email Load Times?
It’s a valid concern, but the short answer is no—not if you do it right.
Most image generation platforms, like ours, are built for speed. The key is to start with a web-compressed base image. As a rule of thumb, always aim for a final file size under 100KB.
Also, make sure the service you use has a Content Delivery Network (CDN). A CDN is crucial because it serves images from a server physically closer to your subscriber, which dramatically reduces load times, especially for a global audience.
What Happens If Subscriber Data Is Missing?
This is where having a good fallback strategy is non-negotiable. If a piece of data, like a first name, is missing from your list, the image URL won't be complete. That leads to that dreaded broken image icon.
You have a couple of solid options to prevent this:
- Set Default Values: You can often set a default value directly in the URL string, like "Friend," so the image still gets created correctly.
- Use Fallback Images: The most robust solution is to have a completely separate, non-personalized image ready to go. If the dynamic one fails for any reason, this one gets displayed instead.
Always have a fallback plan. A generic but professional image is infinitely better than a broken one. It protects the look of your campaign and your brand's reputation.
Are Personalized Images Supported in All Email Clients?
Yes, absolutely. This technique is surprisingly simple on the technical side. It just uses a standard HTML <img> tag, which is supported by pretty much every email client out there that can display images, including Gmail, Outlook, and Apple Mail.
The personalization magic happens on the server before the image is even sent. All the email client sees is a link to a regular image file. The only thing that can really go wrong is if the image URL is built incorrectly, which is another reason why testing and fallbacks are so important.
How Can I Measure the Impact of Using Personalized Images?
The best way to get real, hard data is through A/B testing. It cuts through the guesswork and shows you exactly how much of a difference personalization makes for your audience.
It's simple to set up a split test:
- Version A (The Control): This email uses your standard, generic image.
- Version B (The Variant): This one uses the new dynamic, personalized image.
Send each version to a different slice of your audience and keep a close eye on the click-through rate (CTR) and click-to-open rate (CTOR). This will give you concrete numbers on how much personalized images are boosting engagement and helping you connect with your subscribers.
Ready to create your own personalized images and see what they can do for your email engagement? With OKZest, you can automate the whole process with our powerful no-code editor and API. Get started for free today and see the difference for yourself.