You know what merge tags are, right? They’re the little placeholders like {{FirstName}} that let you pop a subscriber's name into an email. Now, imagine doing that with an image. That's the core idea behind image-based personalization for large scale email campaigns: sending every single person on your list a unique, visually engaging graphic within one email send. It's a powerful way to move beyond just using a name and create a truly individual experience that gets results.
Why Personalized Images Are a Game-Changer for Email Marketing
Let's be honest, inboxes are a battlefield. Generic, one-size-fits-all emails are the first casualties, easily ignored and quickly deleted. To actually forge a connection, you have to speak to subscribers as individuals, and visuals are the fastest way to do that. This is where image-based personalization for large scale email campaigns goes from a nice-to-have feature to a must-have part of your strategy.

Moving From Static Blasts to Dynamic Conversations
A typical static email campaign is a blunt instrument. Everyone gets the same hero image, the same promo graphic, the same call-to-action. It's efficient, sure, but it completely misses the mark on relevance.
Dynamic, personalized images flip the script entirely.
Imagine an e-commerce brand sending an email where the main image shows the exact product a customer was just looking at, maybe with their name elegantly overlaid. Or a travel company sending a "welcome back" email with a stunning image of the city the customer just visited. These aren't just emails anymore; they're personal conversations.
The core idea is simple: If the image in an email is created just for me, I am far more likely to pay attention to it. This shift from broadcasting to personalizing is what drives massive lifts in key performance metrics.
This level of detail makes subscribers feel seen and valued, building a much stronger brand connection than any generic campaign ever could. Platforms like OKZest make this surprisingly simple, acting as "merge tags for images" that let you insert unique visuals as easily as you would a first name. You can see this concept broken down in more detail here: https://okzest.com/blog/live-images-in-email-marketing.
The Hard Numbers: How Personalization Impacts Performance
The proof is in the data. Emails that incorporate personalized visuals see a 29% open rate and a 41% click-through rate (CTR). That's already impressive, but it gets better. Marketers who really lean into segmented and personalized campaigns report a jaw-dropping 760% increase in email revenue. This isn't just a minor tweak; it's a fundamental improvement in how we communicate.
To get the most out of this, it helps to build on a solid foundation. Understanding broader B2B email marketing best practices and then layering powerful visual personalization on top is how you create a strategy that not only grabs attention but drives serious growth.
Laying the Groundwork for Your Personalization Strategy
Jumping straight into designing personalized images without a clear strategy is a classic mistake. It's like setting sail without a map—you might end up with something that looks nice, but it won't get you where you need to go. To make image-based personalization for large scale email campaigns actually work, you need a solid foundation where every dynamic element has a clear purpose.
It all boils down to one simple question: What are we trying to accomplish here? Vague goals like "increasing engagement" just don't cut it. You need specific, measurable objectives that personalized visuals can directly impact.
First, Nail Down Your Campaign Goals
Before you even think about pixels and fonts, you have to define what a "win" looks like in real numbers. Are you trying to get more people to show up for a webinar? Or maybe your mission is to slash cart abandonment by showing shoppers exactly what they left behind.
Think about tangible, measurable goals like these:
- Driving repeat purchases: An e-commerce brand could show a customer’s loyalty points balance or their current rewards tier right on an image, giving them a nudge to use those perks on a new order.
- Boosting webinar sign-ups: An event organizer could display the registrant's name on a personalized ticket or show the local start time for the webinar based on their location.
- Improving customer onboarding: A SaaS company could send a welcome email with an image showing a personalized "next step," pointing the user to the most relevant feature based on their initial actions.
Defining these goals upfront turns your campaign from a fun creative project into a strategic business driver. It gives you the clarity to pick the right data points for the job.
Pinpoint Your Key Data Points
Once your objectives are crystal clear, it’s time to figure out which pieces of data will bring your personalized images to life. This is where you go beyond just plugging in a subscriber's first name. The real magic happens when you use deeper, more contextual information.
The best personalized images use data that reflects a customer's unique journey with your brand. It’s the difference between saying "Hello, John" and showing John the specific hiking boots he was looking at yesterday.
Take a look at the data you already have in your CRM or email platform. You probably have a goldmine of valuable info, such as:
- Purchase History:
last_purchase_item,purchase_date,total_spend - User Behavior:
last_login_date,viewed_product_category,webinar_attended - Loyalty Information:
loyalty_tier,points_balance,membership_anniversary - Geographic Data:
city,country,local_timezone
For example, a travel company could use destination_booked and travel_date to generate an image of a personalized itinerary. Suddenly, your email feels less like marketing and more like a genuinely helpful service—all powered by the data you already have.
Plan for Data Gaps and Fallbacks
Let's be realistic. In any big campaign, you’re going to have subscribers with missing or incomplete data. What happens when you don't have a first name or a recent purchase for someone on your list? A smart strategy always accounts for this with fallback images.
A fallback is simply a default, generic version of your image that shows up when the personalization data isn't there. This is non-negotiable for ensuring a professional experience for every single recipient. No one wants to see a broken image or an awkward empty space in your email.
For instance, if a {{FirstName}} field is empty, your fallback image might just say "A Special Offer Just for You" instead of showing a blank. Planning for these scenarios isn’t just a technical detail—it’s crucial for protecting your brand and delivering a seamless experience at scale.
Designing Scalable and Dynamic Image Templates
This is where the magic really happens—where your data strategy gets a face. Designing templates for image-based personalization for large scale email campaigns isn't just a design task. It's about engineering a flexible, robust system that can crank out millions of unique, on-brand visuals without a single hiccup.
Your goal is to create a core design that acts as a canvas for endless personalization. I like to think of it like building a car chassis. The frame, wheels, and engine are your static, foundational elements—your logo, brand colors, and the basic layout. The dynamic layers are the fun parts that change for every single person, like the car's paint job, the interior trim, or the name on the license plate.
Establish a Solid Base Design
Your base template is the non-negotiable foundation. It’s what guarantees brand consistency across every single image, no matter how many variations you’re pumping out. This is where you lock down the elements that absolutely cannot change.
Here's what goes into a strong base design:
- Brand Consistency: Your logo, primary brand fonts, and core color palette need to be baked right in. This ensures every image feels like it came from you, whether it’s going to a VIP customer or a brand-new subscriber.
- A Clear Visual Hierarchy: You have to guide the viewer's eye. The most important piece of info—like a personalized offer or a key stat—needs to be the most prominent. Use size, color, and placement to create an undeniable focal point.
- Readability First: Text on images can be a nightmare if you're not careful. Make sure your font choices and background colors have high contrast. It has to be legible on everything from a huge desktop monitor to a tiny phone screen.
A well-structured base is your quality control. It stops the dynamic elements from creating a chaotic, off-brand mess. A lot of teams I've seen get a huge head start when they figure out how to automate Canva designs, letting them build a central library of approved templates ready for data.
Defining Your Dynamic Layers
Once your base is locked in, it’s time to define the "smart" layers that will adapt to each subscriber's data. These are essentially placeholders in your design waiting to be filled automatically. For anyone new to this, it’s worth spending some time on the principles of mastering dynamic content.
For an e-commerce store, your dynamic layers might be:
- A product image layer: Pulling in the exact item a customer last viewed.
- A text layer for their name: Elegantly overlaid on the image.
- A text layer for a unique discount code: Tied to their user segment.
A fitness app, on the other hand, might have dynamic layers for:
- A progress chart background: Changing color based on goal completion.
- Numerical text layers: Showing
steps_taken,calories_burned, andactive_minutes. - An avatar image layer: Displaying the user's actual profile picture.
The key is to map each dynamic layer directly to a specific data field in your CRM or database. That direct connection is what makes the automation tick and guarantees the right information shows up for the right person.
Optimizing for Performance and Scale
When you’re sending emails by the thousands—or millions—image performance is everything. Slow-loading images don't just kill engagement; they can even hurt your deliverability. File size optimization is absolutely non-negotiable.
This kind of technical foresight has become critical over the last few years. Post-2019, image-based personalization just exploded in big campaigns, mostly thanks to AI and no-code tools making it easier. Back in 2019, only 38% of retail firms personalized emails based on past purchases. Now, that number has shot up to 60%, and they’re often using dynamic images to do it.
The data backs this up. Personalized emails now see 44.3% open rates compared to just 39.13% for generic ones.
Always, always aim for the smallest possible file size without a noticeable drop in quality. Use modern formats like WebP where you can, and make sure your image generation platform handles compression for you. Every single kilobyte you save gets multiplied across your entire send list, ensuring a fast, smooth experience for everyone. This is how you move from a cool idea to a flawless execution that actually works at scale.
Connecting Your Data to Generate Images Automatically
Once your dynamic image templates are designed, it's time to breathe some life into them with data. This is where the magic really happens. The whole point of image-based personalization for large scale email campaigns is the automation—linking your data sources directly to your templates to create unique visuals on the fly, without lifting a finger.
You don't need to be a hardcore developer to pull this off, either. There are really two main paths you can take to connect your data, and they cater to different skill sets and needs. Both get you to the same place: a seamless flow from your customer data to a finished, personalized image that’s ready for your email campaign.
This simple workflow shows the key stages of designing templates before you connect them to data, covering the base design, adding dynamic layers, and applying brand rules.
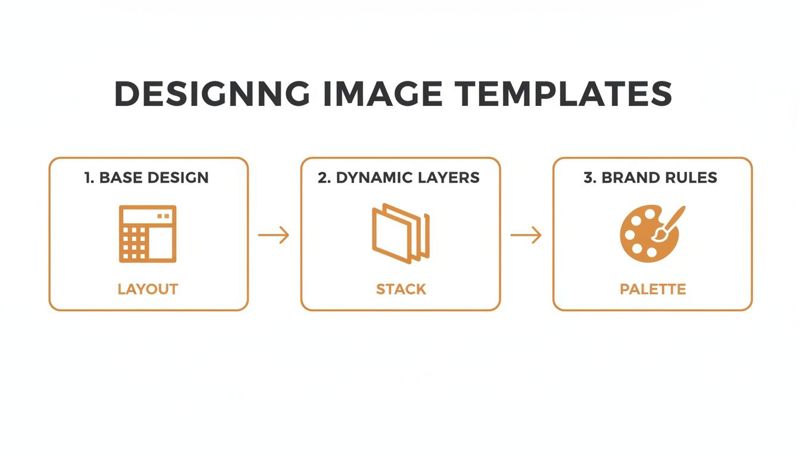
Following a process like this ensures every automated image starts from a solid, on-brand foundation before any personalization is layered on top.
The No-Code Approach for Marketers
For most marketers, consultants, and agencies, the easiest on-ramp is using no-code integration platforms. Tools like Zapier or Make (which used to be Integromat) are basically digital switchboards, letting you connect different apps without writing a line of code. They’re brilliant for creating powerful automation workflows that are surprisingly straightforward.
Let’s say you’re keeping a list of webinar attendees in a Google Sheet. With a tool like Zapier, you can set up a simple "zap" that works like this:
- Trigger: It keeps an eye out for any new row added to your Google Sheet.
- Action: It grabs the data from that new row (like
FirstName,LastName, andCompanyName). - Action: It sends that info over to your image generation platform (like OKZest) to fill out a pre-made certificate template.
- Action: The platform spits back a unique image URL, which Zapier then pops right back into a new column in your original Google Sheet.
This whole chain reaction happens automatically in the background. Suddenly, you have a column filled with personalized image URLs, ready to be mapped into your email service provider using merge tags. You can apply the exact same logic to connect your CRM, like HubSpot or Salesforce, to create slick, personalized sales assets or event tickets.
The no-code method really opens up automation to everyone. It lets marketing teams build and manage their own personalization workflows, which cuts down on the back-and-forth with developers and gets campaigns out the door way faster.
The API-Driven Workflow for Developers
For larger teams or businesses with more complex systems, an API (Application Programming Interface) offers a level of flexibility and power that no-code tools just can't match. An API is just a set of rules that lets software programs talk to each other directly. It's the engine that drives true real-time, on-demand personalization.
Using a dynamic image API for email marketing means you can pull data straight from your internal databases, proprietary software, or any other system you run. An e-commerce platform, for instance, could use an API to:
- Fetch a customer's current loyalty points balance.
- Grab the image of the last product they looked at.
- Generate a unique, time-sensitive coupon code on the spot.
All of this data gets sent to the image generation service through an API call, which instantly returns a personalized image URL. This can happen the very moment an email is opened, making sure the information is always 100% current. You can dig deeper into the technical nuts and bolts by checking out guides on using a dynamic image API for email marketing.
Understanding Key API Concepts
If you’re just dipping your toes into the world of APIs, here are a few terms that will help you find your footing:
- API Key: Think of this as your password. It’s a unique code that authenticates your request, proving you have permission to use the service.
- Endpoint: This is the specific URL you send your data to. For example, there might be one endpoint for creating images and a different one for getting a list of your templates.
- Parameters: These are the actual pieces of data you send in your request. They usually match up with the dynamic layers in your image template (e.g.,
name=Johnorproduct_image_url=...).
Whether you go with a no-code tool for its simplicity or an API for its raw power, the end goal is the same. You're building an automated bridge between your customer data and your visual content, laying the groundwork for personalization that can truly scale.
Deploying Personalized Images in Your Email Platform
You've designed the perfect image templates and your data is flowing smoothly. Now for the final, most critical step: getting those unique visuals into your actual emails. This is where the technical magic meets your marketing platform, turning a simple URL into a "wow" moment for every single subscriber.
Getting image-based personalization for large scale email campaigns to work really boils down to one simple concept you’re probably already familiar with: merge tags. If you've ever inserted a {{FirstName}} or {{City}} into an email, you're 90% of the way there. We’re just applying that same logic to the image source itself.

Integrating with Your ESP Using Merge Tags
Every major Email Service Provider (ESP) on the market supports merge tags, though the exact syntax can look a little different from one platform to another. The process is always the same: store the unique image URL in a custom field for each contact, then call that field using a merge tag inside the <img> tag in your email's HTML.
Let's imagine you've automated everything and now have a custom field called personalized_image_url for every person on your list.
Here’s how you’d actually put this into practice on a few popular platforms:
- Klaviyo: Their syntax would look like this:
<img src="{{ person.personalized_image_url }}">. - Mailchimp: The merge tag is a bit different, looking something like
<img src="*|IMAGEURL|*">, whereIMAGEURLis your merge field's name. - Instantly: This platform uses a clean, simple bracket format:
<img src="{{personalized_image_url}}">.
The trick is to drop that merge tag right into the src attribute of an image tag in your email’s source code. When you hit send, your ESP replaces that placeholder on the fly with the correct URL for each individual recipient. It’s that simple.
Tying this technical step to business impact is huge. Consider that 52% of consumers say they'll switch brands if they don't get personalized communication. Marketers who get this right are tapping into the 58% of all email revenue that comes directly from segmentation and personalization. You can dive deeper into these numbers by reading the full report from Porch Group Media.
Setting Up Robust Fallbacks and QA
When you're sending to thousands—or millions—of people, "hope" isn't a strategy. You absolutely need a bulletproof plan for when data is missing or something just goes wrong. This is where fallbacks and a rigorous Quality Assurance (QA) process are completely non-negotiable.
A fallback image is just a default, generic image that shows up if a subscriber’s personalized_image_url field is empty. Most ESPs let you set a default value for merge tags. Do it. This simple step ensures no one ever sees that dreaded broken image icon, which kills trust in an instant and makes your campaign look amateurish.
Your QA process needs to be meticulous. Don't just check if an image appears; test how it renders across a gauntlet of different email clients and devices.
- Email Client Testing: Use tools like Litmus or Email on Acid to preview your personalized images in Gmail, Outlook, Apple Mail, and others. Outlook, in particular, has a reputation for being finicky, so pay close attention there.
- Device Testing: Flip between various mobile phones (iOS and Android) and desktop screen sizes. You need to be sure your images are responsive and any text on them remains legible.
- Data Validation: Before a massive send, pull a random segment of your list and spot-check them. Do they have the right image URLs populated? Is the data correct?
A classic mistake is seeing the email look great in your own inbox and assuming it will look that way for everyone. It rarely does. Catching a rendering bug before it goes out to a million people is the name of the game.
To keep things on track, use a quick checklist before every major campaign launch.
ESP Integration Checklist for Personalized Images
Here's a straightforward checklist to run through, ensuring your dynamic images deploy smoothly within your Email Service Provider every time.
| Checklist Item | Key Consideration | Status |
|---|---|---|
| Custom Field Created | Is the field for the image URL created in your ESP for all contacts? | ☐ Complete |
| Merge Tag Syntax Confirmed | Have you verified the exact merge tag syntax for your specific ESP? | ☐ Complete |
| Image Tag Implemented in HTML | Is the merge tag correctly placed in the src attribute of an <img> tag? |
☐ Complete |
| Fallback Image Configured | Is a default image URL set up for contacts with no personalized data? | ☐ Complete |
| Link Tracking Verified | If the image is clickable, does the link work and is tracking enabled? | ☐ Complete |
| Multi-Client Test Passed | Has the email been tested in major clients (Gmail, Outlook, Apple Mail) via Litmus? | ☐ Complete |
| Multi-Device Test Passed | Does the image render correctly on both mobile and desktop screens? | ☐ Complete |
| Data Spot-Check Completed | Have you manually checked a few contacts to confirm their image URLs are correct? | ☐ Complete |
Running through these steps can feel tedious, but it's the difference between a flawless campaign and a support ticket nightmare.
Deliverability and Performance Considerations
Finally, never forget that every image adds "weight" to your email, which can affect both load times and deliverability.
Always keep your image file sizes as small as possible without a noticeable drop in quality. Using an image generation platform that automatically compresses and optimizes images is a massive advantage here.
Inbox providers like Gmail are watching how people interact with your emails. If images load so slowly that users get frustrated and delete the message before they even render, that sends a negative engagement signal. Over time, that can hurt your sender reputation.
On the flip side, fast-loading, highly relevant images boost engagement, delight your subscribers, and send all the right positive signals to the ISPs. By carefully managing these final deployment steps, you ensure your campaign doesn't just look incredible—it performs at the highest level, too.
Common Questions About Image Personalization
Jumping into image-based personalization for large-scale email campaigns is exciting, but it naturally brings up a few practical questions. It's smart to tackle these concerns head-on. That way, you can launch your campaigns with confidence, ready for any technical or strategic hurdles that might pop up.
Let’s walk through some of the most common queries we hear from marketers.
Do Personalized Images Slow Down Emails?
This is probably the number one worry, and it’s a valid one. Slow-loading emails are a killer for engagement and can even ding your deliverability.
The short answer is: it all comes down to your image generation provider. A modern platform built for this purpose won't slow you down. They use a Content Delivery Network (CDN) to serve images from a server that's geographically close to each recipient, which means lightning-fast delivery. They also handle all the backend work of compressing and optimizing images automatically, keeping file sizes tiny without you ever noticing a drop in quality.
How Do You A/B Test Personalized Images?
Testing is everything, but with dynamic visuals, you need to think a little differently. You're not just testing one static image against another; you're testing the idea behind the personalization.
Instead of a simple Image A vs. Image B test, your approach needs to be more strategic. Try framing your tests like this:
- Concept vs. Static: Pit your personalized image campaign against a control version that uses a generic, static image. This tells you the real-world impact of personalization itself.
- Data Point vs. Data Point: Test which piece of information resonates more. For example, does an image showing the recipient's name outperform one showing their loyalty points balance?
- Design vs. Design: Test two different personalized template designs against each other. Use the same data points in both, but see which visual style gets more clicks.
When you focus your A/B tests on the strategic "why" behind the personalization—not just the image itself—you get much deeper insights into what truly motivates your audience to act.
Can You Use These Images Outside of Email?
Absolutely. This is one of the most powerful and often overlooked benefits.
Once you have a system generating unique image URLs for each person, you can use them almost anywhere. Think about creating personalized direct mail postcards, dynamic banners for social media retargeting, or even custom visuals for in-app messages and chatbots.
Because the personalization is all handled in the image URL, the same asset can be repurposed for any digital channel that supports images. This lets you build a consistent, personalized experience across the entire customer journey, which reinforces your message and gets you the most bang for your buck on your creative work.
Ready to create stunning, personalized images that engage every single customer? OKZest provides the no-code and API solutions you need to automate your visual marketing at any scale. Start for free and see the difference.