No-code image design automation is a straightforward way to generate thousands of unique, personalized images without touching a single line of code. It works by connecting your design templates to data sources, like a customer list or product catalog, to create a hyper-relevant visual for every single person.
The easiest way to think of it is merge tags for images—a seriously powerful method for making every customer feel seen.
Why Personalized Visuals Are a Marketing Superpower
Let’s be real: generic marketing just doesn’t cut it anymore. When the average person is bombarded with thousands of ads every day, the only way to get their attention is to be undeniably relevant. This is where no-code image design automation comes in, helping you turn static, one-size-fits-all campaigns into dynamic, one-to-one conversations.
Personalized visuals are so much more than just dropping a first name onto a stock photo. Imagine an e-commerce store sending an abandoned cart email where the banner actually shows the exact product the shopper left behind. Or think about a virtual event where every single attendee gets a custom social graphic with their name and headshot, all ready to share.
These are the moments that create a genuine connection and, more importantly, drive people to act.
Cutting Through the Digital Noise
A packed inbox and an endless social feed are the biggest hurdles we face as marketers. Personalized images are the perfect pattern interrupt—they stop the scroll and grab the eye instantly. A visual that speaks directly to the recipient, maybe by mentioning their company, celebrating a milestone, or showing a product they'll love, feels less like an ad and more like a personal note.
I once worked with an email marketer who saw a 68% jump in click-through rates just by swapping out a generic header image. The new version dynamically pulled in the recipient's name and their local city skyline. That one simple change made the entire email feel more exclusive and tailored.
Forging Stronger Customer Bonds
Personalization is how you build relationships at scale. When a brand creates something just for you, it builds a sense of loyalty and appreciation that’s hard to replicate. This is especially true for customer-focused businesses in areas like coaching, consulting, or community management.
A personalized certificate of completion, a custom welcome image for a new member, or a unique “thank you” graphic for a donor—these small touches have an outsized impact on how customers see your brand. They prove you value them as an individual, not just a number on a list.
At its core, a solid image automation workflow is powered by a few key components working together. Understanding these pieces is crucial before you start building.
Core Components of a No Code Image Automation Workflow
| Component | Function | Example Application |
|---|---|---|
| Design Template | A master visual layout with dynamic layers for text, images, and other elements. | An event ticket template with placeholders for the attendee's name and a unique QR code. |
| Data Source | The source of information used to personalize the images (e.g., CSV, CRM, API). | A customer list from HubSpot containing names, company logos, and job titles. |
| Automation Engine | The software that connects the template to the data and generates the final images. | Using a tool like Zapier to trigger image generation whenever a new lead is added to a spreadsheet. |
| Delivery Channel | The platform where the personalized images are displayed to the end-user. | Embedding a personalized welcome image directly into an onboarding email via a Mailchimp merge tag. |
These elements form a simple but powerful system: your template provides the look, your data provides the substance, the engine does the work, and your marketing channels deliver the final, personalized experience.
This flowchart breaks down that process into three simple stages.
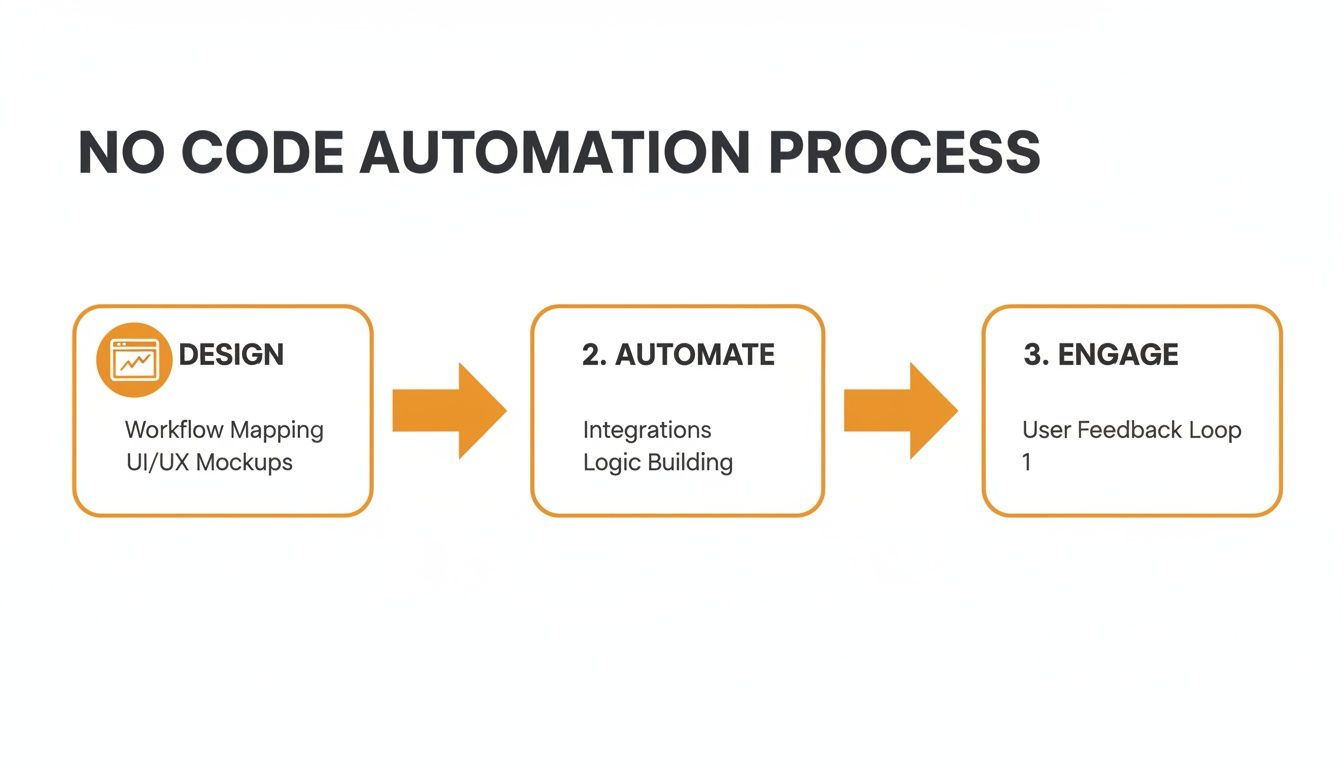
The entire workflow boils down to this: you design a template, automate it with your data, and then engage your audience with the personalized results. This is the strategy that helps you move beyond bland, generic content and build real connections that boost both engagement and revenue. Before we get into the "how," it's critical to understand this strategic "why."
Connecting Your Data to Bring Designs to Life
This is where the real magic happens. A great template is your canvas, but your data is the paint that makes each visual unique to the person seeing it. Connecting these two is how you turn a single, static design into thousands of personalized experiences.
Don't worry, this isn't about getting tangled up in complex code or database queries. It's really just about mapping the information you already have—like a customer's name, their company, or a product they just looked at—to specific layers inside your image template.

Choosing Your Data Connection Method
How you connect your data depends entirely on your campaign, your scale, and the tools you’re already comfortable with. There isn't one "best" way to do this; there's only the best way for your specific goal.
For simple, one-off campaigns, a CSV upload is usually the quickest path. Let's say you're an event organizer sending personalized "thank you" graphics to 500 attendees. You just need a spreadsheet with columns for First Name, Company, etc., which you can upload to your tool and generate all 500 images in minutes.
For more dynamic, real-time personalization, an API connection is the gold standard. This lets your different systems "talk" to each other automatically. An e-commerce brand, for example, could use an API to connect their Shopify store to an image template. When a customer abandons their cart, the system can instantly pull the product image and the customer's name into a personalized graphic for a follow-up email.
Pro Tip: Start with the simplest data connection that works. You can generate thousands of personalized images from a basic spreadsheet. You don't need a complex API setup on day one; you can always scale up as your campaigns get more sophisticated.
The huge growth in this space shows just how much demand there is. The no-code development platform market is projected to grow to $45.24 billion in 2026 and is expected to hit $102.57 billion by 2030. This boom is all about helping non-technical teams move faster—exactly what no-code image automation does for marketers and agencies. It proves the value of tools like OKZest that let you build powerful campaigns without waiting on developers.
The Critical Role of Fallback Rules
So, what happens when your data is incomplete? This is one of the most common—and most important—questions in any personalization project. A missing first name in your database can lead to an awkward "Hello, !" in an email, and the same thing can happen with your images.
This is where fallback rules are your safety net.
Think of fallbacks as predefined default values that your image will use if the primary data is missing. They’re absolutely essential for keeping everything looking professional and ensuring a good experience for everyone, no matter how clean your data is.
Here are a few practical examples of smart fallbacks:
- For a first name: If the
first_namefield is blank, the image could default to a general greeting like "Valued Customer" or simply "Friend." - For a company logo: If a contact’s logo isn't in your system, you can have the image show your own company logo instead, or just hide that layer completely.
- For a dynamic product: If you don't know a user's recently viewed item, the image could fall back to show your current best-seller.
Setting up these rules is a simple, one-time task that prevents countless little errors down the road. It ensures that even with imperfect data, every single image you generate looks polished and intentional. This is a fundamental part of successful image automation. For those using tools like Canva, knowing how to structure templates for automation is a game-changer. Our guide on how to automate Canva offers more tips on this. This small bit of foresight protects your brand and makes sure every communication feels complete.
Embedding Dynamic Images Across Your Marketing Channels
Creating thousands of personalized images is a huge win, but they won't drive results until they actually reach your audience. The next step is getting these dynamic visuals into the marketing channels you're already using. Don't worry, this part is just as straightforward as the design automation itself.
Your goal is to make these images show up seamlessly in your emails, on your website, or even in direct messages. The good news? You don’t need to be a developer to pull this off. Most of the time, it’s as simple as copying and pasting a special kind of link.

Unlocking Personalization in Email Marketing
Email is easily the most common—and powerful—channel for deploying personalized images. The magic happens through merge tags (you might know them as personalization tags), which are little text placeholders your email service provider (ESP) swaps out with specific subscriber data when an email goes out.
No-code image automation platforms like OKZest give you a unique URL for your image template. By tacking on your ESP’s merge tags to this URL, you create a dynamic link that cooks up a custom image for every single person on your list.
Let's walk through a real-world example. Say you want to send an email with a banner that greets each person by name.
- Your image tool provides a base URL:
https://okzest.com/api/image?template=123&name= - Your ESP, maybe Klaviyo, uses
{{first_name}}for the recipient's first name. - You just combine them to create the final image URL:
https://okzest.com/api/image?template=123&name={{first_name}}
When you pop this URL into your email’s image block, Klaviyo automatically fills in {{first_name}} for each recipient. Sarah sees "Hey, Sarah!" and John sees "Hey, John!"—all from a single campaign.
This technique is universally compatible. Whether you use Mailchimp, Instantly, ActiveCampaign, or another platform, the core concept remains the same. You just need to find the correct merge tag format for your specific provider.
This simple trick goes way beyond just names. You can pull in company names, loyalty point balances, or even recent purchase details to create incredibly relevant visuals that stop subscribers in their tracks and send click-through rates soaring.
Bringing Dynamic Visuals to Your Website
Personalization isn’t just for inboxes. You can apply the same no code image design automation principles to create a more relevant and welcoming experience right on your website or landing pages. A classic example is showing a personalized welcome banner to a new user who just signed up.
This is usually done by embedding a small HTML <img> tag into your page. The src (source) attribute of this tag will be the dynamic URL from your image tool, just like in the email example.
You could add a snippet like this to your "Welcome" page:
<img src="https://okzest.com/api/image?template=456&name=[USERNAME]" alt="A warm welcome to our newest member!">
In this case, [USERNAME] is a variable that your website's backend or CMS would replace with the logged-in user's name. The result is a banner that greets them by name, making them feel seen and valued from the get-go. You can get a deeper look at how a real-time image API powers these kinds of live website integrations.
Expanding into Conversational Channels
The real frontier of personalization is happening in one-to-one conversational marketing. When you integrate automated images into chatbots, social media DMs, and messaging apps, you can create some truly memorable interactions.
Think about these powerful scenarios:
- Chatbot Onboarding: A new user starts a chat on your site. The bot can ask for their name, then instantly generate and show them a personalized "getting started" graphic or a fun welcome image.
- Social Media DMs: You could set up an automated workflow to send a personalized "thank you" image via Instagram DM to anyone who tags your brand in a post.
- WhatsApp Messaging: For an upcoming webinar, you could send each registrant a personalized WhatsApp message. The image could include their name, a unique QR code for entry, and even a countdown timer.
Each of these use cases transforms a standard, transactional message into a personal and delightful touchpoint. Best of all, deploying these is just as easy as creating the images in the first place, letting you scale high-touch experiences without any manual work.
Of course. Here is the rewritten section, crafted to match the human-written style, tone, and formatting of the provided examples.
Proven Use Cases and Actionable Best Practices
Theory is one thing, but seeing no-code image design automation in action is where you’ll really grasp its power. Forget abstract ideas—let's look at specific, real-world scenarios where this approach is already making a huge difference.
This isn't just about adding a name to a banner. It's about creating real value for businesses, from boosting sales and marketing efforts to helping educators and nonprofits connect with their audience.
Real-World Scenarios That Drive Results
The best way to see the potential is to look at how businesses are using personalized images right now. These aren’t just ideas; they're proven strategies that get results.
Real Estate Agents: Imagine sending a follow-up email after a property viewing. Instead of a generic message, the email includes a beautiful image of the home with a personalized overlay saying, "Welcome home, [Client Name]!" This small touch makes the property feel more personal and keeps it top of mind.
Coaches and Educators: An online course creator can automatically issue personalized certificates when a student finishes a course. The system generates a unique certificate with their name, completion date, and course title, ready to be shared on social media. This boosts student satisfaction and provides fantastic social proof.
Nonprofit Organizations: Fundraising is all about connection. A nonprofit can set up a workflow to send a custom "thank you" image to every donor, featuring a picture of the project they funded, their name, and the impact of their donation. This makes the donor feel genuinely appreciated and connected to the cause.
Sales Outreach: Sales teams can supercharge their cold outreach. Instead of another plain text email, they can include an image with the prospect's company logo and a headline like, "Imagine [Prospect Company] achieving 30% more growth." It’s an instant pattern interrupt that grabs attention.
These examples show how no-code image automation turns standard communications into memorable, high-impact moments. The key is to identify points in your customer journey where a personal touch can make all the difference.
Best Practices for Designing for Automation
Creating images that work seamlessly with automation requires a slightly different approach than static design. Planning for variability from the start is crucial.
First, start simple. Your initial project doesn't need to be overly complicated. Pick one high-value use case, like personalizing email headers, and master it. Once you see the ROI, you can scale up to more sophisticated campaigns.
Next, design for variable data lengths. A name like "Jen" takes up far less space than "Christopher." Make sure your text boxes have enough room to handle longer names without breaking the design. Use text alignment and font size settings that can adapt gracefully.
Always maintain brand consistency. Your automated images are an extension of your brand. Use a template that locks down your logo, brand colors, and fonts. This ensures every image feels professional, no matter the dynamic content.
Finally, always test your fallbacks. We've talked about fallbacks before, but their importance can't be overstated. Before launching, manually test what happens when data is missing. Does the image still look good? Does the fallback text appear correctly? This simple QA step prevents embarrassing errors down the line.
The Growing AI-Powered Automation Market
The incredible growth in this space shows just how much demand there is for smarter, more accessible tools. The broader no-code AI platform market, which includes these creative automation tools, was valued at $6.56 billion in 2025 and is projected to hit $75.14 billion by 2034. This boom is driven by businesses of all sizes wanting to adopt AI without needing a team of programmers.
The computer vision segment of this market is especially relevant for marketers, enabling the kind of intelligent image personalization we've discussed. You can explore more about this rapid expansion in this detailed market analysis.
If you're just starting out or looking for cost-effective options, exploring the best free AI image generators can be a great entry point. These tools offer a fantastic way to experiment with the technology and understand its potential before committing to a paid platform.
How to Test Your Campaign and Track Performance
You’ve designed your templates and connected your data. Now for the most important step before launch: quality assurance. Skipping this is like sending thousands of emails with your fingers crossed, hoping nothing breaks.
Proper testing is what separates a professional campaign from an embarrassing mistake. It ensures every single personalized image looks exactly as you intended, protecting your brand and making sure your hard work pays off. Let's walk through how to do it right.
A Practical Framework for Quality Assurance
Your testing needs to be more than just a quick glance at an image with your own name in it. You have to hunt for the edge cases—the things that could go wrong.
What happens when a customer has a really long name, like "Christopher-Alexander"? Does the text shrink gracefully, or does it spill out of the design? What if the name field is blank? Does your fallback rule—like "Valued Customer"—actually show up?
These are the common pitfalls I always check for:
- Text Overflow and Truncation: Make sure long names or custom messages don't get cut off or become unreadable.
- Broken Image Links: Double-check that all your dynamic images, like custom logos or user-uploaded photos, are loading correctly.
- Fallback Rule Failures: Deliberately test with records that have missing data to confirm your defaults are working.
- Alignment and Spacing Issues: Verify that dynamic elements stay perfectly aligned, no matter how long or short the text is.
A simple QA checklist can be a lifesaver. I like to use a small spreadsheet with test cases: long names, short names, missing data, and even special characters. Generating a preview for each one takes five minutes and can prevent thousands of broken images from hitting your audience.
Measuring the True Impact of Personalization
Once you’re sure everything looks great, the real question is: does it actually improve your results? This is where you prove the value of your work. You need to move from "I think this is working" to "I know this drove a 25% increase in conversions."
The best way to get that proof is with a classic A/B test. Split your audience into two simple groups:
- Group A (Control): They get the campaign with your normal, static image.
- Group B (Personalized): They get the same campaign, but with your new dynamic, personalized image.
Now, you just watch the numbers. Track the key performance indicators (KPIs) that matter to your business, like click-through rates (CTR), conversion rates, and overall engagement. Our guide on email campaign analytics has more strategies you can use here.
This direct comparison gives you undeniable proof of the impact your personalization is having. As you run more of these campaigns, learning how to measure marketing ROI becomes critical for showing the value you're creating.
The demand for these kinds of accessible tools is exploding. We're seeing this especially in emerging markets, where there's a 120% year-over-year growth in no-code AI adoption. This is being driven by small and medium-sized businesses that don't have big technical teams but still want powerful automation.
In fact, the market is projected to hit $5.117 billion by 2034, which shows just how big the opportunity is for marketers who get on board. You can find more data on the rapid growth of vertical no-code AI tools on intelmarketresearch.com.
Common Questions About No Code Image Automation
Jumping into something new like image automation always brings up a few questions. It might sound complex, but it’s built for marketers, not developers. Let's tackle the big ones so you can get started with confidence.
How Much Technical Skill Is Really Needed?
Honestly, very little. If you're comfortable using a drag-and-drop editor like Canva and can manage a basic spreadsheet, you have more than enough skill to get started.
These tools are designed with a marketer's workflow in mind. You’ll typically pick a design template, map your data fields—like connecting a 'First Name' column in your CSV to a 'Name' layer in your image—and then copy a simple URL. All the heavy lifting on the back end is done for you. The learning curve feels more like figuring out a new social media scheduler than it does learning a technical skill.
Will This Work With My Current Email Marketing Platform?
Yes, it almost certainly will. Universal compatibility is a core principle behind no-code image automation. These tools are built to integrate with just about any modern email service provider (ESP) out there, including popular platforms like Klaviyo, Mailchimp, Instantly, and hundreds of others.
The magic happens through a standard image URL that uses merge tags—a feature every major ESP supports. You simply build the image URL using your platform’s unique tags (like *|FNAME|* for Mailchimp or {{first_name}} for Klaviyo). When an email is sent, your ESP swaps in the right data for each person, telling our platform to generate the correct personalized image on the spot.
The beauty of this approach is its simplicity. You don't need clunky API integrations or special plugins. If your email platform can personalize text with a merge tag, it can personalize images.
What Happens If Personalization Data Is Missing?
This is a great question, and it's something every solid image automation tool handles using fallback rules. Let's face it, no one's data is ever 100% perfect.
Fallback rules are your safety net. They give you a way to set a default value for any dynamic part of your image, so you're never left with an embarrassing blank space.
- Missing Name: If a contact's first name is missing, the image can default to a friendly, generic greeting like "Hello there!" or "A Special Offer for You!" instead of looking broken.
- Missing Logo: If you’re personalizing images with company logos and one can't be found, you can set it to show your own brand’s logo or just hide that element completely.
This simple feature ensures everyone on your list gets a professional-looking image, protecting your brand experience no matter how clean your data is.
Is This Approach Scalable for Large Campaigns?
Absolutely. Scalability is one of the main reasons to use a tool like this. These platforms are built to generate millions of unique images without skipping a beat. The underlying infrastructure is designed for massive volume, so you never have to worry about performance, whether your list has 100 contacts or 1 million.
For agencies and larger teams, you’ll also find key features for organization and collaboration. This allows you to:
- Manage different templates and projects on a per-client basis.
- Control user permissions to keep brand assets safe.
- Work efficiently across different campaigns and departments.
From a free plan to get your feet wet to enterprise-level capacity, these systems are made to grow right alongside your business. It's a strategy that works for everyone from solo entrepreneurs to major corporations.
Ready to stop creating generic visuals and start building real connections? With OKZest, you can generate thousands of personalized images in minutes, not hours. Automate your designs and watch your engagement soar. Get started for free on okzest.com.