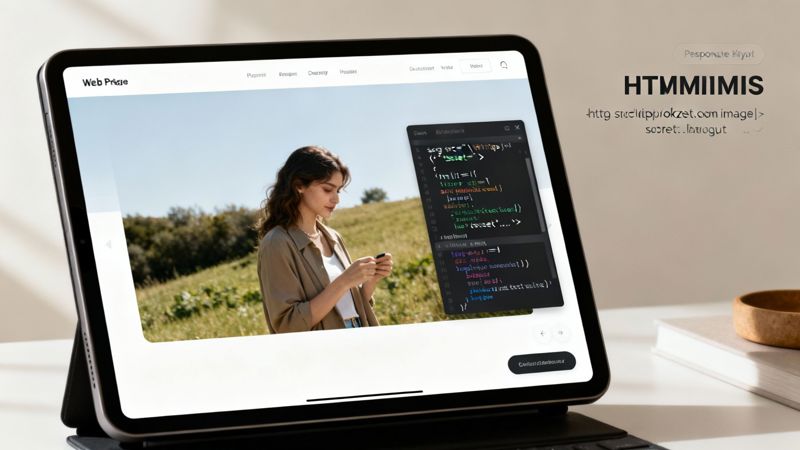
When you use an API to fetch an image URL, you’re tapping into the power to create personalized visuals on the fly. This is a huge leap forward for any modern app or email campaign. It's the core technology that lets a platform like OKZest generate and deliver a unique image for every single user, dropping it right into their inbox or onto a webpage.
This isn’t just some minor technical detail. It’s a fundamental shift away from static, one-size-fits-all content and toward dynamic, genuinely engaging experiences.
Why Dynamic Image URLs Are a Game Changer
Let's be honest, static images are a relic. Storing thousands of pre-made image variations is a nightmare—it's inefficient, expensive, and completely rigid. Need to update a simple design or fix a typo? You’re stuck manually recreating and re-uploading every single file. That approach just doesn't work when you need to scale.
An API-driven approach flips this entire model on its head. Instead of pulling from a limited library of static files, you just make a quick request to an endpoint. In return, you get a URL pointing to a freshly generated image, created just for that moment.
The Power of On-Demand Image Creation
Imagine sending an email campaign where every single recipient sees a welcome banner with their name beautifully integrated into the design. Or picture an e-commerce site where product images instantly update to show a customer's chosen color or custom text. This level of one-to-one personalization is only possible when you can generate images in real time.
This is exactly what an API like OKZest’s was built for. You're not just fetching an image; you're creating one. This unlocks some serious advantages:
- Hyper-Personalization: Tailor images with user data like names, locations, or purchase history to create a real connection.
- Real-Time Updates: Change a single template, and every image generated from that point forward is instantly updated. No more tedious manual edits.
- Massive Scalability: Generate millions of unique images without ever worrying about storage space or file management. The system just handles it.
This technology is the engine behind a market that’s absolutely booming. The global AI image generation market, which relies heavily on APIs providing image URLs, has skyrocketed to $28 billion and is growing at over 35% annually. This isn't some niche tool; it's a foundational piece of modern digital communication.
For a deeper look, you can explore our full post on the benefits of dynamic images.
To put it simply, fetching image URLs via an API offers a powerful set of benefits that directly address the limitations of traditional, static image hosting.
Core Benefits of Using an API for Image URLs
| Benefit | Description | Impact on Business |
|---|---|---|
| Personalization at Scale | Generate unique images for each user by passing data (like names or locations) into the API call. | Boosts user engagement, conversion rates, and brand loyalty by creating a one-to-one feel. |
| Operational Efficiency | Eliminate the need to manually create, store, and manage thousands of image variations. | Saves significant time and resources, allowing teams to focus on strategy instead of tedious production tasks. |
| Real-Time Agility | Update a single image template, and all future generated images will reflect the change instantly. | Enables rapid campaign updates, A/B testing, and brand consistency without re-uploading files. |
| Infinite Scalability | Generate millions of images on-demand without worrying about server storage or file organization. | Supports business growth and large-scale marketing campaigns without hitting technical limitations. |
In short, making the switch from static files to API-generated image URLs isn't just an upgrade—it's a complete transformation in how you create and deliver visual content.
Making Your First API Call to Get an Image URL
Alright, let's move from theory to action. Making your first API call is less intimidating than it sounds, and it's the critical step where your instructions become a real, usable image. We'll use the OKZest API as our example to show you exactly how to generate a personalized image URL from scratch.
The basic idea is simple: you send a request with all your desired parameters to a specific API endpoint. The API then does its magic and sends back a unique URL pointing to the brand-new image it just created for you.
This whole workflow, from your code to the final image link, is really just a simple three-part process.

As you can see, it's a clean handoff. Your application builds the request, the API does the heavy lifting, and you get back a ready-to-use image URL.
Structuring Your API Request
Every API call you make will have a few core components. You absolutely need to know where you're sending the request (the endpoint), how to prove you're allowed to make it (authentication), and exactly what you're asking for (the payload).
The Endpoint: This is the specific URL you'll be sending your request to. For OKZest, this is a URL designed specifically to handle image generation. Think of it as the direct address for the "image creation department."
Authentication: You can't just ask an API to do work without introducing yourself. This is almost always handled with an API key—a unique string of characters you include in the request headers. This key tells the server who you are and confirms you have permission to use the service.
The Payload: This is the heart of your request, usually formatted as JSON. It contains all the instructions for the image you want. Here is where you'll specify which template to use and provide the dynamic data, like a customer's name or a company logo.
Many professionals, like real estate agents using virtual staging software options, rely on this process to generate visuals on the fly. Knowing how to structure this first call is a fundamental skill.
A well-structured payload is everything. It's the blueprint you're sending to the API, so being clear and accurate here will prevent most of the common errors you might run into.
Practical Code Examples
Let’s get our hands dirty with a real request. Imagine you want to generate a personalized welcome image for a new user named "Alex." Your payload would need to specify the ID of your welcome image template and then provide "Alex" as the value for the name parameter.
Here's how you could structure that api get image url call using JavaScript's fetch method:
const apiKey = 'YOUR_OKZEST_API_KEY'; const templateId = 'YOUR_TEMPLATE_ID';
async function getPersonalizedImageUrl(name) {
const response = await fetch('https://api.okzest.com/v1/images', {
method: 'POST',
headers: {
'Content-Type': 'application/json',
'Authorization': Bearer ${apiKey}
},
body: JSON.stringify({
template: templateId,
parameters: {
'user_name': name
}
})
});
const data = await response.json(); // The response contains the URL to your new image console.log(data.imageUrl); return data.imageUrl; }
getPersonalizedImageUrl('Alex');
This snippet does a few things: it sends a POST request to the OKZest endpoint, authenticates using a bearer token (your API key), and includes a JSON payload defining exactly what the image should contain. The server processes this and responds with a JSON object that includes the all-important imageUrl.
For a deeper dive into integrations, our complete https://okzest.com/blog/api-integration-tutorial offers more examples and best practices.
Securing Your Image API Endpoints
Once you start pulling image URLs from an API, a scary realization hits: an unsecured endpoint is a huge liability. This isn't just some abstract risk; it's a wide-open door for abuse that can burn through your resources, compromise data, and leave you with a shocking bill. Protecting your image generation pipeline isn’t just a good idea—it's an absolute must for any professional setup.
The numbers are pretty stark. API security threats have gone through the roof, with "api get image url" endpoints becoming prime targets in a staggering 1,025% surge in AI vulnerabilities. A recent Wallarm report found that 57% of AI APIs are exposed to the outside world and 89% use insecure authentication. It's a clear signal that building a secure foundation from the very start is non-negotiable.
Beyond Basic API Keys
An API key is your first line of defense, but it can't be your only one. It does a great job of authenticating your application, proving it has permission to make a request. The problem is, once the API hands back a standard image URL, that link is often public and lives forever. Anyone who gets their hands on it can access it, share it, or embed it on their own site—a practice called hotlinking—which drains your bandwidth and eats up your API credits.
This is exactly why you need a more robust security layer. You need a way to make sure only the intended recipient can see the image, and only for a short amount of time.
Key Takeaway: Relying only on API keys is like locking your front door but leaving every window wide open. The initial request is secure, but the image URL it produces is completely exposed.
Implementing Signed URLs for Maximum Protection
The single most effective way to stop this kind of abuse is to use signed URLs. A signed URL is a special kind of link that contains a cryptographic signature and—most importantly—an expiration date.
Here’s how it works with a system like OKZest:
- Request with a Signature Flag: When you call the API to get an image URL, you simply include a parameter that asks for a signed, temporary link instead of a permanent one.
- Server Generates a Secure Link: The server creates the image and then generates a URL with a unique signature based on your secret key and a timestamp.
- URL Becomes Invalid After Expiration: Anyone trying to visit that URL after its short lifespan (say, 60 seconds) gets denied. The image is gone.
This simple move completely shuts down hotlinking and unauthorized sharing. The image is only available for that brief moment it takes to load in a user's browser or email client. This is one of the most important concepts to master, and you can dive deeper in our guide to API integration best practices.
By implementing signed URLs, you ensure your resources are used exactly how you intended, and not a penny more.
Image API Security Measures Compared
Choosing the right security strategy depends on your specific needs. While signed URLs offer top-tier protection, it's helpful to see how they stack up against other common methods.
| Security Measure | Primary Purpose | Implementation Complexity | Best For |
|---|---|---|---|
| API Keys | Authenticates the requesting application, not the end-user. | Low | Basic protection for internal or low-risk applications. |
| IP Whitelisting | Restricts API access to a pre-approved list of IP addresses. | Medium | Securing server-to-server communication where IPs are static. |
| Signed URLs | Creates temporary, expiring links to prevent hotlinking and unauthorized access. | Medium | Protecting individual image assets, especially in emails or user-facing apps. |
| OAuth 2.0 | Authorizes access on behalf of a user, providing granular permissions. | High | Complex applications where users need to grant specific access rights. |
Each method has its place, but for preventing the widespread abuse of generated image URLs, signed URLs provide the perfect balance of robust security and manageable implementation.
Putting Your Dynamic Image URLs to Work
Getting the image URL back from the API is just the first step. Now for the fun part: plugging that dynamic, personalized visual right into your webpage, email, or mobile app. The process itself is pretty simple, but a few smart practices can turn a clunky user experience into a seamless one.
For web pages, the classic HTML <img> tag is your best friend. Your front-end code—maybe a React or Vue component—will call the API to get the image URL and then slot that link directly into the src attribute.
This is a great approach because it keeps your data separate from your presentation. Your app's logic fetches the URL, and the browser takes care of the heavy lifting to render the final image.
Building Responsive and Resilient Images
You’ll want your images to look sharp on every device, from a small phone screen to a massive desktop monitor. The srcset attribute is perfect for this. It lets you feed the browser a list of different-sized images, and the browser intelligently picks the best one based on the user's screen and connection speed.
You can also pair this with modern loading techniques to keep your pages zippy. Adding loading="lazy" to your <img> tag tells the browser not to load the image until the user actually scrolls it into view. This simple trick can dramatically speed up initial page load times.
Here’s a quick look at how you might embed a dynamic URL from OKZest into a simple React component:
import React, { useState, useEffect } from 'react';
function PersonalizedWelcome() { const [imageUrl, setImageUrl] = useState('/path/to/placeholder.png');
useEffect(() => {
// This function calls your backend, which then calls the OKZest API
fetch(/api/get-user-image?userId=${userId})
.then(res => res.json())
.then(data => {
if (data.imageUrl) {
setImageUrl(data.imageUrl);
}
})
.catch(err => console.error("Failed to fetch image", err));
}, [userId]);
return ;
}
Did you notice the placeholder image? That part is crucial. If the API call fails or is just slow, the user sees a fallback graphic instead of a broken-image icon.
Tackling Email Client Challenges
Putting dynamic images in emails is a whole different ball game. Email clients like Gmail and Outlook are known for being quirky and inconsistent with how they render HTML. Some block images by default, forcing the user to click a "Display images" button.
To navigate these challenges, stick to these best practices:
- Use Absolute URLs: Always use the full, complete URL from the API in your
srcattribute. Relative paths are a no-go in email. - Set Alt Text: Meaningful
alttext is non-negotiable. It describes the image for users when it can’t be loaded. - Keep It Simple: Avoid complex CSS or positioning for email images. Basic HTML table layouts offer the most reliable compatibility.
APIs that deliver image URLs have become essential for almost any digital product today. Using an API can slash development and maintenance costs by 60-80% compared to building a similar system in-house, especially when you factor in compute resources, data labeling, and ongoing updates.
If you’re interested in a deeper dive, especially if you're developing a social network app, this guide offers some fantastic, practical advice. When you thoughtfully embed your dynamic URLs, they truly enhance the user experience instead of getting in the way.
Optimizing Performance with Caching and CDNs
Getting that first image URL back from the API is a great feeling. But once you move into a live production environment, performance is the name of the game. Calling the API for the exact same image over and over again is a huge waste of resources and will slow your application to a crawl, especially as traffic picks up. This is where you bring in the heavy hitters: smart caching and Content Delivery Networks (CDNs).
Honestly, implementing these strategies is what separates a functional app from a fast, scalable, and professional one. They work in tandem to slash latency, lighten the load on the API, and give your users a much better experience.
Implementing Smart Caching Strategies
Caching is just a fancy word for storing data temporarily so you can grab it faster the next time you need it. When you get an image URL from an API, caching it means you don't have to make the same API call again and again.
You can implement caching in two main places:
- Client-Side Caching: This happens right in the user's browser. By setting the right HTTP headers (like
Cache-Control), you can tell the browser to hang onto an image for a while. When the user comes back to the page, the browser just loads the image from its local stash instead of downloading it again. Everything feels instant. - Server-Side Caching: This is where you store the API response on your own server. If you get a bunch of identical requests—say, generating a welcome image for a dozen new users all named "Chris"—your server can just grab the cached image URL from a system like Redis or Memcached instead of bothering the OKZest API every single time. It's a massive win for efficiency.
A well-designed caching layer is your first line of defense against performance bottlenecks. It not only speeds up response times for users but also significantly reduces your API usage costs by eliminating unnecessary requests.
Think about it: if you're generating thousands of personalized certificates after an online course finishes, caching the underlying certificate template on your server means you only fetch it once. That simple move can turn a slow, expensive process into something incredibly efficient.
Leveraging CDNs for Global Speed
A Content Delivery Network (CDN) takes performance to a whole other level, especially if you have a global audience. A CDN is just a network of servers scattered all over the world that keep copies of your content—in this case, your images.
When a user in London requests an image, they don't have to wait for it to travel all the way from a server in San Francisco. Instead, the CDN delivers it from a local "edge" server right there in Europe. This drastically cuts down the physical distance the data has to travel, which means latency plummets.
The good news is that modern image APIs, including OKZest, often deliver image URLs that already point to a global CDN. This means you get all those performance benefits right out of the box. The URL you get back is already optimized for lightning-fast delivery, no matter where on the planet your users are. This setup ensures everyone gets consistently fast load times, which is absolutely critical for keeping them happy and engaged.
When you start playing around with dynamic images, a few questions tend to pop up right away. Getting these sorted out early can save you a ton of headaches and help you build something much more solid and secure. Let's dig into what developers usually ask.
One of the first things that trips people up is the difference between a normal image link and an API URL. They might look the same at first glance, but they work in completely different ways.
Direct Link vs. API URL
A direct image link is static. It’s a simple pointer to a file that already exists on a server, like my-image.jpg. Every time you hit that URL, you get the exact same image. Simple, predictable, but zero flexibility.
An API URL, on the other hand, is an active command. When you api get image url, you're not just grabbing a file—you're kicking off a process. Your request, often loaded with specific parameters, tells the server to generate a totally new, custom image on the fly. Then, it gives you a link to that freshly made asset.
The real difference here is static versus dynamic.
An API lets you personalize images in real-time and create them on-demand, whereas a direct link is just a fixed path to an existing file. This dynamic power is what really opens the door to true one-to-one marketing.
This dynamic approach naturally leads to questions about performance, especially when you need to generate a whole bunch of images at once.
Handling API Rate Limits
It's surprisingly easy to slam into an API's rate limits if you're not careful, particularly when running batch jobs. The best way to handle this is with a few layers of defense:
- Check the Docs: This sounds obvious, but always know the exact limits of the API you’re working with.
- Cache on Your Server: This is the big one. Set up server-side caching with a tool like Redis to store and reuse URLs for identical requests. It's the single most effective way to slash your API calls.
- Queue and Delay: For big jobs, don't hit the API all at once. Use a queue system to process requests one by one, adding a small, built-in delay between each call.
- Implement Exponential Backoff: Build your code to handle rate-limiting errors gracefully. If a request fails, make it retry after a short wait, and then progressively increase that waiting period for each subsequent failure.
So you’ve got the URL. Now what? The final questions usually revolve around security and actually using the link. Can you just drop it into an <img> tag? Yep, absolutely. Your front-end code calls the API, gets the URL string back, and plugs it right into the src attribute.
But that brings up a huge security question: what’s stopping someone from grabbing that URL and using it wherever they want? If the link is permanent, it can be "hotlinked," which could run up your API costs. The best way to prevent this is by requesting signed URLs from the API. These are special, temporary links with a cryptographic signature and an expiration time baked in, making them useless for anyone trying to use them long-term without permission.
Ready to create stunning personalized images for your audience without the technical headaches? With OKZest, you can automate your visual content for emails, websites, and social media, whether you're using our API or our simple no-code tools. Start for free and see how easy it is to boost engagement at https://okzest.com.