So, what exactly is an API picture? Think of it as a smart image, generated on the fly by an Application Programming Interface (API). Instead of using the same static photo for everyone, you use a special URL. This URL calls an API that instantly creates a customized picture based on data you send it—like a user's name, a unique offer, or event details.
Why Personalized Images Are Your New Secret Weapon

It’s time to move past the world of generic stock photos. While standard images can fill a space, they rarely grab anyone's attention because they aren't relevant to the person seeing them. Personalized visuals, on the other hand, are a total game-changer for engagement.
There's a powerful psychological trigger at play here. Seeing your own name on a welcome banner or a unique coupon code embedded right into an image makes the content feel exclusive and important. It instantly shifts a mass communication into what feels like a one-to-one conversation.
That personal touch dramatically increases the odds that your message will actually be seen and acted upon.
The Power of Contextual Visuals
Just imagine how an API picture generator could elevate a campaign from good to unforgettable in these real-world scenarios:
- Dynamic Event Tickets: Instead of a generic PDF confirmation, each attendee gets a digital ticket with their name and a unique QR code beautifully designed into the image.
- Tailored Onboarding Graphics: A new user is greeted with a series of welcome images featuring their name and profile picture, making their first steps feel personal and guided.
- Hyper-Personalized eCommerce Offers: A customer who left an item in their cart gets an email showing an image of that exact product, now with a custom discount code just for them.
This level of customization used to be incredibly complex and expensive. But modern tools, like our OKZest API, make it surprisingly accessible for businesses of any size.
The technology is part of a massive trend. The AI API market is already valued at $48.50 billion in 2024 and is projected to skyrocket, all fueled by the demand for smarter automation.
A quick comparison shows just how big the difference is.
Impact of Personalized vs Generic Images
| Metric | Generic Stock Images | Personalized API Picture |
|---|---|---|
| Engagement Rate | Low - easily ignored | High - captures immediate attention |
| Conversion Rate | Standard - lacks a compelling call to action | Significantly higher - feels exclusive |
| Brand Recall | Poor - blends in with other content | Strong - creates a memorable experience |
| Customer Connection | Impersonal and broad | Creates a direct, one-to-one feeling |
The takeaway is clear: personalized images create real, tangible results that generic visuals just can't match.
By using an API to generate dynamic images, you stop broadcasting a single message to everyone and start delivering a unique visual to each person. This forges a powerful connection that static content will never achieve.
To get into the nitty-gritty of how it all works, check out our guide on dynamic image generation.
Getting Your Image Generation Engine Ready
This is where the magic begins. Before you can generate your first custom api picture, you need to get the engine running that will do all the heavy lifting. We’ll walk through the whole setup process with OKZest, from creating an account to designing a reusable image template.
The process is surprisingly simple, built for developers and no-code folks alike. Your first move is just signing up for an OKZest account. Once you’re in, the main goal is to find your unique API key, which is basically the secure password for all your future image requests. You'll usually find this tucked away in your account settings or a dedicated API section.
Key Takeaway: Treat your API key like a password. It's the unique identifier that links your requests to your account, so keep it secure and never expose it in public-facing code like front-end JavaScript.
Designing Your First Image Template
With your account ready, it’s time to build your first visual template. This part isn’t about coding; it’s a creative design process you handle right inside the OKZest platform. Think of it like using a simple graphic design tool. You'll start by uploading a base image—maybe a branded background, a certificate border, or an event banner.
From there, you start adding layers. These layers are the individual pieces of your final image, like text boxes, logos, or other design elements. The most important part here is deciding which of these layers will be dynamic. For instance, you could add a text layer for a customer's name and another for a unique discount code.
By giving these dynamic layers specific names—like customer_name or coupon_code—you create placeholders that the API will later fill with real data. This is the core idea that turns a static design into a powerful, personalized image generation machine.
The image below shows a designer in a similar creative space, building the core elements for a dynamic template.
This visual editor approach lets you focus on the design first, separating the creative work from the technical side of things.
Understanding Your Core Components
Once your template is saved, you officially have everything you need to start making images. Let's quickly recap the essential pieces you'll be working with:
- Your API Key: The unique authentication token for your account.
- Template ID: A specific identifier for the image design you just created.
- Dynamic Layers: The named placeholders in your template (e.g.,
customer_name).
These three elements are the foundation of every single API request you'll make. The API key proves it's you, the template ID tells the system which design to use, and the dynamic layers are where you'll send your personalization data.
If you’re exploring different tools for an image generation engine, you might find a good comparison of the best AI image generators helpful for getting a feel for the broader landscape. That said, the template-based approach is often a perfect fit for marketing and personalization, as it guarantees brand consistency and reliability. Now that you have these components ready, you're all set for the next exciting step—making your first live API request.
How to Make Your First API Picture Request
Alright, let's get to the fun part—bringing your first personalized image to life. You’ve designed your template and have your API key ready, so now it’s time to make a request that generates an api picture on the fly. This is a lot simpler than it sounds, and I'll walk you through a clear, copy-paste-ready example to make sure your first call is a success.
At its heart, an API request is just a specially formatted URL. You don’t need complex coding tools right away; you can often generate your first image just by pasting this URL into your web browser. This is a great way to get that instant 'win' and see your creation working immediately.
Running this simple test is a fantastic way to confirm everything is set up correctly before you start integrating the URL into your email platform or website. It's a low-stakes method for validating your work.
Deconstructing the API Request URL
Let's break down the structure of a typical OKZest API request. Think of it like a recipe where each parameter in the URL is an ingredient. Each piece tells the API exactly what to do—from which template to use to what text to place on the image.
The URL is built from a few key components:
- Base URL: This is the constant starting point for every request, pointing to the OKZest image generation service.
- Template ID: This unique identifier tells the API which one of your saved designs to use.
- API Key: This is your secret key that authenticates the request and links it back to your account.
- Dynamic Data: These are the key-value pairs that match the dynamic layers you named in your template (e.g.,
customer_name=Alex).
For example, a complete URL will string these parts together, with each serving a distinct purpose. This structure makes generating a custom picture as simple as building a link.
Crafting a Real-World Example
Let's say you created a template for a webinar invitation with dynamic layers named attendee_name and event_date. To create a personalized invite for someone named Maria for an event on November 5th, your URL parameters would pass that specific data.
The API takes these parameters, finds your template, and instantly replaces the placeholders with the data you sent.
Pro Tip: When passing data in a URL, special characters (like spaces or ampersands) need to be "URL encoded" to be read correctly. For example, a space becomes
%20. Most tools and programming languages handle this for you, but it’s good to know if you ever run into weird issues.
To see this in action, you can manually build the URL and paste it right into your browser's address bar. If everything is correct, the personalized image will pop up on your screen. That immediate feedback loop is one of the most satisfying parts of working with an image API.
For a deeper dive into the technical side of things, our comprehensive API integration tutorial covers more advanced scenarios and best practices for developers.
Beyond static images, you can also explore turning your photos into dynamic video content. For a detailed walkthrough on transforming static visuals into moving content, check out this practical guide on an AI video generator from image. This opens up even more possibilities for dynamic, engaging media. With your first request successful, you're ready to embed these images where they matter most.
Putting Your Dynamic Images to Work in Emails and on Web Pages
Okay, you've designed a stunning, personalized image. That's a great first step, but the real magic happens when your audience actually sees it. An api picture is only powerful if it gets in front of people, which means knowing how to embed it seamlessly into your emails and web pages.
This is where your dynamic image goes from being a clever concept to a genuine marketing asset. The key to all of this is the dynamic URL you built. That one link is all you need to deliver unique visuals at scale, whether you're sending a campaign to ten thousand subscribers or just welcoming a new user to your website.
This diagram breaks down the simple but powerful workflow behind every API picture request.
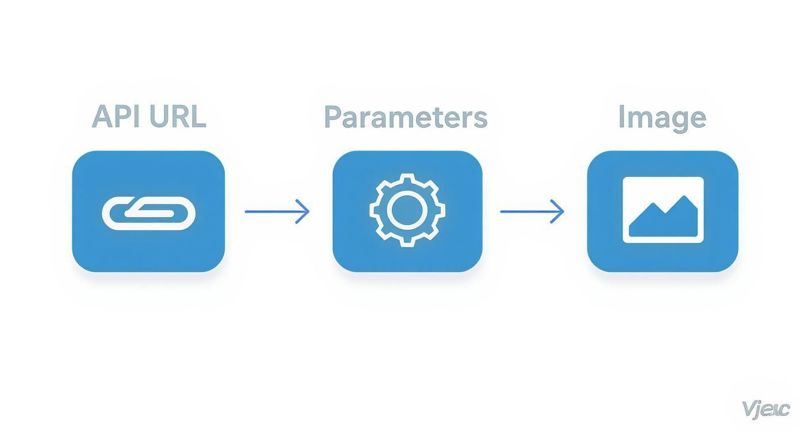
As you can see, the process is pretty straightforward. Your base URL, combined with specific parameters, tells the API exactly what image to generate in real-time.
Embedding Dynamic Images in Emails with Merge Tags
Email marketing is where this technology really comes alive. Instead of blasting everyone with the same static banner, you can make every single email feel like it was crafted just for the person reading it. The secret to doing this at scale is using merge tags (sometimes called personalization tags) from your email service provider (ESP) like Mailchimp, Klaviyo, or ConvertKit.
A merge tag is just a small piece of code—like *|FNAME|* or {{ first_name }}—that your ESP automatically replaces with a subscriber's data right before sending the email.
To get it working, you just build your dynamic image URL but use the merge tags as the values for your parameters. It's that simple.
Let's look at an example for a welcome email:
Imagine your API URL needs a name parameter. Instead of typing in a real name, you would build the URL inside your email's HTML like this:
https://api.okzest.com/v1/template-id/image?name=*|FNAME|*
When that email goes out, Mailchimp sees *|FNAME|* and instantly swaps it with the recipient's first name, generating a custom image just for them. For a deeper dive into these strategies, check out our guide on using personalized images for email marketing.
Using JavaScript for Dynamic Web Page Images
On web pages, you're usually personalizing the experience for logged-in users or basing it on their recent actions. For this, a little bit of JavaScript is your best friend. You can use it to grab user data (like their name or company) and build the API picture URL on the fly as the page loads.
For example, you could show a personalized welcome banner on a user's dashboard. Your HTML would have a standard <img> tag with an ID, and your script would handle setting the image source.
// Let's assume 'user' is an object with the logged-in user's info const user = { name: "Jordan" };
// Find the image element on the page const bannerImage = document.getElementById("welcome-banner");
// Now, build the dynamic URL and set it as the image source
bannerImage.src = https://api.okzest.com/v1/template-id/image?name=${user.name};
This approach makes your website feel far more engaging and tailored, ensuring every user sees an image created just for them.
Crucial Tip: Always Set a Fallback Image What happens if the API call fails or the personalization data is missing? A broken image icon is a terrible user experience. You should always set a fallback image. Most email platforms and HTML itself allow for this. For instance, in your HTML
<img>tag, you can use anonerrorattribute to load a default, generic image if the dynamic URL ever fails to load.
Pro Tips for a Smarter API Picture Strategy
Getting your dynamic images up and running is one thing, but making the system fast, secure, and visually polished is what separates the pros from the beginners. Once your API calls are flowing, a few smart practices can save you a ton of headaches later on.
These are the details that turn a functional setup into a truly professional one. Thinking ahead about performance, security, and design ensures your api picture strategy isn't just effective today but is built to last.
Boost Performance with Smart Caching
One of the easiest wins you can get is with caching. Instead of hitting the API to generate the exact same image over and over again, you can temporarily store it. This simple trick dramatically cuts down your API calls, which can lower your costs and make things load much faster for returning visitors.
Think about it: if a user’s welcome banner with their name on it doesn’t change, why regenerate it every single time they visit their dashboard? Just cache the image URL on your server for a set period, maybe 24 hours.
Our Experience: We've seen clients slash their monthly API calls by as much as 40-60% just by implementing a basic caching layer. This works wonders for frequently requested images that aren't time-sensitive, like personalized certificates or welcome banners.
It's a small change that seriously lightens the load on everyone.
Prioritize Security and Data Handling
Security always needs to be front and center. Your API key is literally the key to your account, so you have to guard it. Never, ever expose it in client-side code like the public-facing JavaScript on your website. That’s a recipe for disaster. Always make API calls from a secure, server-side environment.
Another big piece of the security puzzle is sanitizing user input. If you're pulling data directly from a user form to put on an image (like a custom message), you absolutely must clean it first. This stops someone from inputting malicious code or ridiculously long text that breaks your beautiful image template.
Here are a few quick sanitization steps:
- Trim whitespace from the beginning and end of any text.
- Limit the character length to make sure it fits within your design.
- Strip out any HTML tags or script elements to prevent injection attacks.
Perfect Your Template Design
Finally, the design of your templates plays a huge role in whether your personalized images land well. A great template is built to handle variety and gracefully adapts to different data.
Keep these design best practices in mind:
- Choose Readable Fonts: Make sure your font is clear and legible, even if the text length changes and the font size has to adjust.
- Plan for Text Wrapping: Long names or messages can wreck a design. Be sure to configure your text layers to wrap to a new line or automatically shrink the font size to fit inside the box you’ve defined.
- Test with Extremes: Don’t just test with an average name like "John Smith." See what happens with a very short name ("Li") and a really long one ("Maximillian Bartholomew"). A solid design can handle both without looking awkward.
A well-designed template is a resilient one. When you build it to handle whatever data gets thrown at it, you can be confident that every single api picture you generate looks fantastic.
Got Questions About Using an API Picture Generator?
Once you start diving into dynamic images, a few questions and roadblocks inevitably pop up. It's totally normal. Getting those sorted out quickly is the key to mastering how an api picture generator really works.
Let's walk through some of the most common things people ask.
What Happens If My Text Is Too Long for the Design?
This is a great question and one we hear all the time. What if a customer's name or a custom message is way longer than you expected? Does it just break the whole design?
Thankfully, no. A well-built template handles this gracefully. Most image generation APIs, including what we've built at OKZest, give you a few ways to manage text overflow automatically.
You can usually tell the template to:
- Truncate the text and add an ellipsis (...) so people know there's more.
- Shrink the font size on the fly, making sure everything fits perfectly within the box you defined.
- Wrap the text onto a new line, which is the perfect solution for longer messages.
My advice? Always test your templates with ridiculously long and super short examples. It's the only way to be sure your final image looks sharp and professional in every possible scenario. You don't want to be caught off guard by an awkward layout.
Can I Use This with No-Code Tools?
Absolutely! In fact, this is where things get really powerful for a lot of people. You don't need to be a developer to make this work.
Tools like Zapier or Make are perfect for connecting your apps and automating image creation without writing a single line of code.
Imagine setting up a workflow where a new customer in your CRM triggers an action. That action can be a "Webhook" or "API Request" that calls the api picture URL, pulling in the new customer’s data dynamically. The very next step in your automation could then pop that shiny new personalized image URL right into a welcome email.
Will This Slow Down My Website or Email?
It’s a valid concern. Since the image is generated the moment it's requested, there can be a tiny initial delay. But this is easy to manage.
First off, make sure your base template images are already optimized for the web—think compressed JPEGs or PNGs. Second, lean on caching. If an image for a specific user isn't going to change often, you can cache the generated URL on your end. That way, it’s served instantly on their next visit.
Ready to create stunning, personalized visuals in minutes? With OKZest, you can automate your image generation with our powerful API or easy-to-use no-code tools. Start for free and see the difference today!