Let's be honest, manually creating certificates one by one is a soul-crushing task. In my experience, it's a huge time sink that just doesn't make sense for modern businesses, course creators, or trainers. The real power today lies in automation, and tools like OKZest are leading the charge by letting you generate personalized, professional certificates in an instant.
This isn't just about saving a few hours; it's about fundamentally changing your workflow and making sure every single credential looks fantastic and reinforces your brand.
The Shift to Automated Certificate Creation

We've all been there. Hunched over a design program, meticulously editing a name, date, and course title for every single person. While it gets the job done, this old-school manual process is a massive bottleneck. It’s not just slow—it’s prone to human error and can lead to tiny inconsistencies that, over time, cheapen your professional image.
Think about a corporate trainer who just wrapped up a workshop for 50 employees. They're now facing hours of tedious personalization work. Or an online course creator with hundreds of graduates? Manual creation is simply off the table. This is exactly where dynamic image generation becomes a game-changer.
From Manual Effort to Smart Automation
Instead of the old way, automated systems connect a master certificate template to a simple data source, like a spreadsheet. You provide the list of names and other details, and the system does all the heavy lifting, cranking out unique, personalized certificates in moments. It’s that simple.
Making this switch brings some immediate, powerful benefits:
- Massive Time Savings: What used to take hours of mind-numbing work can now be done in just a few minutes.
- Rock-Solid Brand Consistency: Every certificate uses the exact same fonts, colors, and layout. No more weird variations.
- Effortless Scalability: Need to issue 500 certificates? Or 5,000? No problem. The process is the same.
- Instant Gratification: Recipients get their credentials right away, which they can—and will—share on social media, giving your program a nice visibility boost.
Take a look at how the two approaches stack up.
Traditional vs Automated Certificate Creation
| Feature | Traditional Method (e.g., Photoshop) | Automated Method (e.g., OKZest) |
|---|---|---|
| Time per Certificate | Minutes to hours, depending on complexity | Seconds |
| Scalability | Very poor; becomes unmanageable with volume | Excellent; handles hundreds or thousands easily |
| Consistency | Prone to human error and inconsistencies | Perfect consistency every time |
| Delivery Speed | Slow, often delayed by manual work | Instant, upon completion or request |
| Required Skill | Graphic design software proficiency needed | Minimal; requires only a data list |
| Overall Cost | High, when factoring in time and labor | Low and predictable subscription cost |
The difference is pretty stark. One path is a repetitive, manual grind, while the other is a smart, scalable solution that frees you up to focus on what actually matters.
This shift isn't just about process; it reflects a change in design philosophy too. Modern certificates have moved away from overly ornate, frilly designs toward a cleaner, more minimalist look. This isn't just a trend—it's practical. Simpler layouts are easier to verify and look much better when shared digitally, which is crucial now that secure digital credentials are the norm.
By embracing automation, creating professional images for certificates stops being a dreaded chore. It becomes a smooth, powerful, and almost invisible part of your workflow. You can get back to creating amazing content, confident that the recognition part of the process is handled beautifully and professionally.
Designing a Versatile Certificate Template

Before you can automate anything, you need a solid foundation. In this case, that's your base certificate template. Think of this as the master canvas—a versatile, professional design that reflects your brand and is ready to be personalized for each recipient.
I usually start by creating this base image in a tool I'm comfortable with, like Canva or Figma. The key is to include all the static elements that won't change from person to person. This means your logo, any official seals, decorative borders, and the signature lines for key people should all be part of this initial design.
Balancing Professionalism with Modern Design
A great certificate needs to feel both official and current. The design choices you make directly impact how valuable the achievement feels to the recipient. While certificates have their own unique needs, you can still draw inspiration from general principles of effective template creation to get the structure right.
Here are a few things I always focus on:
- Font Selection: The right fonts project authority and are easy to read. A classic serif for the recipient's name paired with a clean sans-serif for the details is a combination that almost always works.
- Color Palette: Stick to your brand colors. This builds instant recognition and creates a cohesive, professional look when used strategically in borders, text, or logos.
- Layout & Hierarchy: Arrange elements logically. The recipient's name should be the star of the show, followed by the specific achievement, and then smaller details like the date and issuer.
Graphic design trends for 2025 are leaning heavily into bold typography, minimalism, and impactful color schemes. This is great news for certificates, as large, crisp fonts boost readability and authority, making images for certificates feel both modern and prestigious.
Once you’re happy with the design, go ahead and export it as a high-quality PNG or JPG file. This image is what you'll upload into OKZest as your base layer, ready for us to add the dynamic text and other personalized touches.
This approach perfectly blends creative design with technical automation. If you're interested in how this applies to other areas, you can learn more about the power of dynamic images in email marketing in our other guide.
Building Your Automated Workflow in OKZest
Got your static certificate design ready to go? Perfect. Now it's time for the fun part: bringing it to life inside OKZest. This is where we turn that simple image into a dynamic, automated template that can generate personalized credentials whenever you need them. The whole process is built around the idea of layers, and it's surprisingly intuitive.
First things first, you'll create a new image template and upload the base certificate design you've already made. This PNG or JPG file becomes your background layer—think of it as the static canvas for all the personalized details we're about to add.
Defining Your Dynamic Layers
This is where the real magic happens. For every piece of information that needs to change from one certificate to the next—like the person's name or the course they completed—you'll add a new dynamic text layer. You're essentially creating smart placeholders right on top of your design.
For a standard certificate, you'll probably want layers for a few key things:
- Recipient Name: This is usually the star of the show, so it gets the most prominent spot.
- Course or Achievement Title: A clear description of what the certificate represents.
- Completion Date: This adds a specific timestamp, making the credential official.
Inside the OKZest editor, you just drag and position each text layer exactly where you want it. You can get really specific, tweaking the alignment, picking fonts that match your brand, and dialing in the perfect color and size. The live preview makes it a breeze because you can see precisely how the final images for certificates will look in real-time.
This is a great visual of what I mean—a designer fine-tuning these exact layers on a certificate mockup.
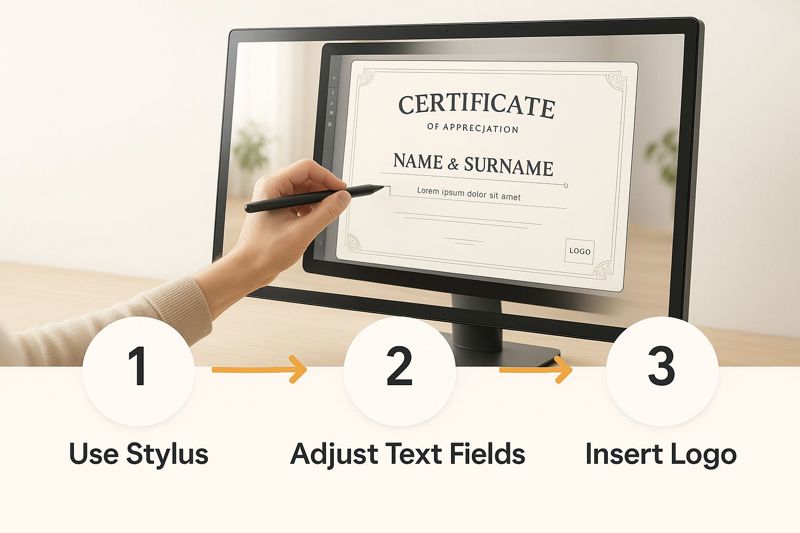
It really shows how modern tools give you precise, on-the-fly control over dynamic fields on a single base template.
Connecting to Your Automation Tools
With your layers all set up, OKZest gives you the tools to hook this template into your other systems. Any time you're building an automated system like this, it's a good idea to follow some core API integration best practices. It just ensures everything runs smoothly and can handle growth without any hiccups.
The real power here is turning a design into an automated asset. By mapping data fields to your template's layers, you're building a system that can generate hundreds of unique certificates from a single spreadsheet row or a form submission, completely hands-free.
This whole approach is incredibly flexible. While our focus here is on certificates, you can apply the same logic to so many other things. I've seen a lot of users get great results by creating personalized images for email campaigns to boost engagement with custom visuals.
Now that your template is fully configured, you're all set to connect your data source and start generating certificates at scale.
Alright, you've got your dynamic certificate template dialed in with OKZest. Now for the fun part: bringing it to life by connecting it to your data. This is where a single, beautiful design multiplies into hundreds of unique, personalized credentials.
The system is built to be flexible. You can create images for certificates one by one or churn them out in massive batches.
For a quick, one-off certificate, you don't need a complex setup. Just tweak the image URL. Each dynamic layer you added in the editor corresponds to a URL parameter. Need to issue a certificate for a last-minute award winner or a single new hire? This is the perfect way to do it instantly.
Automating with Spreadsheets
But the real magic happens when you connect your template to a data source, like a simple Google Sheet. This is where you get a massive boost in efficiency.
Imagine you have a spreadsheet with columns for "First Name," "Last Name," and "Course Title." You can use an automation tool like Zapier or Make.com to keep an eye on that sheet.
A really common workflow looks something like this:
- Trigger: Someone adds a new row to your 'Graduates' Google Sheet.
- Action: The data from that new row (the person's name, the course they finished) gets sent over to the OKZest API.
- Result: OKZest instantly generates a personalized certificate image using your template and that fresh data.
It's a genuine "set it and forget it" solution. Every time you add a graduate to your list, their professional certificate gets created in the background. No more manual work, no tedious copying and pasting, and zero chance of embarrassing typos.
The whole idea is to let a simple, everyday task—like updating a spreadsheet—kick off the entire certificate creation process. You get back countless hours, and every single recipient gets their credential instantly. That’s a powerful way to make them feel seen and recognized.
For any organization that issues credentials regularly—think university departments or corporate training programs—this kind of automation isn't just nice to have; it's essential. It ensures that every graduate, like those from the University of Arizona's Academy of Clinicians as Teachers program, receives their certificate of completion promptly and consistently. You can produce hundreds of custom images for certificates with the same effort it takes to update a single row.
Advanced Tips for Professional Certificate Images
Once you have your basic automation up and running, it's time to add a few layers of sophistication. These aren't just cosmetic changes; they're strategies that make your credentials more robust, credible, and valuable to the people earning them.
A great place to start is with different award tiers. Many programs, for instance, offer a "Certificate with Distinction" for top performers. With OKZest, you can use conditional logic to automatically add a special seal or ribbon to the certificate image. This is all based on a student's score in your spreadsheet, adding a powerful, automated layer of personalization.
Another key detail is the file format itself. To make your certificates look sharp and perform well online, it's worth taking a moment to learn how to optimize website images.
Enhance Security and Professionalism
For a real boost in credibility, think about adding a QR code to your design. This code can link straight to a verification page on your website, giving anyone an instant way to confirm the certificate is authentic. It’s a small addition that provides immense security and peace of mind for both the recipient and anyone who needs to verify the credential.
Choosing the right file format is also a critical decision:
- PNG: This is your best bet for digital use. It supports transparency, which is perfect for placing logos or seals on different backgrounds without that clunky white box around them.
- JPG: This format is ideal if you expect people to print their certificates. JPGs handle color gradients beautifully and can be saved at high resolutions, ensuring they look crisp and professional on paper.
Efficiency is a huge driver in modern design. In fact, recent industry reports show that 33% of business leaders see cost control as their top challenge, which is why digital-first solutions like automated certificates are gaining so much traction.
By thoughtfully combining these advanced elements, you're not just creating an efficient system—you're building one that's secure and authoritative.
For more guidance on the initial setup, you can always circle back to our guide on how to create a certificate from scratch.
Common Questions
When you first start automating certificates, a few questions always pop up. Let's walk through the most common ones I hear, so you can get your new workflow running smoothly from day one.
Can I Use My Own Fonts?
Absolutely. This is one of the first things people ask, and for good reason—brand consistency is everything.
While OKZest gives you the entire Google Fonts library right out of the box, you're not stuck with it. You can easily upload your own .TTF or .OTF font files. This means your certificates will perfectly match your organization's style guide, no compromises needed.
What's the Best Image Size for a Certificate?
This really comes down to how people will receive and use their certificates. There isn't one perfect size, but there are two main scenarios to plan for.
- For Digital Use: If you're emailing the certificate or it's meant to be shared on social media, think screens. A 16:9 aspect ratio like 1920x1080 pixels looks fantastic on monitors and mobile devices.
- For Printing: If you expect recipients to print their awards, you need to go much bigger to avoid a blurry, unprofessional result. Design your template at 300 DPI based on a standard paper size. For a US Letter page (8.5x11 inches), that means using dimensions of 2550x3300 pixels for a crisp, clean print.
The real magic happens when you connect OKZest to an automation tool like Zapier or Make.com. I've seen clients set up simple workflows where a new row in a spreadsheet—say, a graduate's name—triggers OKZest to instantly generate their personalized certificate and email it directly. It’s a complete set-it-and-forget-it system.
Ready to stop wasting time on manual design and start creating beautiful, personalized credentials on autopilot? OKZest makes it incredibly simple to generate dynamic images for certificates, emails, and much more.
Start automating your image creation today at okzest.com.