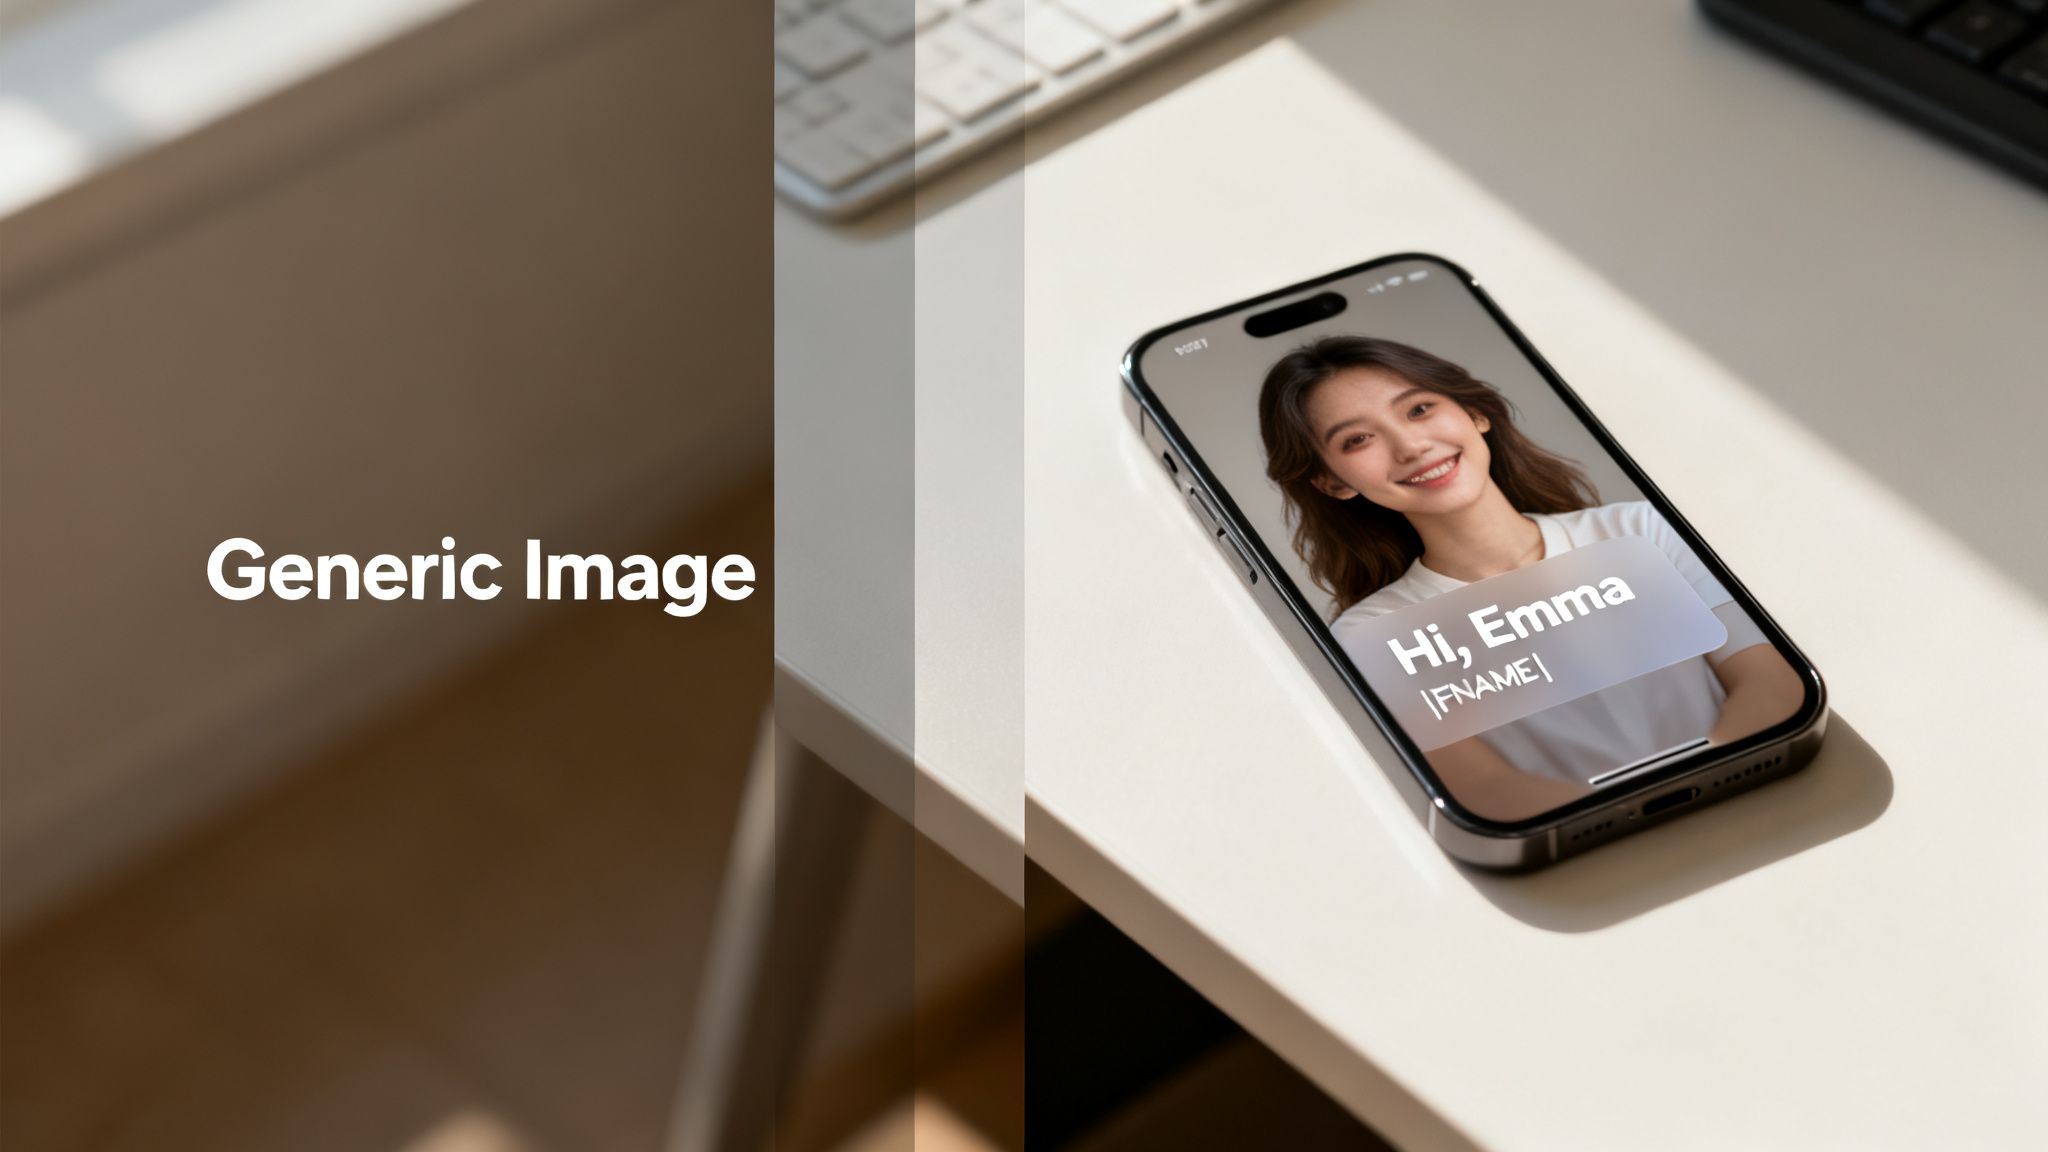
At their core, merge tag images are dynamic visuals that change based on who's looking at them. It's the same idea as a text merge tag like *|FNAME|* that pulls in a subscriber's name, but for images.
This means you can use a single image link that generates a completely unique graphic for every single person on your list.
The Power Of Personalized Visuals In Modern Marketing
In a world drowning in generic content, personalization is your best bet for grabbing—and holding—attention. We’ve all seen emails that start with "Hi John," but visual personalization takes this a massive step forward. Instead of just reading their name in plain text, your audience sees an image crafted just for them.
This shift from a one-size-fits-all graphic to a one-to-one visual experience is a game-changer. It turns a passive message into an active conversation, making the recipient feel genuinely seen.
Why Visuals Matter More Than Ever
Let's be honest, static, uniform images are easy to ignore. They just become background noise in a crowded inbox or a busy social feed. But dynamic merge tag images shatter that pattern by creating a moment of surprise and pure relevance.
That simple act of showing someone their name, their company logo, or some other piece of custom data on a graphic triggers an immediate connection. It stops the scroll. It pulls them into your message.
The benefits are straightforward and powerful:
- Increased Attention: A personalized visual is unexpected, grabbing focus in a way plain text never could.
- Stronger Connection: It proves you’ve done more than just import a CSV file; you’ve created something specifically for them.
- Improved Engagement: This personal touch directly leads to better open rates, higher click-throughs, and, ultimately, more conversions.
Think about it this way: the old approach was sending the exact same banner to thousands of people. The new way is generating thousands of unique banners on the fly, each tailored to an individual. This isn't just an upgrade; it's a fundamental change in visual communication.
Setting The Stage For Success
Understanding the "why" is the first step. The real magic happens when you start applying this to your marketing. Throughout this guide, we'll get practical, showing you exactly how to put this strategy to work. For a deeper dive, our guide on personalized images offers even more insight.
And this idea goes way beyond email. The broader landscape of visual personalization is blowing up with tools for AI social media content creation, giving marketers the ability to create unique visuals at scale for all kinds of channels.
Now, let’s dig into how these images actually impact your customer engagement.
How Merge Tag Images Transform Customer Engagement
Let's move beyond the theory. The real power of merge tag images snaps into focus when you look at the data. This isn't just some clever marketing trick; it's a strategy grounded in psychology and proven by hard numbers.
When a customer sees an image with their name on it—whether it’s a custom certificate, a loyalty reward, or a social media shout-out—it triggers what’s known as the "cocktail party effect." This is our brain's uncanny ability to pick out personally relevant information from a sea of noise. In a crowded inbox, seeing your own name in a visual format instantly commands attention.

This immediate connection makes your message feel more personal and trustworthy. It stops the mindless scroll and encourages people to actually engage with what you've sent them.
The Undeniable Proof Is in the Numbers
The impact here isn't subtle—it's a massive performance driver. Personalized emails that use custom images see a 29% higher open rate and a 41% higher click-through rate compared to their generic counterparts.
And the effect snowballs from there. Segmented and personalized emails are responsible for generating a staggering 58% of all revenue. If you're curious, you can discover more about these powerful personalization statistics and how they impact campaign results.
The data is clear: investing in personalized visuals delivers a significant return. It turns your one-to-many broadcast into a series of one-to-one conversations, all happening at scale.
The most compelling figure might be this: personalized calls-to-action, often embedded right inside these dynamic images, result in 202% better conversion rates. This shows that personalization doesn't just grab attention; it actively drives action.
From Gimmick to Foundational Strategy
A decade ago, seeing your name pop up in an image might have felt like a novelty. Today, it’s an expectation. Customers are so used to generic marketing that anything tailored just for them stands out dramatically.
This is why merge tag images have shifted from a clever tactic to a core part of any modern engagement strategy.
Think about these real-world scenarios:
- For Event Organizers: Imagine sending a speaker a social media graphic with their headshot, name, and session title already populated. They're far more likely to share it.
- For E-commerce Brands: Show a customer a product mockup with their name already on it to showcase a custom item.
- For SaaS Companies: Create a personalized onboarding graphic that welcomes a new user by name and points them toward their first key action.
In every case, the personalized visual does more than just share information. It builds a relationship, fosters loyalty, and makes the recipient feel seen and valued.
Crushing Industry Benchmarks
Let's be honest, standard email campaigns often struggle to hit double-digit click-through rates. By introducing this deep level of personalization, you're not just aiming for small improvements; you're setting a whole new performance standard for your marketing.
The psychological trigger of seeing a custom-made visual is what allows these campaigns to consistently crush industry benchmarks. It’s the difference between sending an ad and delivering a personal message. Now that we've covered the "why," it's time to dig into the "how."
Creating Your First Campaign With No-Code Tools
Jumping into personalized visuals doesn't mean you need to be a developer or wrangle any complex code. With the right no-code tools, you can get a powerful merge tag images campaign up and running in less time than it takes to brew a pot of coffee. The whole process is visual, intuitive, and built for marketers.
It all begins with your base image template. This is your master design—the canvas where all the personalization will happen. A platform like OKZest lets you upload a background image or even design one from scratch, setting the stage for all the dynamic parts.
Building Your Dynamic Image Template
Think of this template like a blueprint for your design. You'll set up the static elements first—things like your company logo or a branded background that stay the same for everyone. After that, you'll add dynamic layers for the parts you want to personalize.
These layers are where the magic really happens. You can add:
- Text Layers: Perfect for names, company names, or custom messages.
- Image Layers: Great for adding profile pictures, customer logos, or even specific product images.
Each dynamic layer gets a specific name, like first_name or profile_pic. This name is the crucial link that connects the layer to your data source later on. It’s a simple step, but it’s what tells the system exactly where to slot in each piece of personalized info.
Connecting Your Data Source
Once your template is looking sharp, you need to feed it the data that will bring those dynamic layers to life. The most straightforward, code-free way to do this is with a CSV file or a Google Sheet. If you're an email marketer, your contact lists are probably already in this format.
You just upload your file or connect your sheet, then map the columns to the layers you created in your template. For example, you’ll map the "First Name" column from your spreadsheet directly to the first_name text layer in your image. The mapping process is just a few clicks.
After you connect the data, the tool generates a unique image URL for every single person in your spreadsheet. This URL is the key to the whole operation. It holds all the personalized data for that specific contact, ready to be plugged right into your email campaign.
The real beauty here is the scalability. You design one template, connect one data source, and the platform does all the heavy lifting, creating thousands of personalized merge tag images automatically. It’s mass personalization made simple.
Integrating With Your Email Platform
With your unique image URLs ready to go, the final step is to get them into your Email Service Provider (ESP), whether that's Klaviyo, Mailchimp, or ActiveCampaign. This is where the "merge tag" concept comes full circle. Instead of using a normal, static image, you’ll be using a dynamic one.
You’ll add an image block to your email template, but for the image source (the src attribute in the HTML), you’ll paste the base URL from your image generation tool. Then, you simply add your ESP’s merge tags to pass the contact-specific data along.
For example, in Klaviyo, your URL might look something like this:
https://okzest.com/image?first_name={{ person.first_name }}
This tells Klaviyo to grab the first name for each recipient and pop it into the URL just before sending the email. OKZest then receives that information and generates the right personalized image in real-time. To see how this works with different platforms, you can check out our guide on creating an email personalised image generator for more examples.
The process is almost identical across all the major ESPs, even if the merge tag syntax changes a bit. The core idea is always the same: use your ESP's merge tags to complete the image URL dynamically for every contact.
ESP Merge Tag Formats For Dynamic Image URLs
Here’s a quick reference guide for inserting your dynamic image URL into popular Email Service Providers. Just replace 'YOUR_IMAGE_URL_HERE' with the URL from your image generation tool and add the appropriate merge tags.
| Email Service Provider (ESP) | Merge Tag Example For Image Source |
|---|---|
| Klaviyo | YOUR_IMAGE_URL_HERE?name={{ person.first_name }} |
| Mailchimp | YOUR_IMAGE_URL_HERE?name=*|FNAME|* |
| ActiveCampaign | YOUR_IMAGE_URL_HERE?name=%FIRSTNAME% |
| HubSpot | YOUR_IMAGE_URL_HERE?name={{ contact.firstname }} |
| Brevo (Sendinblue) | YOUR_IMAGE_URL_HERE?name={{ contact.FIRSTNAME }} |
| ConvertKit | YOUR_IMAGE_URL_HERE?name={{ subscriber.first_name }} |
Getting the syntax right is the key. Once you have it, you can deliver a unique visual experience to every single person on your list.
Automating Image Creation With An API
While no-code tools are fantastic for getting started, technical marketers and developers often hit a ceiling. When you need more power, flexibility, and serious scale, an image generation API is the way to go. This approach lets you programmatically create merge tag images on the fly, triggered by user actions or automated workflows.
Instead of manually uploading a CSV file, you can integrate image creation directly into your existing applications.
This opens up a whole world of real-time personalization. Imagine a new user signs up. Your backend server can instantly make an API call to generate a custom welcome image with their name. This image could then pop up in a welcome email, a chatbot message, or even on their dashboard—all within milliseconds.
The process is actually pretty straightforward. You start with a base template, feed it some data, and out comes a personalized image URL ready to use.
This flow diagram breaks it down visually:
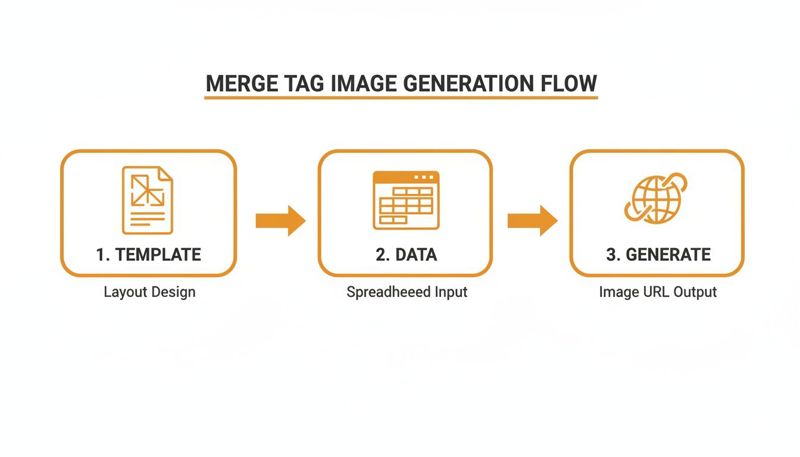
This simple, three-stage process—Template, Data, Generate—is the engine behind any automated visual content workflow, whether you're using a no-code tool or hitting an API endpoint directly.
Making Your First API Request
The core idea of using an image API is simple: you send data to a specific endpoint, and it sends back a personalized image URL. This is usually done with a POST request, where the body contains all your personalization data, typically formatted as a JSON object.
First thing's first: authentication. Most APIs, including ours here at OKZest, use an API key to keep your requests secure. You'll just need to include this key in the request header to identify yourself.
Let's walk through a real-world example. Say you've designed an image template with two dynamic layers you've named user_name and company_logo. Your API call just needs to provide the content for those two fields.
Here’s a basic JavaScript example using fetch to make the request:
async function generatePersonalizedImage(name, logoUrl) { // The endpoint for the image generation API. const apiUrl = 'https://api.okzest.com/v1/generate';
// Your unique API key for authentication. const apiKey = 'YOUR_API_KEY_HERE';
// The data to personalize the image, matching the layer names in your template. const data = { templateId: 'YOUR_TEMPLATE_ID', // ID of the image template you want to use. data: { user_name: name, company_logo: logoUrl } };
try { const response = await fetch(apiUrl, { method: 'POST', headers: { 'Content-Type': 'application/json', 'x-api-key': apiKey // Authentication header. }, body: JSON.stringify(data) });
// Check if the request was successful.
if (!response.ok) {
  throw new Error(`API request failed with status: ${response.status}`);
}

// The API returns JSON with the unique image URL.
const result = await response.json();
console.log('Generated Image URL:', result.imageUrl);
return result.imageUrl;
} catch (error) { console.error('Error generating image:', error); } }
// Example usage: generatePersonalizedImage('Alex Smith', 'https://example.com/logo.png');
In this snippet, the function grabs a user's name and logo URL, sends them off to the API, and gets a ready-to-use image URL back. Simple as that.
Practical Applications and Scalability
The real magic of an API is its ability to plug into any system you're already using. You can trigger image generation from just about any event.
- Chatbot Responses: When a user finishes a quiz in your chatbot, you can generate and send them a personalized graphic summarizing their results.
- On-Site Banners: Greet returning customers with a welcome banner on your homepage that features their name.
- Automated Workflows: In a Zapier or Make.com workflow, create a custom visual whenever a new lead hits your CRM.
This approach is built for scale. A good API can handle thousands of requests per minute, making it perfect for large-scale email campaigns, social media outreach, or high-traffic websites. For a closer look at scaling your visual content, learn more about using an API for personalized email graphics at scale.
The core takeaway is that an API transforms image creation from a manual task into a dynamic, automated part of your tech stack. It's about creating visuals at the exact moment they are needed, with data that is fresh and contextually relevant.
If you're curious about the tech that makes this all possible, you can get a better understanding of how image-to-image AI works. This context helps explain just how sophisticated these generation processes can get.
Creative Use Cases To Inspire Your Next Campaign
Alright, now that you've got the hang of setting up merge tag images—both with no-code tools and the API—it's time for the fun part. Let's dig into some practical, real-world ideas that show just how powerful these visuals can be when you ditch generic stock photos.
The trick is to think about any moment where a personalized visual can create a genuine connection. You can adapt these plays for your own marketing, whether you're in email, social media, or even direct messaging apps like WhatsApp.
Event Promotion and Management
If you've ever organized an event, you know you're constantly talking to speakers, sponsors, and attendees. Personalized visuals can make every one of those touchpoints feel special and seriously ramp up social sharing.
Let's say you're running a virtual summit. Instead of the standard "You're confirmed!" email to a speaker, you could send them a custom social media graphic.
- The Play: Design a branded template with layers for the speaker's headshot, name, session title, and time.
- Dynamic Data:
speaker_name,speaker_photo,session_title,session_time. - The Win: Your speakers get a polished, ready-to-share graphic. Not only does this make them feel like a big deal, but it also turns them into promoters for your event, giving you a ton of organic reach.
You can easily apply this to attendees, too. Generate a personalized ticket or a "Can't wait to see you, [Name]!" graphic that they can post to show they're coming.
Hyper-Personalized Sales and B2B Outreach
In B2B sales, getting noticed on a platform like LinkedIn is a grind. A generic InMail message is easy to ignore, but a custom visual? Not so much.
A sales development rep (SDR) can use merge tag images to craft outreach that actually makes a prospect pause.
- The Play: Create an image that looks like a branded notepad or whiteboard. Use dynamic layers to pull in the prospect’s name, company, and maybe even their logo.
- Dynamic Data:
prospect_name,company_name,company_logo. - The Win: Instead of a block of text, the prospect gets an image that says, "Hey [Name], I have an idea for [Company]." That level of personal touch shows you’ve done your research and makes getting a reply so much more likely.
This tactic flips your outreach from a mass blast to a one-to-one conversation. It's an incredible way to show genuine interest before you've even booked a meeting.
E-commerce and Customer Loyalty
For any e-commerce brand, personalization is the name of the game. Dynamic images can elevate the entire customer journey, from that first purchase to building long-term loyalty.
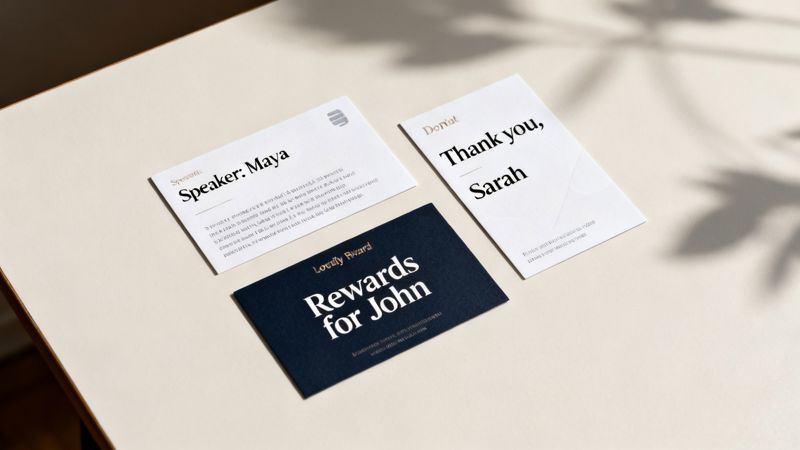
Think about a simple "Thank You" campaign for new customers.
- The Play: After an order is placed, automatically generate a "Thank You" card image with their name and a nod to the product they bought. You can send this in an email or even a WhatsApp message.
- Dynamic Data:
customer_name,product_image,order_number. - The Win: It’s a small detail, but it creates a real emotional connection and encourages repeat business. The customer feels like a person, not just another order number in your system.
Loyalty programs are another perfect fit. You can create personalized graphics showing a customer their points balance, tier status, and unlocked rewards. This makes the program feel more tangible and exciting. Consumers are practically demanding this; recent data shows 90% want more personalized experiences, and a whopping 96% are more likely to buy from brands that provide it. This is especially true for Gen Z and Millennials, key audiences for most social media managers. You can learn more about how shoppers want brands to use personalization.
Nonprofit Donor Engagement
Nonprofits are built on deep, meaningful relationships. A standard email receipt after a donation is fine, but a personalized thank-you visual is something people remember and share.
- The Play: Design a certificate-style image that thanks the donor by name and mentions the specific impact their contribution made.
- Dynamic Data:
donor_name,donation_amount,impact_statement(e.g., "funded 10 meals for families"). - The Win: This transforms a transactional receipt into a heartfelt moment of acknowledgment. Donors feel a much stronger tie to your mission, which makes them far more likely to become repeat givers and advocates for your cause.
Common Questions About Merge Tag Images
As you start exploring personalized visuals, you're bound to have a few questions. That's totally normal. I've gathered the most common ones I hear to give you clear, straightforward answers, so you can move forward with confidence.
What Happens If Personalization Data Is Missing?
This is probably the most critical question, and thankfully, there's a simple answer: fallback logic. Any solid image generation system is built to handle missing data gracefully. This means you can set a default value for any dynamic element in your image.
For instance, if the first_name field is empty for a particular contact, you won't be left with an awkward blank space. Instead, the image can automatically fall back to a generic greeting you've predefined, like "Hello there!" or "A special gift for you!"
The same principle applies to images.
- If a customer's profile picture isn't available, you can display your company logo or a branded icon instead.
- If a prospect's company logo can't be found, you could show a generic industry icon as a placeholder.
This built-in safety net ensures every image you send looks complete and professional. It protects the brand experience, even when your data isn't perfect.
The key takeaway? You’re always in control. Fallbacks prevent broken-looking images and guarantee a polished, consistent look for every single recipient.
Are These Images Compatible With All Email Providers?
Yes, for all practical purposes, they are universally compatible. Merge tag images are just standard image URLs embedded in your email's HTML. This means they work with any Email Service Provider (ESP) that supports two fundamental features: custom HTML and merge tags.
That covers pretty much every major platform out there—Mailchimp, Klaviyo, HubSpot, ActiveCampaign, and countless others. The whole magic happens when you paste your dynamic image URL into the source (src) attribute of an <img> tag.
The only real requirement is that your ESP lets you insert its own merge tags right into that URL string. Since that's the core of email personalization, you'll find it's a standard feature everywhere.
How Do I Handle Different Image Sizes?
Excellent question, especially if you're planning a multi-channel campaign. An image that looks perfect in an email might get cropped awkwardly in an Instagram DM. The solution is to create multiple templates, each designed for a different aspect ratio.
A good image personalization platform will let you design separate versions of your visual for each channel.
- Email Banner: You might create a wide template, like 600x300 pixels.
- Social Media Post: For Instagram or LinkedIn, a square 1080x1080 pixel template is perfect.
- Direct Message: A vertical format, like 1080x1920 pixels, works best for story-style DMs.
When you generate the image, whether through a no-code tool or an API call, you just specify which template you want to use. This simple step ensures your personalized visuals look fantastic on every channel, with no weird stretching or cropping.
Can I Track Engagement on Personalized Images?
Absolutely. Engagement tracking is handled by the marketing platform you're already using, like your ESP or a social media scheduler.
Because the personalized image is just another element within your message, you can track opens, clicks, and conversions with the same analytics tools you're already familiar with. The image itself doesn't get in the way of that process.
For even more granular tracking, you can append parameters (like UTM codes) to any links that are part of your image's logic. This lets you trace clicks directly back to a specific personalized visual campaign, giving you powerful insight into what's working.
Ready to create stunning, personalized visuals that capture attention and drive action? With OKZest, you can automate your image creation with our easy-to-use no-code tools and powerful API. Start for free and see the difference one-to-one marketing can make. Learn more and sign up at OKZest.com.