Ever wonder how you can create thousands of unique, personalized images in real-time without ever opening a design tool? That's the magic of a REST API for images. Instead of blasting the same static graphic to every user, these APIs let you programmatically generate visuals on the fly, tailored to each individual.
Why Use a REST API for Images

At its heart, a REST API for images swaps out manual design work for automated, data-driven image creation. Think of it as a bridge between your application's data and a visual output. This allows developers and marketers to craft highly specific content that truly connects with people one-on-one, moving way beyond generic visuals.
The last time you received an email with your name flawlessly embedded in a header image, or instantly got a personalized certificate after finishing a course? That slick experience was almost certainly powered by an image generation API.
The Core Benefits of Image APIs
The real appeal here comes down to three key advantages that solve some of the most common headaches in marketing and development. By plugging in an image API, you can unlock some serious efficiencies and create far more memorable user experiences.
The main benefits are pretty straightforward:
- Deep Personalization: Create visuals that pull in a user's name, their company logo, a profile picture, or any other piece of data you have. This makes every single interaction feel unique and thoughtfully designed for them.
- Scalable Automation: Need to generate thousands—or even millions—of unique images? No problem. It's perfect for large-scale email campaigns, social media outreach, or event management where manual creation is impossible.
- Real-Time Generation: Produce images on demand as users interact with your app or website. This keeps your content fresh, relevant, and perfectly timed.
A REST API for images is more than just a technical tool; it’s a strategic asset for creating dynamic, engaging content at scale. It lets you build a genuine one-to-one connection with your audience through visuals.
This kind of automation is becoming essential across the board. The global image recognition market, which relies heavily on APIs to process visual data, was valued at USD 45.02 billion in 2022 and is on a steep growth path. This boom shows just how widely RESTful APIs are being adopted everywhere, from marketing automation platforms to advanced analytics. You can find more insights on the top image recognition APIs and their market impact on Daffodil's blog.
With these core ideas in mind, you're ready to dive in and see how to make your first API call.
Getting Ready for Your First API Call
Before you write a single line of code to generate your dynamic images, a little prep work goes a long way. Think of this as a pre-flight checklist. Getting these few things in order first will make your integration with any REST API for images much smoother and save you from some common headaches.
It all starts with getting your credentials and understanding the rules of engagement.
The very first thing you need to do is grab your API key. Most services, including ours, will show you this unique string of characters in your account dashboard right after you sign up. This key is how the API identifies and authenticates your requests—it’s basically the password your code uses to talk to the server.
Authentication and Access
How you actually use this key will depend on the API's security setup. Typically, you'll find one of two common authentication methods, and you'll need to specify it in the request header.
- API Key: This is often the most straightforward method. You just pass the key directly in a header, something like
X-API-Key: YOUR_API_KEY_HERE. - Bearer Token: A slightly different approach involves sending a token with the
Authorizationheader, which looks like this:Authorization: Bearer YOUR_TOKEN_HERE.
Getting this header right is where most people trip up at first. I've spent more time than I'd like to admit staring at a 401 Unauthorized error, only to realize I had a typo or the header was formatted incorrectly. Always double-check the API documentation for the exact header name and format they expect.
For a deeper dive into how API security and requests work under the hood, this API integration tutorial is a great resource that covers these fundamentals in detail.
Set Up a Safe Sandbox
Once you have your key, resist the temptation to immediately plug it into your main application. Instead, your next stop should be a dedicated API client like Postman or Insomnia. These tools give you a simple interface to send requests and see the responses without writing a lick of code.
Using an API client for your initial tests is a non-negotiable step in my book. It isolates the API call from your own application's code, letting you confirm that your authentication, headers, and payload are all correct before adding any more complexity.
This "sandbox" approach lets you quickly confirm your credentials work and that you're sending data in the format the API expects.
Just as important, it helps you get a feel for the API's behavior, especially its rate limits. Every API has rules about how many requests you can make in a certain amount of time—for instance, maybe 60 requests per minute. This info will be in the documentation. Ignoring it is a fast track to getting your IP temporarily blocked, so always find out the limits before you start building.
Crafting Your Image Generation Payload
Once you're authenticated, the real fun begins. This is where you tell the API exactly what kind of image you want it to create, and you do that using the request body, more commonly known as the payload.
Think of the payload as your instruction manual for the server. It's a structured message, usually in JSON format, that lays out the blueprint for your final image. You're not just asking for "an image"; you're specifying every last detail, from the base design to the dynamic text you want layered on top.
The Anatomy of an Image Payload
Most image generation APIs work from a base template. This could be a pre-designed background, a certificate layout, or a social media graphic you've already cooked up in a tool like Figma or Canva and uploaded to the service. The template has specific layers or fields that you can then tweak using the API.
Your payload will usually contain a few key parameters:
- Template ID: The unique identifier for the base design you're working with.
- Modifications Array: A list of all the changes you want to make. Each change will target a specific layer by name (like "userName") and provide the new value (like "Jane Doe").
- Output Format: This is where you define the file type you need. You might want a JPEG for photos or a PNG if you need a transparent background.
- Dimensions: You can often specify the final width and height for the image, which is super useful for creating everything from email banners to high-res print files.
This structured, key-value approach is why JSON is king. A recent study found that a staggering 89% of web APIs now support JSON, with RESTful services hitting a 93% adoption rate. It's just so lightweight and easy for both humans and machines to understand. If you're curious, you can find more details on API data exchange formats and their widespread use on Arxiv.
From Database to Dynamic Image
The real magic happens when you start pulling data from your application and feeding it directly into the payload. Let's imagine a new user, Jane, just signed up for your service. Your database has her name and maybe even a profile picture URL.
Your code can grab that information and build a JSON payload on the fly. You'd map jane.name to the text field for the user's name and jane.profile_picture_url to the image layer for their avatar. Just like that, you've transformed a generic template into a unique, personalized visual for every single user. For more practical scenarios, our guide on how to use API pictures for personalization has some great examples.
The payload is where your data becomes visual. By dynamically populating JSON fields from your database, you turn a static template into an infinitely variable and personalized communication tool.
Choosing the Right API and Tools
Of course, crafting the perfect payload means you need an API that offers the right level of control. Some platforms are pretty basic, only allowing simple text and image swaps. Others get much more advanced, offering features like conditional logic, dynamic QR codes, or complex image filters.
If you're looking for the right platform, it's worth exploring some of the leading AI image generator tools, as many now offer robust API features. A well-documented API is your best friend here—it makes it so much easier to figure out what parameters are available and how to structure your payload to get the exact result you're after.
Handling API Responses and Embedding Your Images
You’ve sent your carefully crafted payload, and now it’s time to see what the API sends back. This response is where the magic happens—it contains the link to your brand-new personalized image. But how you get that link can differ, so understanding the response type is crucial for building a solid workflow.
Some API calls are synchronous. This means you send a request and get the final image URL back almost instantly. It's a direct, one-and-done process that’s common for simple tweaks, like adding a person's name to a certificate template. It's fast and easy to work with.
Then there's the asynchronous approach, which is more common for complex renderings that need some serious processing power—think AI-driven backgrounds or detailed data visualizations. In this setup, the first response you get is just an acknowledgment, maybe with a job ID. You'll then need to check in on the status by polling another endpoint or, far more efficiently, by using a webhook that pings your app the moment the image is ready.
Parsing the Response and Finding Your URL
Whether the process is instant or takes a few moments, the final prize is almost always delivered in a JSON object. Your code’s job is to crack open that JSON and pull out the image URL. You'll typically find it under a key named url, image_url, or something similar.
For a straightforward synchronous response, you might get something that looks like this: { "success": true,
"image": {
"url": "https://cdn.example.com/generated/your-new-image.jpg"
}
}
In your code, you’d just grab response.image.url to get the link. Simple.
More advanced systems, like those following the International Image Interoperability Framework (IIIF) Image API 3.0 standard, pack a lot more into their JSON responses. They provide rich technical metadata like size, format, and even rights information, which is a lifesaver for big digital archives.
Ultimately, the goal is to turn that raw data from your database into a usable image URL.
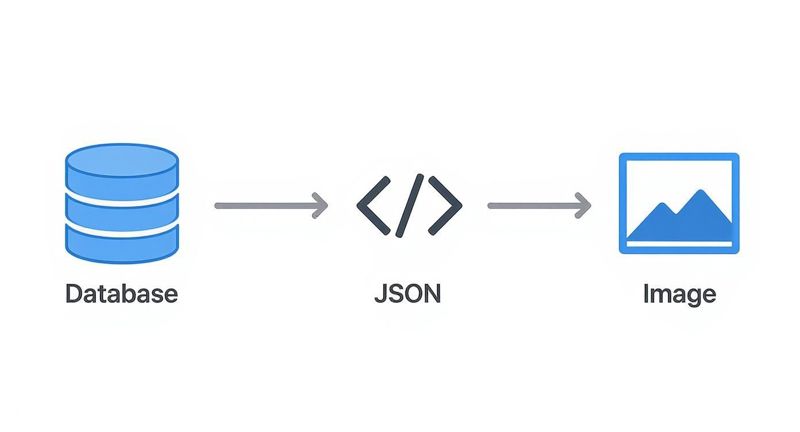
As you can see, structured data is formatted into a JSON payload, sent to the API, and then returned as a finished, ready-to-use image.
Putting Your New Image to Work
Once you have the URL, you can plug your dynamic image in just about anywhere.
Here are a few common places people put them:
- On a Website: The classic way is to use an HTML
<img>tag. Just set thesrcattribute dynamically with the URL you got from the API. - In an Email Campaign: Tools like HubSpot or Mailchimp live on merge tags. You can save the generated URL to a custom contact field and pop it into your email template with something like
{{contact.custom_image_url}}. - In Social Media DMs: Many social media APIs let you drop media URLs right into messages, opening the door for some seriously cool, personalized interactions with your followers.
Pro Tip: Always have a backup plan. API calls can fail or time out. If that happens, you don't want a broken image ruining the user experience. Set up a fallback—a generic, non-personalized image—to display instead. It keeps things looking smooth and professional.
If you want to dive deeper into the nitty-gritty of embedding, our guide on creating image links for various platforms has some great, practical advice.
Real-World Scenarios and Pro Tips
Let's move from theory to practice. A REST API for images truly proves its worth when it solves real business problems, turning static content into dynamic, personalized experiences. We'll walk through a few common ways people use this technology and share some pro tips I've picked up to make sure everything runs smoothly.

Imagine you need to send out personalized certificates to everyone who attended your last event. Instead of a designer manually editing hundreds of files, you can just trigger an API call the moment someone finishes a webinar. The request would pull the attendee's name and the event title straight from your database, instantly generating a professional certificate they can share online.
This same logic works perfectly for creating unique welcome images for new user onboarding. A quick API call can produce a branded graphic with the user's name or company logo, making their first interaction with your platform feel personal and memorable right from the start.
Automating Personalized Certificates
For something like an event certificate, the JSON payload is refreshingly simple. All you're doing is pointing to a pre-designed template and feeding it the dynamic data you want to drop in.
Here’s what that looks like in the real world:
{
"template_id": "cert-webinar-2024",
"modifications": [
{
"name": "attendee_name",
"text": "Alex Rivera"
},
{
"name": "course_title",
"text": "Advanced Email Marketing"
}
],
"format": "png"
}
In this snippet, you're telling the API to grab the cert-webinar-2024 template and swap the text in the attendee_name layer with "Alex Rivera". It's clean, it scales, and it completely eliminates hours of tedious design work.
Generating Dynamic Social Previews
Another fantastic use case is generating dynamic preview images for social sharing. When a user shares a link from your site, you can use an API to create a custom Open Graph image on the fly. This image could include the article title, the author's name, and maybe even their profile picture.
Pro Tip: Don't regenerate the same image every single time. Cache it! After the first request, store the generated image URL in your database. For any future requests for that same resource, you can just serve the cached URL directly. This saves API calls and seriously cuts down on load times.
This approach makes every link shared from your platform look polished and professional, which can give your click-through rates a nice boost. It’s also a good idea to learn about best practices for resizing photos for different platforms, since that's a huge part of making social previews work well.
Optimizing Your Workflow
To really get the most out of your image API, you need to think beyond just simple, one-off requests. If you're trying to generate thousands of images at once, a standard synchronous request is just going to time out. This is where webhooks become your best friend.
- Use Webhooks for Big Jobs: Instead of making your application wait for a response, just give the API a webhook URL. The API can then ping your application once the image is ready. This is absolutely essential for long-running processes and keeps your server from getting bogged down.
- Design Flexible Templates: Don't hardcode anything you might want to change later. Build your templates with clearly named layers for every dynamic element—text, images, colors, you name it. This gives you maximum flexibility without forcing you to create entirely new templates for minor tweaks.
By putting these strategies together, you can build a really robust and efficient system for creating personalized visuals at any scale.
Common Questions About Image REST APIs
When you first start playing around with a REST API for images, it’s completely normal to have a few questions pop up. The core technology is pretty straightforward, but a few details can definitely trip you up if you're not careful.
Let's walk through some of the most common questions we see from developers who are integrating an image generation service for the first time. Getting these sorted out early will save you a ton of headaches down the road.
What Is the Best Image Format to Request?
This is a classic question, and the answer is always: it depends on what you’re trying to do. There's no single "best" format, but there are clear winners for different jobs.
- JPEG: This is your workhorse for photos or any complex image where file size is a big deal. Its compression is fantastic for keeping load times snappy, which makes it perfect for most web use cases.
- PNG: Go with PNG when you absolutely need a transparent background. If you're overlaying your generated image on top of a colored background or another graphic, PNG is the only way to fly. It also keeps text and logos looking crisp and sharp.
Most modern image APIs will let you specify the format you want right in the request payload. For general-purpose web apps, I usually find that JPEG strikes the perfect balance between quality and performance.
The choice between JPEG and PNG really just boils down to a simple trade-off: file size versus transparency and sharpness. Figure out what your final image needs to do, and the choice becomes obvious.
How Do I Handle API Rate Limits for Bulk Jobs?
Smacking into an API rate limit is frustrating, but it’s almost always avoidable with a little planning. Your first stop should always be the API's documentation to understand what the limits are. They’re there for a good reason—to keep the service stable and fast for everyone.
When you have a big batch of images to create, the last thing you want to do is slam the API with all your requests at once in a tight loop. A much better approach is to set up a simple queueing system and add a small, polite delay between each call. Even a one or two-second pause can make all the difference and keep you safely under the limit.
For really massive jobs, see if the API offers a dedicated batch processing endpoint. They are built specifically for these high-volume tasks.
Can I Use a REST API to Edit Existing Images?
Absolutely. A lot of image APIs are built to handle both generating new images from a template and modifying ones that already exist. You can usually just pass an existing image URL or upload a file as part of your API request.
From there, your JSON payload will specify the edits you want to make. Some common modifications include:
- Adding a watermark or your company logo
- Resizing the image to create a thumbnail
- Cropping it to a different aspect ratio
- Applying a cool visual filter or effect
This is incredibly handy for automating tedious tasks, like branding user-submitted photos for a contest or creating perfectly standardized product images for an e-commerce store.
Ready to stop designing images manually? With OKZest, you can automate personalized image creation for your email campaigns, social media, and websites in minutes. Start creating for free today and see the difference dynamic visuals can make.