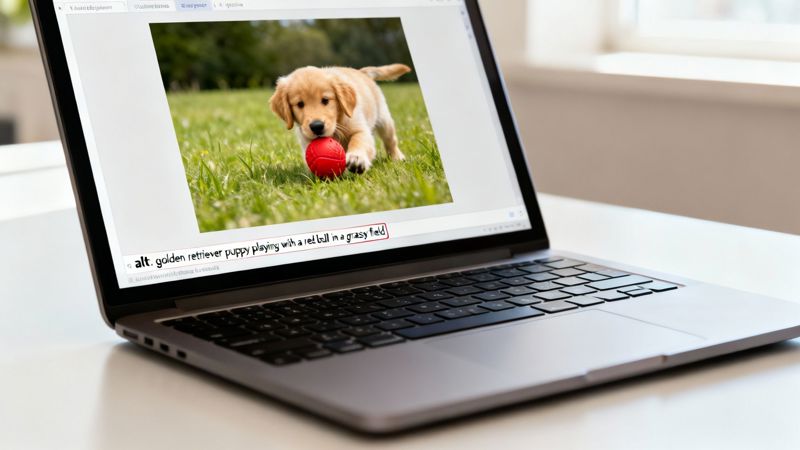
Making an image a clickable link is one of the first things most of us learn in HTML, and for good reason. It’s a simple, powerful way to make your site more interactive. The whole trick is just nesting one tag inside another.
You simply take a standard image tag (<img>) and wrap it completely inside an anchor tag (<a>). The anchor tag points to where you want the user to go, and the image tag tells the browser what picture to show. When you put them together, the image becomes the link.
The Foundation for Clickable HTML Images

At its core, this process combines two of HTML’s most fundamental elements to do two things: display a visual and define a destination for a click.
This isn't some newfangled technique. The method for linking an image in HTML has been around since the mid-1990s as the web started to become more visual and interactive. Back then, studies showed that using images for navigation could boost click-through rates by up to 40% compared to just text links. You can dig into the history of these web standards on w3schools.com.
To get this right, you need to know the essential attributes for both tags.
- The
<a>Tag (Anchor): This is your hyperlink. Its most important job is holding the destination URL in itshrefattribute. - The
<img>Tag (Image): This embeds the image. It absolutely needs asrcattribute to point to the image file and analtattribute for accessibility.
Key Takeaway: The structure is always
<a href="destination-url.html"><img src="image.jpg" alt="description"></a>. The image tag goes inside the anchor tag. Getting this order wrong is a classic beginner mistake.
Before we dive deeper, let’s quickly break down the key HTML tags and attributes you'll be working with.
Essential HTML Tags for Linking Images
| Tag & Attribute | Purpose | Example Usage |
|---|---|---|
<a> |
The anchor tag that defines the hyperlink. | <a href="...">...</a> |
href |
Specifies the destination URL for the link. | href="https://okzest.com" |
<img> |
The image tag that displays the visual element. | <img src="..." alt="..."> |
src |
Defines the source path to your image file. | src="logo.png" |
alt |
Provides alternative text for accessibility. | alt="OKZest Company Logo" |
With these two tags, <a> and <img>, you have everything you need to create a basic clickable image. Next, we'll look at how to handle image paths correctly.
Navigating Image Paths Without Broken Links

There’s nothing worse than crafting the perfect clickable image, only to see that dreaded broken icon when you load the page. Nine times out of ten, this headache comes down to one simple thing: an incorrect image path in the src attribute.
Getting this right is all about understanding the two ways to point to an image file: absolute and relative paths.
An absolute path is the full, complete web address of an image, like https://okzest.com/assets/logo.png. It includes the protocol (https://), the domain, and the exact file location. You’ll always use an absolute path when you're pulling in an image from another website or a content delivery network (CDN).
A relative path, on the other hand, tells the browser where to find an image in relation to the current HTML file. This is the go-to method for images hosted on your own server because it keeps your project self-contained. If you decide to move your entire website folder to a new server, all your image links will still work perfectly.
Choosing the Right Relative Path
Navigating your project’s folders with relative paths is easy once you get the hang of the syntax. Let’s say your website files are organized like this:
index.html(your current page)logo.png(in the same folder as index.html)images/(a subfolder)photo.jpg
assets/(another subfolder)icons/social.svg
From your index.html file, here’s how you’d link to each of those images:
- Same Folder: To grab
logo.png, you just need its filename.src="logo.png"
- Subfolder: To get
photo.jpg, you point inside theimagesfolder.src="images/photo.jpg"
- Nested Subfolder: For
social.svg, you’ll navigate down two levels.src="assets/icons/social.svg"
Pro Tip: What if your HTML file was buried in a subfolder and you needed an image from the main directory? You’d use
../to go up one level. For instance,src="../logo.png"tells the browser to look in the parent folder for the file.
Mastering these paths is a small step that makes a huge difference. It ensures your linked images show up reliably and function exactly as you intended, every single time.
Crafting Alt Text for Accessibility and SEO

When you’re linking an image, that little alt attribute is way more than an optional extra—it’s absolutely essential for building a smart, responsible website. Think of it as a small piece of text doing two massive jobs you really can't skip.
First, and most importantly, it's the foundation of web accessibility for your images. People with visual impairments rely on screen readers to navigate the web, and these tools read the alt text aloud. Without a clear description, they have no idea what your image is about or why it's clickable. It’s a dead end.
On top of that, search engine crawlers depend on alt text to figure out what your images are showing. Since a bot can't "see" a picture, your description helps it index the image correctly, which can give your image search rankings a nice boost. A good alt attribute translates your visual content into something both people and machines can understand.
From Vague to Valuable Alt Text
The trick is to be descriptive but keep it brief. Avoid just stuffing it with keywords or using generic phrases. A good rule of thumb is to ask yourself: "How would I describe this image to someone over the phone?"
- Poor Example:
alt="product image" - Good Example:
alt="A red OKZest personalized coffee mug with a golden retriever's face on it"
This level of detail makes a world of difference. In fact, a 2023 survey found that over 85% of websites with linked images now include descriptive alt text to better support users with visual impairments and meet accessibility standards. It’s quickly becoming the standard.
A great alt tag provides the same functional and informational value as the image itself. If the image is a link to your products page, the alt text should describe the image and hint at the link's destination, like
alt="A collection of personalized OKZest mugs linking to the product gallery".
Writing solid alt text also plays nicely with your other SEO efforts. For instance, just like alt text gives context to an image, understanding how to approach optimizing content for featured snippets and search engine visibility can lift your entire page's performance. This context even affects how your images look when shared on social media, a topic we dive into in our guide to the Open Graph preview.
Styling Your Linked Images with CSS

So you've wrapped an image in a link. Great! But you might notice something a little… off. Many browsers, by default, will slap a stark blue border around that image. It's a throwback to the early days of the web, and it rarely fits a modern design.
Thankfully, a tiny bit of CSS is all it takes to clean this up and make your linked images look intentional and professional. The most straightforward fix is to target all linked images and tell the browser to leave them alone.
a img { border: none; }
This simple rule finds every <img> tag nested inside an <a> tag and removes the border. It’s a small change, but it makes a huge difference in the overall polish of your site.
Creating Visual Feedback with Hover Effects
Styling isn't just about making things look good; it's also about clear communication with your users. When someone moves their cursor over an element, you want to signal that it’s interactive. This visual feedback is crucial for a good user experience.
A few classic hover effects work wonders here:
- Opacity Change: A subtle fade is a clean, minimalist cue that the image is clickable.
- Subtle Shadow: Adding a
box-shadowcan create a neat "lifting" effect, making the image pop off the page. - Scale Transformation: A slight zoom effect (
transform: scale(1.05)) adds a modern, dynamic feel.
For example, to make your image slightly transparent on hover, you'd add this rule:
a:hover img { opacity: 0.8; }
Modern web design has moved way beyond basic links. Today, we're seeing linked images used in sophisticated ways with CSS and JavaScript to create truly rich user experiences. Interactive timelines, for instance, which use clickable images to tell a story, have seen a 35% increase in project adoption since 2018. It just goes to show how effective these advanced techniques are for boosting engagement.
You can also add other elements on hover, like text overlays. We actually have a whole guide on how to add text on an image in CSS. And don't forget, making sure your images look sharp and load quickly is just as important, which is where understanding platform-specific image specifications comes in handy.
Linked Images in the Real World
Theory is great, but let's look at how clickable images actually work on the websites you use every day. Seeing it in action is where the lightbulb really goes on. These examples show how this simple technique is used everywhere, from basic site navigation to a full-blown e-commerce store.
The most common example? A company logo. Think about it—almost every website has its logo in the top-left corner. You instinctively know that clicking it will take you back to the homepage. It's a perfect, simple use case that every user expects.
Clickable Company Logo
Your website's logo is basically its "home" button. Tucking your <img> tag inside an <a> tag that points back to your homepage is a foundational skill you'll use constantly.

This simple snippet makes sure your users can always find their way back to your main page without even thinking about it.
Product Gallery Links
Now, picture an online shop. You've got a grid of products, and each one needs to link to its own detail page. This is where making individual images clickable is absolutely crucial for driving sales and creating a smooth shopping experience.

Here, each product photo acts as a visual doorway to more information. For any e-commerce site, this isn't just a nice-to-have; it's essential for making the browsing experience quick and intuitive.
It’s not just a hunch—user behavior studies have shown that product images get 56% more clicks than the text links next to them on retail sites. This really drives home how important it is to make your visuals interactive.
If you want to dive into more hands-on examples, check out our guide on creating an image link for some extra tips and tricks.
Common Questions About Linking Images in HTML
Once you get the hang of linking an image, you'll inevitably run into a few real-world scenarios that require a bit more finesse. Let's walk through some of the most common questions that pop up when you're putting this into practice.
How Do I Make a Link Open in a New Tab?
This is a classic. You almost always want external links to open in a new tab so you don't send people away from your own site. It’s just good user experience.
The magic happens by adding the target="_blank" attribute to your <a> tag. It's a simple instruction that tells the browser to open the link in a new tab or window.
But there's a catch. For security and performance reasons, you should always pair it with rel="noopener noreferrer". The noopener part stops the new page from accessing your original page's window object, and noreferrer prevents it from knowing where the traffic came from.
Pro Tip: Think of this combination as the gold standard for all external links. Your final, secure code for a clickable image that opens in a new tab should look exactly like this:
<a href="https://example.com" target="_blank" rel="noopener noreferrer"><img src="image.jpg" alt="Description"></a>
Can I Link Different Parts of a Single Image?
Absolutely. You can turn one image into a multi-link powerhouse by creating an HTML image map. This lets you define specific clickable areas, or "hotspots," right on top of your image.
It might sound complicated, but it just involves a few tags working together:
<map>: This tag defines the map itself. You give it a uniquenameso you can reference it later.<img>: Your image tag needs ausemapattribute that points to the map's name, starting with a#.<area>: Inside your<map>, you define each hotspot. You'll specify itsshape(likerectfor a rectangle), itscoords(the pixel coordinates defining the shape), and itshref(the destination URL).
This is perfect for things like interactive diagrams, product feature callouts, or even geographical maps where you want each region to have its own unique link.
What Happens If My Linked Image Fails to Load?
A broken image is bound to happen sooner or later, but a well-written alt attribute is your safety net. If the browser can't find your image file, it will show a broken image icon. But crucially, it will also display your alt text right next to it.
This means the link itself still works. Your visitors can still read the description, understand what the image was supposed to be, and can still click the alt text to navigate to the URL. It’s a perfect example of why descriptive alt text is non-negotiable for both usability and SEO.
Ready to create stunning, personalized images for your own website or email campaigns? OKZest offers powerful no-code and API solutions to automate image personalization at scale. Learn more and start for free at okzest.com.